
GTM recipes could not exist without export and import features within Google Tag Manager. The ability to extract container data as a portable file helps us manage multiple containers, make bulk changes, etc., therefore, making the work process with GTM much faster.
In this guide, I’ll show you everything you need to know about how to export and import a Google Tag Manager container.
Why Is Container Import Useful?
There are several reasons why you should consider using container import in Google Tag Manager:
- Implementing the same tags, triggers, and variables in multiple GTM containers. For example, imagine a healthcare company that has 10 websites which look very similar, each with its own container. There are two ways you can go:
- You manually do all the changes in GTM and repeat that process 10 times (because there are 10 containers)
- Or you fully set up one container, then export it and import it in the other 9 containers (+ do minor adjustments, e.g., change Google Analytics 4 Measurement ID). Obviously, this option is the best option.
- Importing new tags, variables, and triggers that have been shared with you. Maybe a colleague has prepared an awesome template that they use for their projects, which helps them save a lot of time.
- Importing ready-made solutions which are available online. I’m talking about GTM recipes (here’s a large collection of them).
- You’re maintaining separate GTM containers in different environments, like a development or staging site, and you want to export data from one environment and import it to another.
How to Import Google Tag Manager Container?
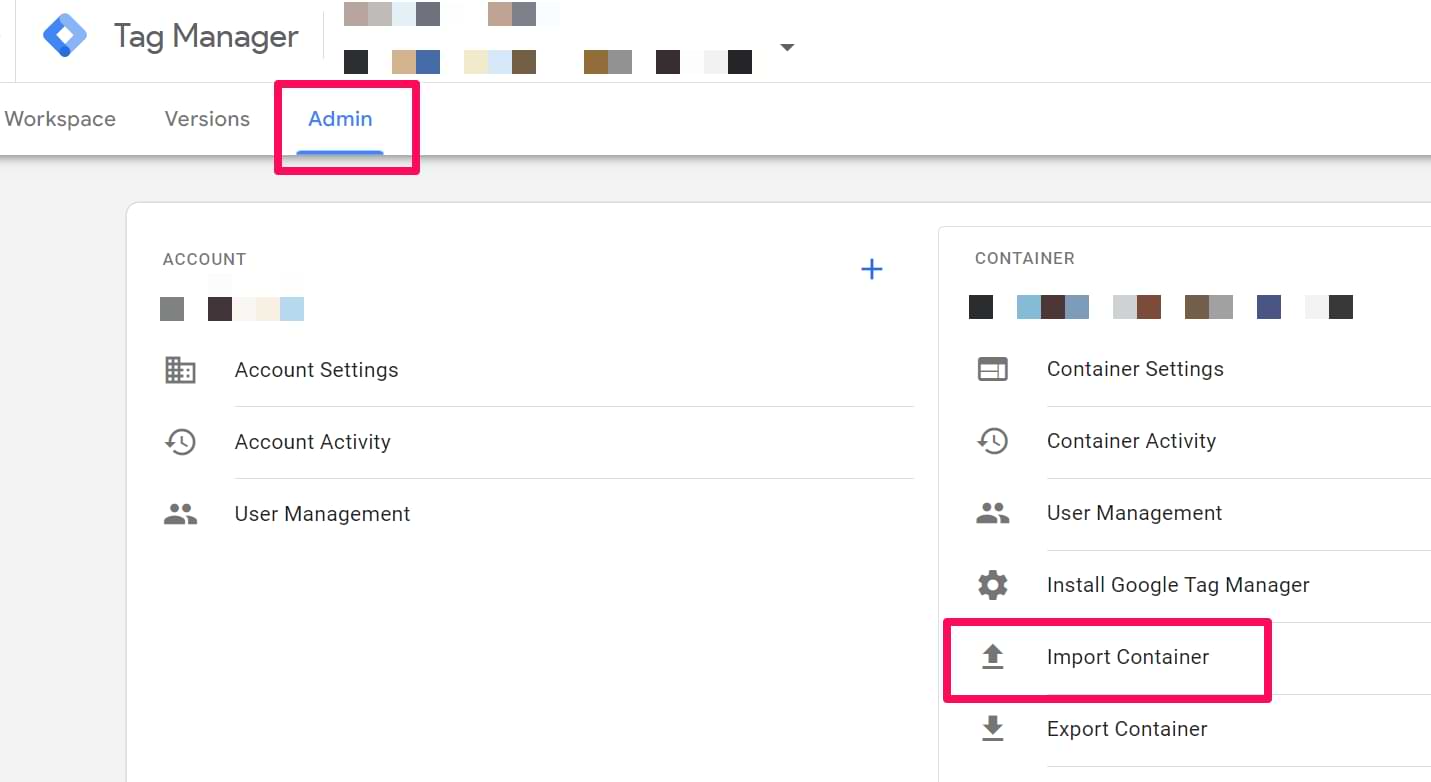
#1. Go to GTM container’s Admin section and click Import Container.
#2. Choose the container file (JSON) of the container you wish to import. You can get container files from the Library of GTM Recipes, your coworkers, etc.
#3. Choose the workspace that you want to import the file into. If you have no clue what a workspace is, chances are that you’re using only a default one. In that case, click the button Existing under the “Choose workspace” and select “Default workspace”.
If you want to learn more about workspaces, read Simo’s guide.
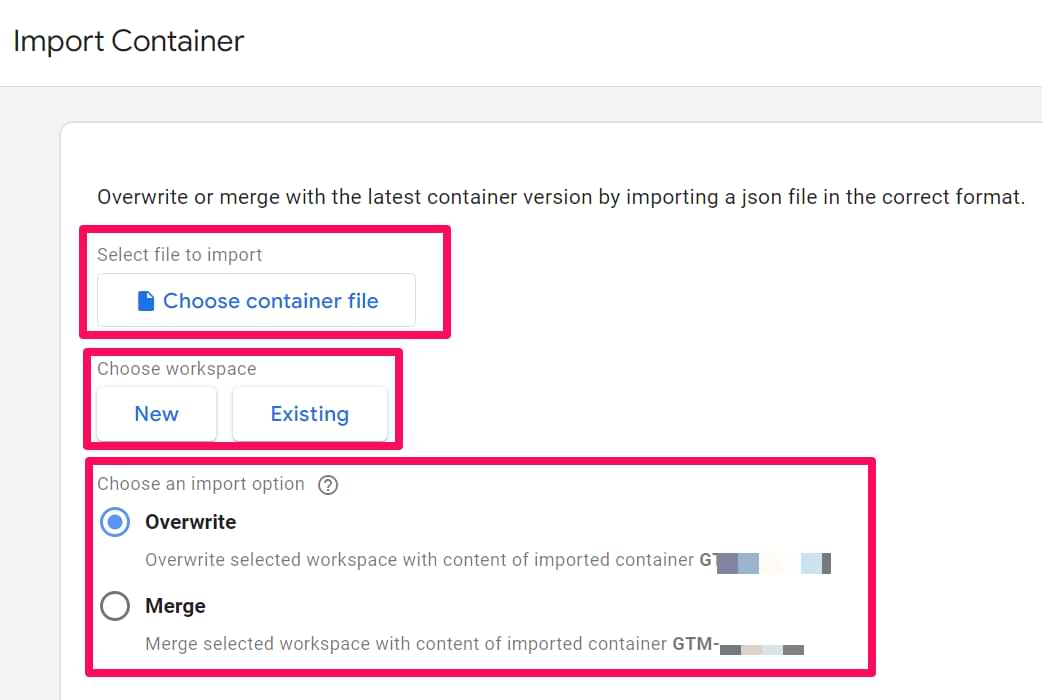
#4. Choose the import option:
- Overwrite
- Or merge
The Overwrite option will delete ALL existing tags, triggers, and variables and import everything that is stored in the container’s JSON file (that you’re trying to import). One of the use cases for this option: a recipe that clears the GTM container.
The Merge option will let you keep your existing tags, triggers, and variables and just add the new ones. If you choose this path, you’ll have to decide what to do with the conflicting tags (which are of the same name). GTM will give you two options:
- Overwrite. If a variable, tag, or trigger in the new container has the same name but the content is different, GTM will remove the old one and insert the new one.
- Rename. If a variable, tag, or trigger in the new container has the same name, but the content is different, GTM will keep the old one and rename the new one (think of it as if you were copying a folder on your laptop: folder’s title will change to something like Copy of Important Folder (2)).
Depending on which option you choose, Google Tag Manager will show a quick preview of how tags, triggers, and variables will be saved or removed from the container.

You can also click the View Detailed Changes link to see the titles of the container’s assets.
#5. Finally, click the Confirm button to finalize the import process.
Done! Hit the Preview button and test the updates you’ve just imported. If you see an error saying something about {{ADD YOUR GA4 CONFIG TAG IN THE FIELD ABOVE}}, read the following chapter to learn the solution.
Does the recipe contain GA4 tags?
If the recipe you have imported is using Google Analytics 4, you will have to enter your GA4 measurement ID in the GA4 event tag(s).

How to Export Google Tag Manager Container?
In the Admin section of GTM, just beneath the Import Container option, there is also an Export Container option. Clicking on it will let you select the container version, workspace, and then it will generate the JSON file needed to import into another container.
Keep in mind that this feature will always export the entire container; therefore, do not keep unwanted tags, triggers or variables in the container during the export.
If you want to export only a part of the container, there are various ways to get it done, including GTM’s own selected export option. Here’s a full guide to that.
Also, you can get a ready-made container from the Library of Google Tag Manager Recipes.
