
September 10, 2024
DOM Scraping with Google Tag Manager
Have you ever set up an event and thought to yourself, “It would be great if I could include some more information with this event, but I’m not sure how to capture it”. DOM scraping might just be the solution you need.
DOM scraping enables you to collect additional details about user actions directly from the code without requiring the help of a developer. While there are some considerations to be aware of, this might be a handy solution for when you’re in a pinch.
This article will explore how you can leverage DOM scraping with Google Tag Manager effectively. Whether you’re a seasoned developer or just getting started (and wondering, “What the heck is a DOM?”), this guide can help you get started!

Table of Contents
Here’s what you will learn in this article
- Prerequisites
- What is the DOM?
- The risks of DOM scraping
- Practical examples
- We are just scratching the surface here
- Final Words
Video tutorial
If you prefer video content, here’s a tutorial from my Youtube channel.
Prerequisites
This article does have some prerequisites that you will need to ensure that you meet before getting started. Don’t worry; there are resources linked that you can review if you need to.
- You will need to have some familiarity with JavaScript
- Check out the JavaScript for Google Tag Manager: 5 topics to learn article for a quick review.
- For a much more thorough tutorial, check out my JavaScript for Google Tag Manager course.
- You will need to have GA4 installed on our site using GTM. You may have GA4 installed on your site using a different method, which is totally fine, but this article will not apply to you.
- Skip to section #2.3 of my How to Setup and Install Google Analytics 4 (3 ways) article to learn how to install GA4 with GTM.
What is the DOM?
When you enter the URL of a site, you tell your browser the web page you want to visit. Your browser will send a request to the server where the website is hosted. This request will ask the server to return the web page’s contents.
The server will respond by sending back the HTML and all related resources for the site, including any CSS and JavaScript. Once the browser has downloaded all this, it processes and displays the content of the web page.
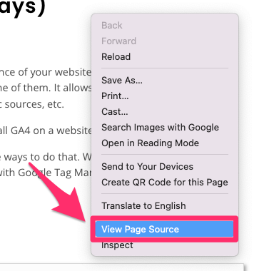
To view the HTML code, right-click on the site’s page and select “View Page Source”. What you see here is static; it’s downloaded from the server, but when the browser downloads this information, it creates a dynamic version of the site code.
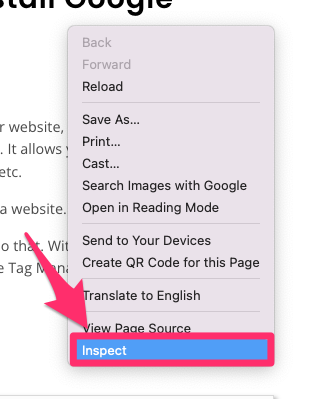
To see the dynamic elements, back on the webpage, right-click and select “Inspect”.
 c
c
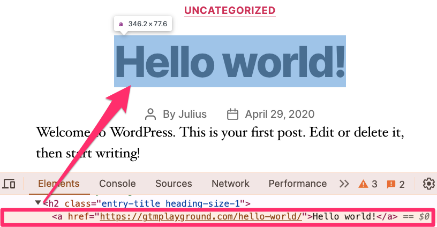
Here, you can interactively explore the structure of the site. By hovering over different elements in the code, you’ll see the corresponding areas highlighted directly on the webpage.
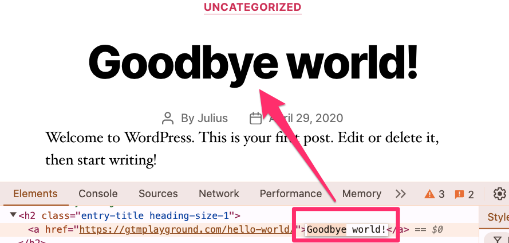
You can also make temporary changes in this mode, though anything you change is only visible to you (it will never affect the actual webpage) and will reset when you change the page. You can do this to any website to make for a fun prank!
Ok, so let’s come back to our original question, “What the heck is a DOM?” The DOM, or document object mode, is what we see rendered on the site. It’s a system for describing and manipulating the structure of a web page. It acts like an interface between the web page and the scripts that modify its content and appearance.
The DOM lets you use the code to do things such as change content or retrieve certain values (this is called “DOM scraping”).

The risks of DOM scraping
This is not a “with great power comes great responsibility” moment, but I still must give a small warning about DOM scraping.
DOM scraping can be risky since it relies on everything on a web page staying the same. If you are collecting information that a certain element contains, any changes to that element will impact your tracking by collecting a different (and incorrect) value or nothing at all. For example, if a developer changes the structure of how products are displayed, your JavaScript that scrapes the DOM might fail.
The best course of action is to ask a developer to push information into the data layer for you to collect with a Data Layer variable, but I know this is not always possible, so this is where DOM scraping can be helpful!
Practical examples
We will review some practical examples to help you better understand DOM scraping. As always, these are just examples to inspire you to find ways to use DOM scraping for your own tracking needs.
Example 1: Collect order confirmation details
In this first example, we will start from the order confirmation page, where we want to collect additional information on the transaction, including transaction ID and total value.
Create a DOM element variable
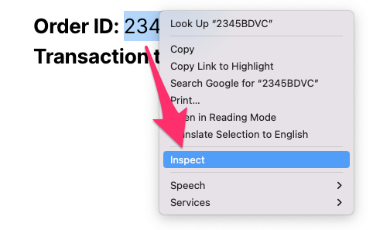
Go to Google Tag Manager and preview your site. Find the element that you want to track the value of and highlight it (in this case, we are looking for the transaction ID). Right-click the highlighted text and select “Inspect”.
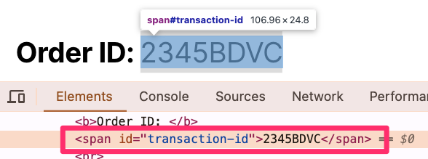
Here, we can see that the element contains an ID labeled “transaction-id” which contains the value you see on the webpage.
Back in GTM, go to Variables and, under User-defined Variables, select “New”.

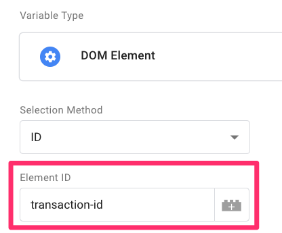
For the Variable configuration, choose “DOM element”. This lets you retrieve values from the DOM element.

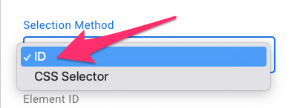
You will need to choose between “ID” & “CSS selector” depending on how your site is set up. In this example, we will use the “ID” since it is available.
Enter the name of the ID exactly as it is in the code into the Element ID textbox.
If you leave the Attribute Name textbox empty, the value of the element you entered in the Element ID box will be collected. If the element had some other attribute, such as “data-name”, you could enter that into the Attribute Name textbox. Then, the value collected would be “xyz”.

Finally, name the variable “dom – transaction-id”. Preview your site again and complete the action that loads the element you are collecting, e.g., a transaction. Go to the “DOM ready” event in the Preview to check that the variable is collected.

You might notice that the variable comes up as an “Unknown Variable Type”. This is just a weird bug that will usually disappear after a while.
Add the DOM element variable to an event
It’s very important to ensure that the tag containing the variable created above fires either ON or AFTER the DOM Ready event. This ensures that the DOM has fully loaded and collected the variable before the tag executes.
Technically, some website elements might be dynamically added to the site content even later. So, if you face a situation where your DOM element variable does not work sometimes, you can try firing the tag later (e.g., on Window Loaded).
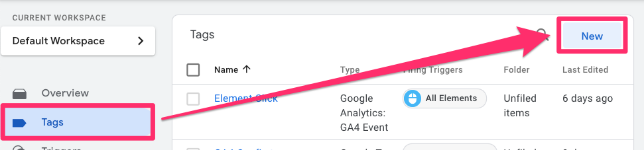
To use this new variable, we will create a purchase event. Go to Google Tag Manager > Tags (in the left-side navigation) > New.
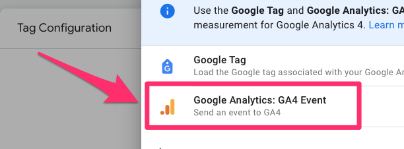
For the Tag Configuration, select Google Analytics > GA4 Event.
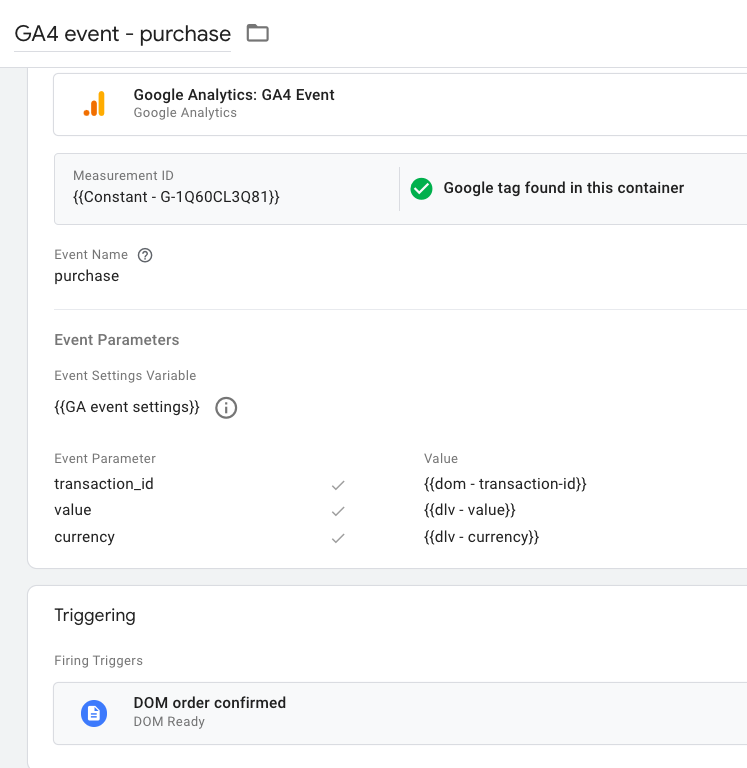
The first thing you’ll have to enter is the Measurement ID (it’s helpful to keep this saved as a constant variable so you can add it to tags easily). Then, the event name. In this case, it’s just purchase.

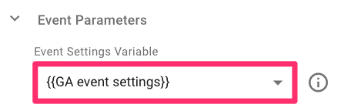
The next part is adding the event settings variable. If you use the event settings variable, I highly recommend adding it to all your events, including this one. Check out this article if you don’t have this set up yet!
Additionally, under the Event Parameter (which is just for the tag), add transaction_id to the variable. The purchase event also needs the value and currency variables, so you will need to collect those, too (either with a DOM elementor some other way).

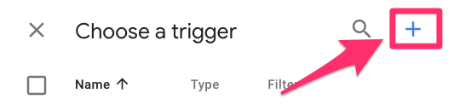
For the Triggering, we need to create a new trigger. Click on the Triggering box and, when the new page loads, select the “+” in the top-right corner.
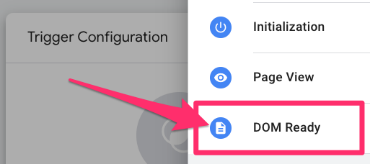
For the Trigger configuration, choose “DOM ready” (don’t use Page View or Initialization since the DOM may not be loaded before these events).
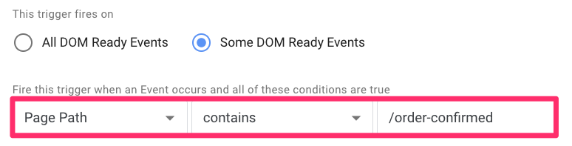
Select “Some DOM Ready Events”. The condition will be that the Page Path contains “/order-confirmed”. Name the trigger “DOM order confirmed”. The trigger conditions here are just an example. Your situation might require a different configuration.
Save the tag as “GA4 event – purchase”.
For this example, we’re going to pretend that the value and currency are available in the Data Layer.
Preview the GTM container and complete a purchase to confirm that the event works correctly.

Example 2: Capture additional information with a click
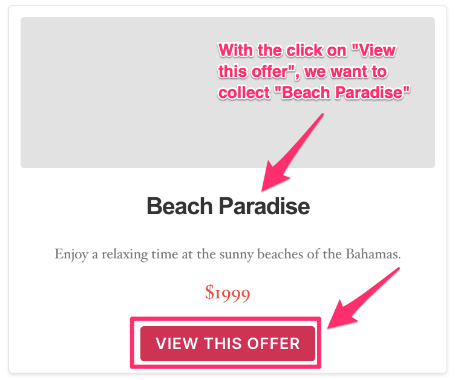
Here is the scenario of the 2nd example: You sell travel packages on your site. There is a page that lists all the travel packages, and each travel package has a button that says “View this offer”. When a user clicks on this button, you want to collect the name of a travel package. The name of the travel package is available in the parent element of the element that the user clicks on.
Create “All clicks” event
To start, you need to create an event that captures all clicks. You may already have this, in which case, you can skip this step. If you don’t, it’s pretty simple.
In GTM, go to Triggers and create a new trigger.
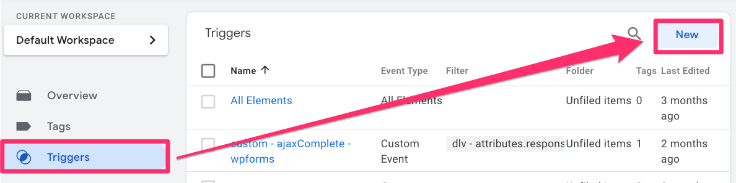
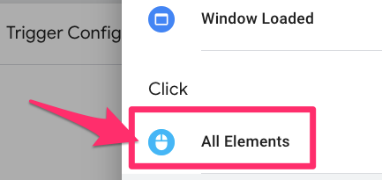
For the trigger configuration, select “All Elements”. Name the trigger “All clicks”.
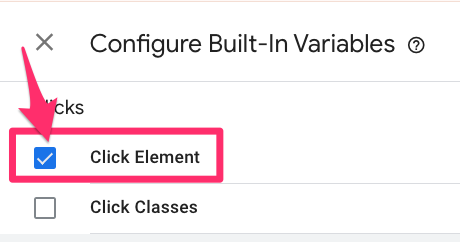
Next, go to Variables > Configure and enable “Click Element” (if needed).
Then, preview your site and complete the action that loads the element you are collecting. Go to Click event and look for the “Click element” variable.

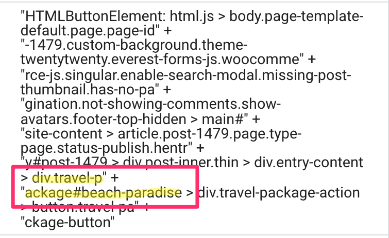
One interesting thing to note is that the click element is actually an object even though it’s displayed as a string (check this article). This variable returns the element and all information related to the element. We want to “climb” this to reach the element that contains the travel package identifier.
Using JavaScript to collect parent value
Now that we have collected this value, we will use a JavaScript code to collect the value of the parent element of the button.
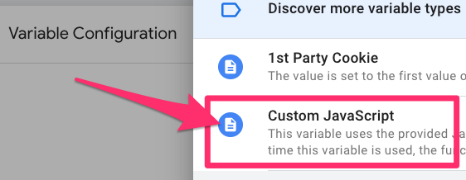
Create a new variable. For the Variable configuration, select “Custom JavaScript”.
Insert code below:
function(){ // returns something
  var clickedElement = {{Click Element}}
  return clickedElement.closest(".travel-package").id
}
Let’s break the code down:
- function(){}: Custom JavaScript variable requires an anonymous function (a function without a name)
- var clickedElement = {{Click Element}}: Declare a variable to store the Click Element, which contains all information on the button (this is our starting point that lets us “climb up” the DOM).
- return clickedElement.closest(“.travel-package”).id: Enter the CSS selector of the element to which we want to climb. Here, we are looking for the closet element with this name higher in the DOM than the button element. The .id indicates that we just want the ID of the travel-package element.
Name the variable “cjs – travel package id”.
Finally, preview your site and click the button on it. Check the Click event and confirm that the custom JavaScript variable is collecting the value that you expect.

We are just scratching the surface
While this blog post provides a solid overview of DOM scraping, it only scratches the surface of the topic. There’s a lot more to explore! For a deeper dive into DOM scraping, check out my JavaScript course for beginners, where I cover the subject in much greater detail.
DOM Scraping with Google Tag Manager: Final Words
While working with a developer to push additional information for events into the Data Layer follows best practices, sometimes that’s not always possible. When that’s the case, you can use DOM scraping to quickly create variables to collect this additional information.
Remember, web pages can change, so there is a possibility that the element you reference on your site may change to collect a different type of value or just nothing at all, so I wouldn’t recommend using this solution all the time.
If you have any other suggestions for how DOM scraping can be used, leave them in the comments below!

0 COMMENTS