
April 6, 2026
Facebook Conversions API for Shopify with Google Tag Manager
Setting up the Facebook Conversions API for your Shopify store can be a bit complicated, but it’s worth it since it’s one of the most effective ways to make sure your ad tracking remains accurate. In this guide, you will learn how to move beyond basic browser-side tracking to a more reliable server-side approach.

Table of Contents
Here’s what you will learn in this article
- The Setup
- Prerequisites
- Web GTM Container Setup
- Server GTM Container Setup
- Combine the server-side setup with Facebook Pixel
- Deduplication of events
- Go live
- Final Words
Video Tutorial
If you prefer video content, here’s a tutorial from my Youtube channel.
The Setup
The setup starts with your Shopify website and a Google Tag Manager container. Inside that container, we’ll create data tags (developed by Stape) that are configured to send your store’s data to a server-side GTM container. From there, the data is sent directly to Facebook Conversions AI.
To take your tracking a step further, you’ll also learn how to implement Facebook Pixel in your web container and send that same data to Facebook. You don’t need to worry about duplicate data; we’ll avoid that by using a unique event ID to deduplicate the information.
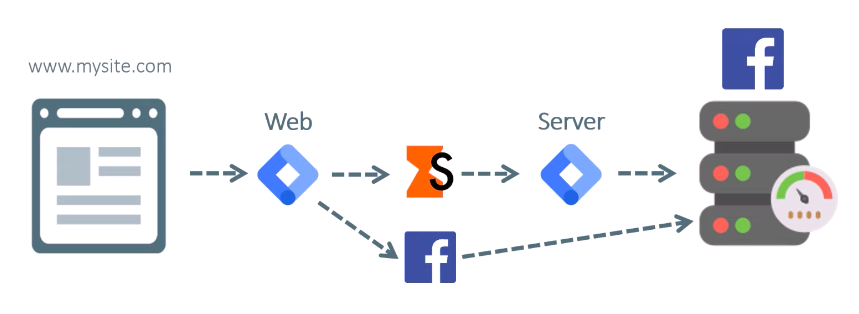
Even with CAPI (Conversions API), we won’t forget about the browser-side Pixel. We will use a hybrid setup with both systems running in parallel. This way, if a user has a browser extension installed that blocks the Facebook Pixel, the server-side setup will still have high chances of capturing the data and ensuring your conversions are recorded.
If you’re ready to start tracking conversion, let’s dive in!
Prerequisites
To get started, you will need to complete the following steps:
- Inject the Web GTM Script: Use the Stape plugin for Shopify to quickly and correctly add your Google Tag Manager script to every page of your store.
- Configure Custom Domains and Data Layer: Set up your custom tracking domain and enable advanced data layer settings, such as the Custom Loader and Cookie Keeper, to improve tracking accuracy and bypass browser restrictions.
- Implement Custom Pixel for Checkout: Since Shopify’s checkout is a restricted environment, you must set up a custom pixel to track successful purchases and checkout events reliably.
I have a very thorough tutorial on server-side tagging for Shopify using Stape available here (it explains all the steps mentioned above).
Web GTM Container Setup
To set up your Web GTM container, we need to capture specific actions users take on your Shopify store. While there are many different events you can track, we will focus on three core ones to keep this guide shorter: page view, add to cart, and purchase.
Once you understand how to configure these three, you can follow the same logic to add any other events you might need for your tracking!

Create the Page View Event
To begin sending data to your server, we first need to configure a basic page view event.
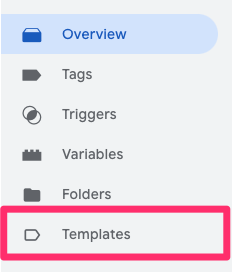
Navigate to the Templates section in your Web GTM container.
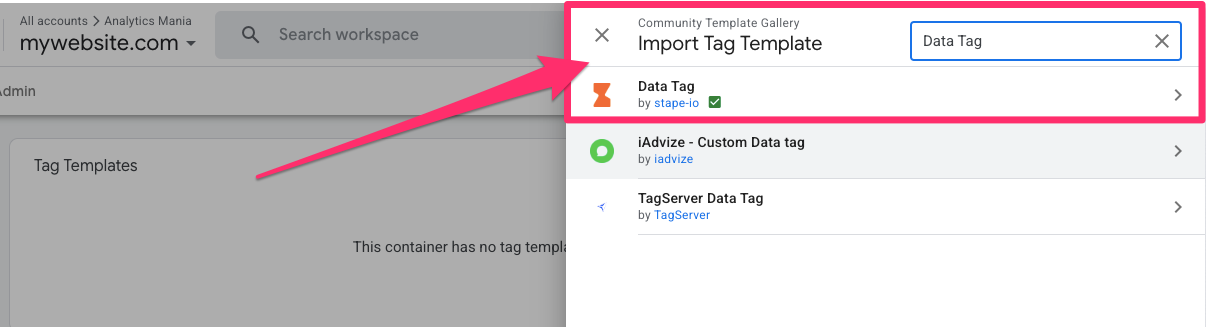
Go to Tag Templates > Search gallery, search for and add the “Data Tag” by Stape to your workspace.
In the left-side navigation, go to Tags to create a new tag.

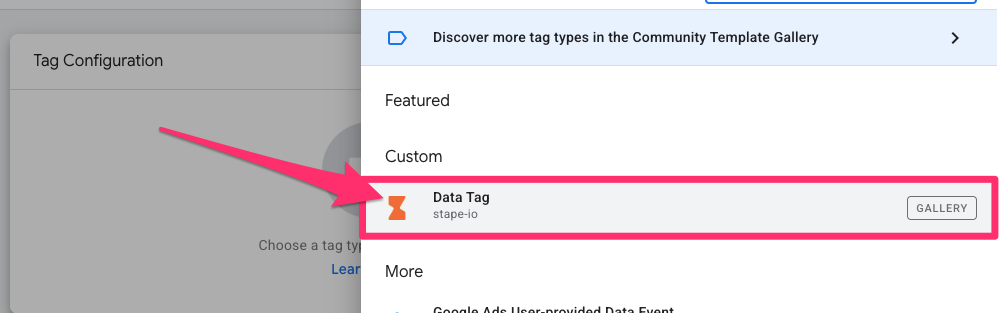
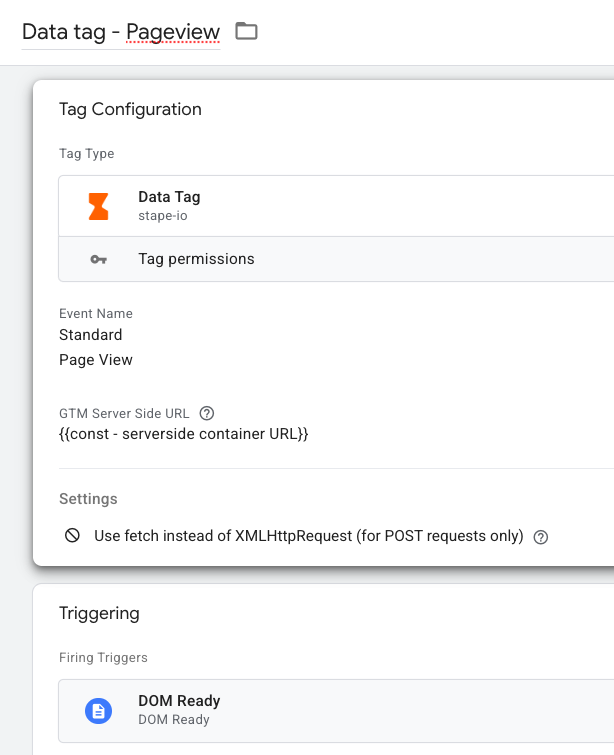
For the Tag Configuration, choose the “Stape Data Tag”.
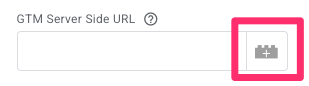
The first thing we’ll update is the GTM Server Side URL, and to keep things clean, we will create a reusable constant variable:
- Click the variable icon next to the “GTM Server-side URL” field and click the “+” icon in the top-right corner of the new screen.

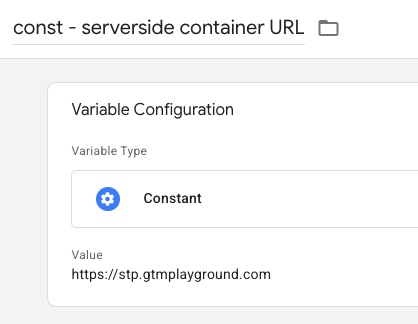
- Choose the Constant variable configuration and enter your GTM Server URL as the value, ensuring there is no trailing slash at the end.
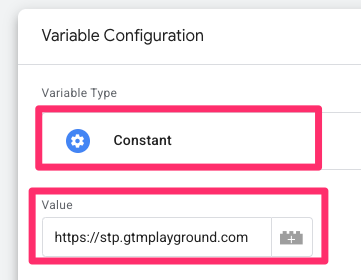

- Name it “const – serverside container URL” and save.

Next, go down to the Settings section and make sure to turn off the option “Use fetch instead of XMLHttpRequest (for POST request only)”.

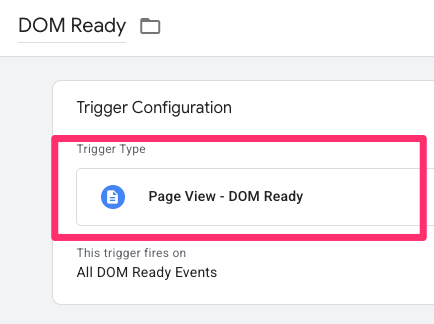
We want this tag to fire on DOM Ready. Since this isn’t available by default, click Triggering to add a new trigger. Select the “+” icon on the new screen.
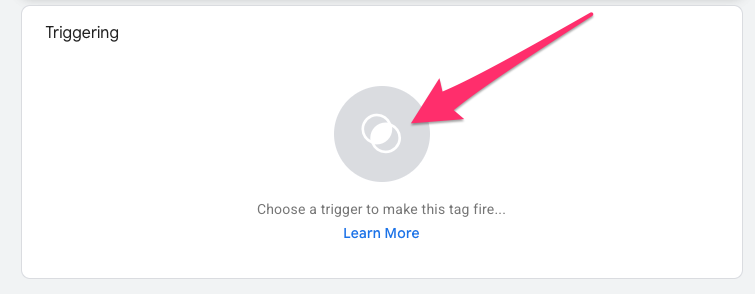
Under the Trigger Configuration, select DOM Ready, and name it “DOM Ready” before saving.
Name your new tag “Data tag – Pageview” and save it.
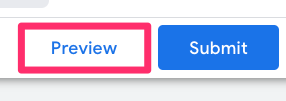
Before moving forward, it’s important to verify that the data is flowing correctly. Even though we’re working in the Web container, you need to click Preview in your server-side container first. SGTM preview mode should be open while you are testing the web preview mode because if you open it too late, you will miss the incoming requests. Keep this in mind throughout the rest of this tutorial.
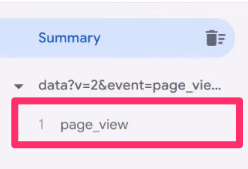
Now, enter Preview mode in the web container and enter your website. Then return to the Preview mode tab. You should see a page_view event appear in the summary on the left. Now, go to the Preview mode of your Server-side container. You should see the incoming request from your web container appearing there in real-time.
Create the Add to Cart Event
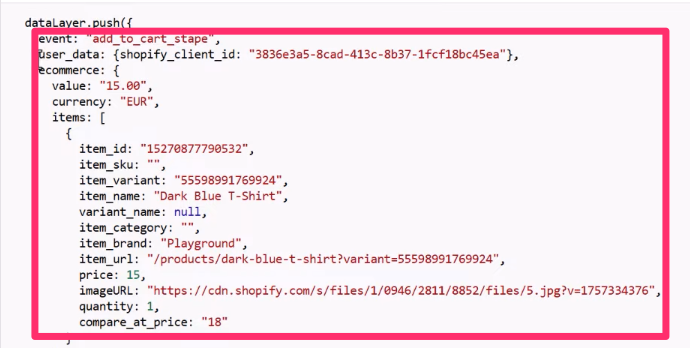
While the web container’s Preview mode is still open on your website, find any item and add it to your cart. When you go back to the Preview mode, you’ll see an event called add_to_cart_stape.
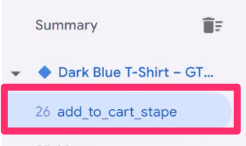
If you click on this, you can view all the details currently being collected.
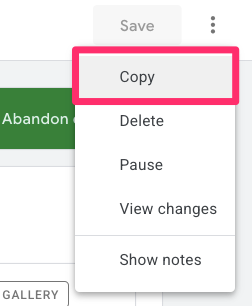
Now, we need to create a tag to actually capture this information from the data layer. To make this easier, go to the Page View tag we created earlier and make a copy by clicking the three dots in the top-right corner of the tag.
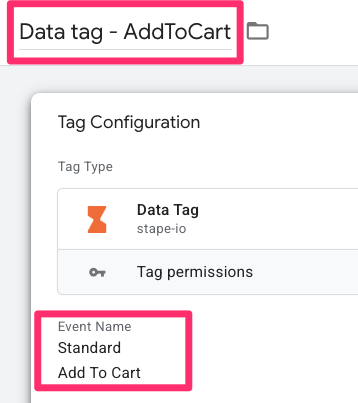
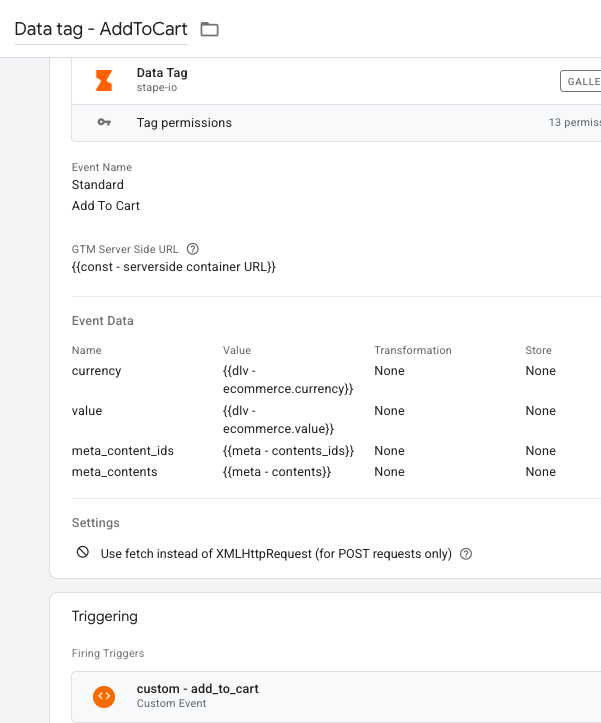
Rename the tag to “Data tag – add_to_cart” and change the event name to “Add to cart”.
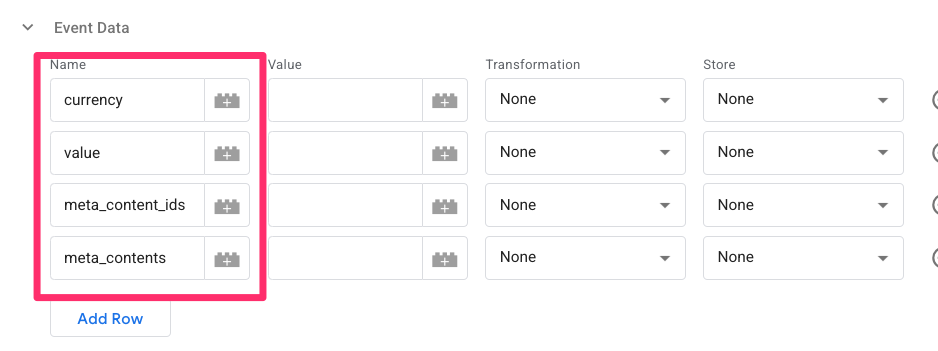
We will need to add some additional parameters to this tag under the Event Data section:
- currency
- value
- meta_content_ids
- meta_contents
For the first two (currency and value), we need to create standard data layer variables. To do so, click on the icon to create a new variable under Value.
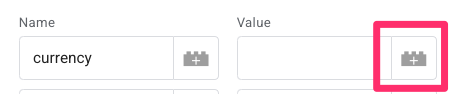
For the variable configuration, choose “Data Layer Variable” and enter the variable name as it’s shown in Preview mode. We’ll start with currency, which appears as ecommerce.currency (since it’s stored in the ecommerce array). Save the variable as “dlv – ecommerce.currency”.
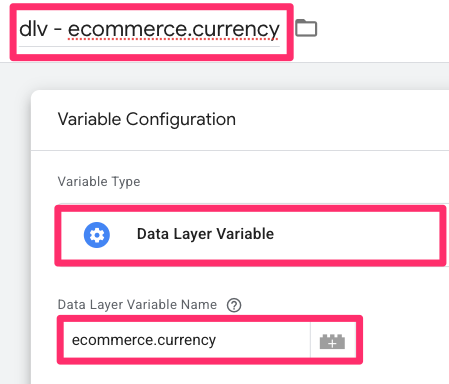
Now, repeat this step for the other data layer variable: ecommerce.value.
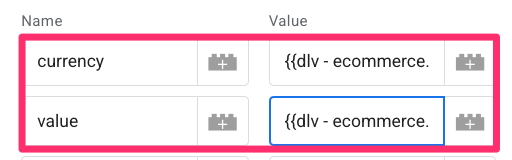
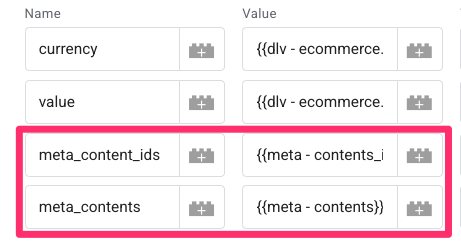
In the parameters section of the tag, you’ll have the following pairings:
- currency – ecommerce.currency
- value – ecommerce.value
The next two parameters are a bit trickier because Facebook does not accept them in the exact way they appear in the Shopify data layer. To fix this, download the template code from this GitHub link.
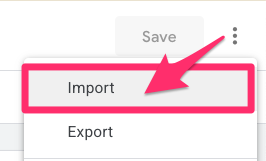
Back in GTM, save your tag and go to Templates > Variable Templates > New. Click the three dots in the top right to select “Import,” and upload the file you just saved. This will add a “Universal Conversions Variable” to your container. Save the template.
This template is super handy if you want to transform one object into another object or array (that contains different keys). Example: transform GA4 ecommerce object into a Facebook content_ids array.
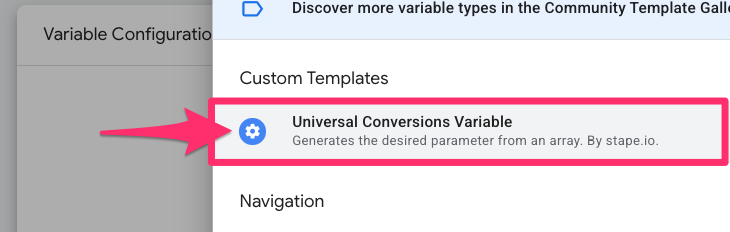
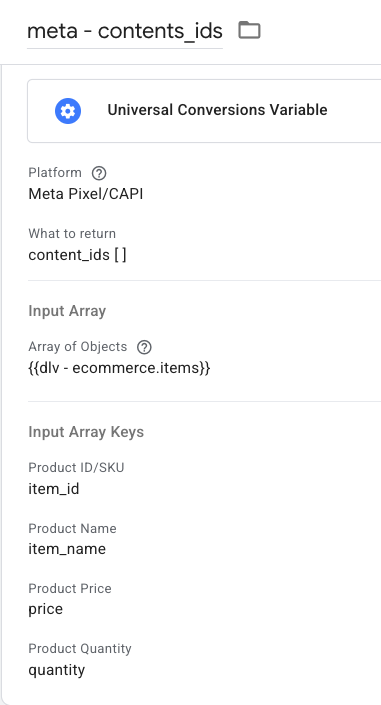
Now, we can create the meta_content_ids variable. Go to Variables, create a new variable, and select the “Universal Conversion Variable” template (this is what you just uploaded).
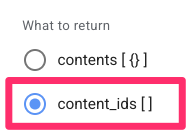
Choose the “content_ids []” return type.
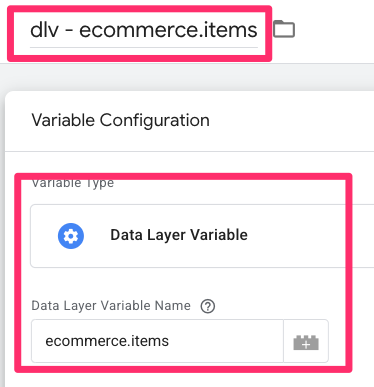
Beside the Array of Objects textbox, click to create another new Data Layer Variable for ecommerce.items (the same way you created the ones above).
Under the Input Array Keys section, map:
- “Product ID/SKU” to item_id
- “Product name” to item_name
- “Product price” to price
- “Product quantity” to quantity.
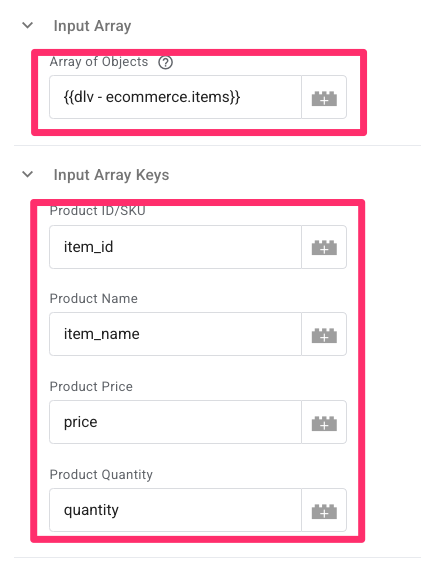
Name this variable “meta – contents_ids” and save it.
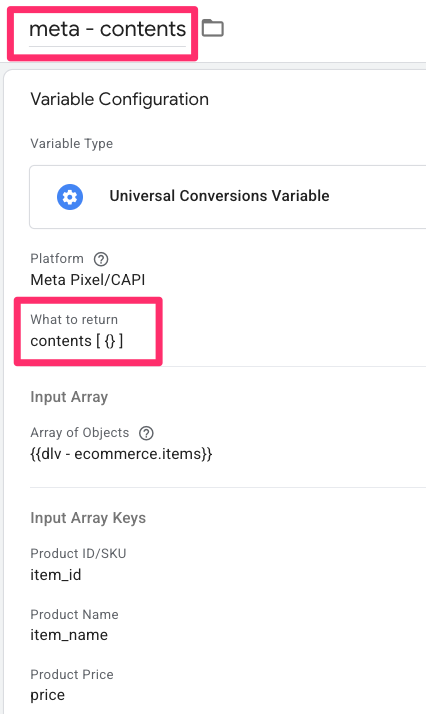
To create the meta_contents variable, simply make a copy of the variable you just created. Change the return type to “contents [ {} ]” and rename it to “meta – contents”. Keep everything else the same and save the variable.
Once both are ready, add these two new parameters to your Add to Cart tag.
Next, remove the DOM Ready trigger.

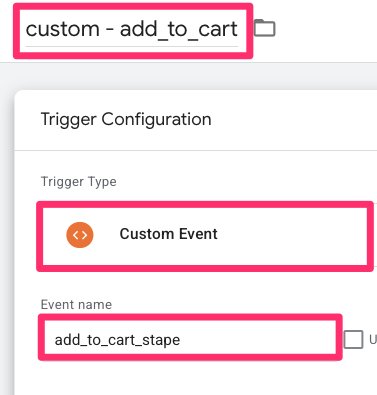
Create a new trigger by selecting the Triggering section. You’ll select “Custom Event” type as the trigger configuration, enter “add_to_cart_stape” as the event name, and name the trigger “custom – add_to_cart”.
Save the tag.
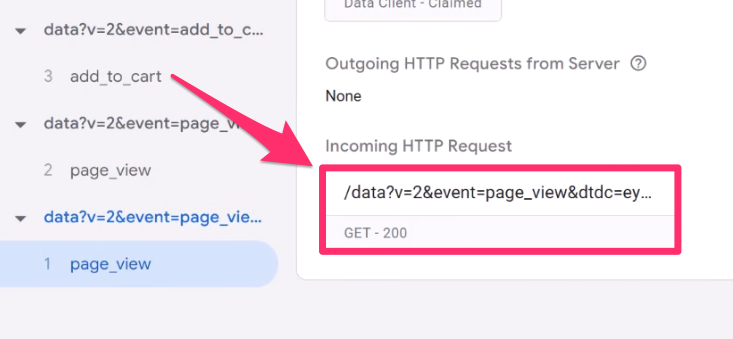
To test the event, click “Preview” in both the web and server-side containers. Add an item to your cart and navigate to the server-side Preview mode. You should see an add_to_cart event appear on the left. Click the Incoming HTTP Request.
If you click on the event, it may not be super clear if it’s collecting the correct data, so to check, copy the Request URL and use Google to find a base64 converter. Enter the request URL in there to view it in a more human-readable way.

Two data tags down, one to go!
Create the Purchase Event
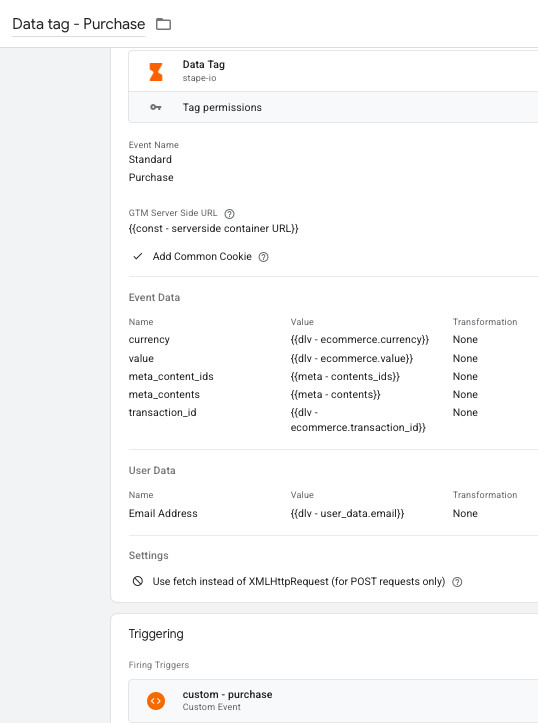
To save time, go to the Add to Cart tag we just created and make a copy. Change the name of this new tag to “Purchase.”

In the tag Settings, make sure to select the option “Add Common Cookie.” This is a vital step because it allows specific cookie information to be passed from your website directly to the server container, which helps with attribution at the checkout. You can save the tag as it is for now.

This is where things get more technical. Standard GTM Preview mode does not work with Shopify’s checkout environment, which limits how we can test the data layer. To see what data is being collected during a real transaction, follow this process:
- Publish your web GTM container as it is currently configured.
- Open your website, add an item to your cart, and proceed to the checkout.
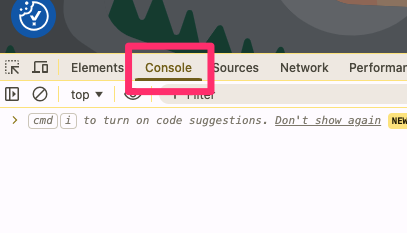
- Before you complete the order, open your browser’s Developer Tools (Right-click > Inspect) and click on the Console tab.

- Complete the purchase of your item.
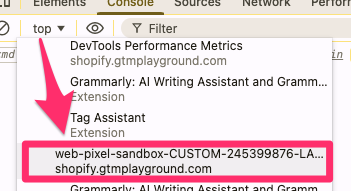
- Usually, you would just type dataLayer into the console, but Shopify’s sandbox works differently. In the console, look for the dropdown menu that says “top” and change the environment to the one that starts with “web-pixel-sandbox-CUSTOM-[some-number]…”

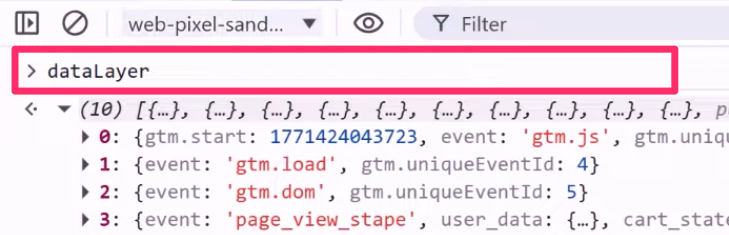
- Now, type dataLayer and hit Enter.

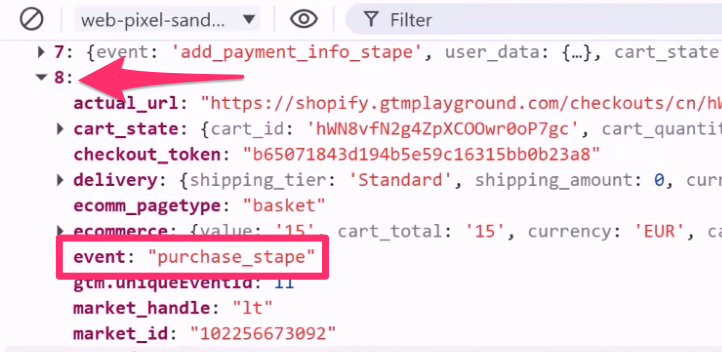
- Find the purchase_stape event in the list and click it. This will show you exactly what data is being collected with the purchase.

Now that you can see your data, go back to your Purchase Data tag in web GTM to add the final details:
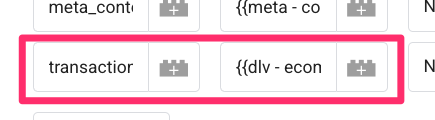
- Add a new parameter for transaction_id. You’ll need to create a new data layer variable for the ecommerce.transaction_id to map this key to. Follow the same steps as early on in the article for the creation of the variable.

- To help Facebook match the purchase to a specific user, we should send customer details. In the tag settings, look for User Data, add a row for Email, and create a new data layer variable for user_data.email.
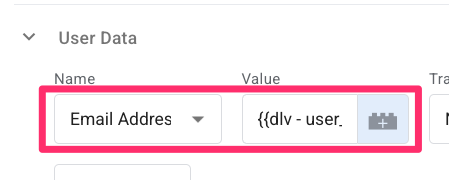

Note: While we are just sending the email here, you can follow the same steps to send other information like city, first name, or country.
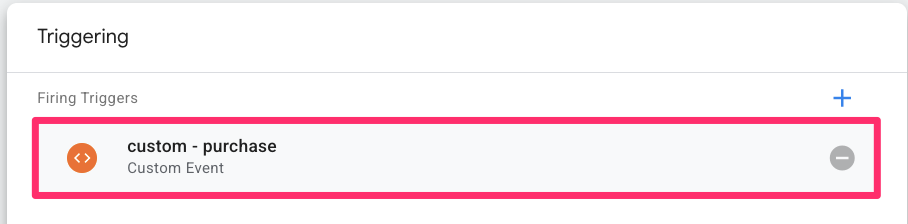
Finally, update the trigger for this tag. Create a new custom event trigger, enter purchase_stape as the event name, and name it “custom – purchase”. Make sure to remove the add to cart custom trigger, too.
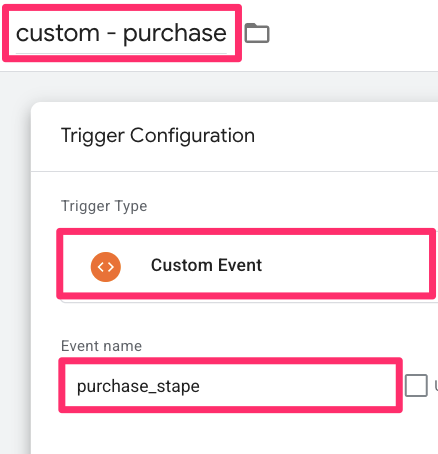
Save the tag.
To verify everything is working, perform another test purchase and check the console using the same “web-pixel-sandbox” method we used above to make sure the data is firing correctly.
Server GTM Container Setup
The server container acts as the “bridge,” receiving requests from the Data tag and forwarding them to Meta’s servers.
Configure the Data Client
Now that your Web container is sending data, we need to prepare the Server container to receive it. This is done by setting up a Data Client.
First, you will need to download the Data Client template code from this GitHub link (download the template.tpl file). Once you have that file on your computer, navigate to your Server container in GTM. Go to the Client Templates section, click the three dots in the top-right corner to select “Import”, and choose the file you just saved. Save the template.
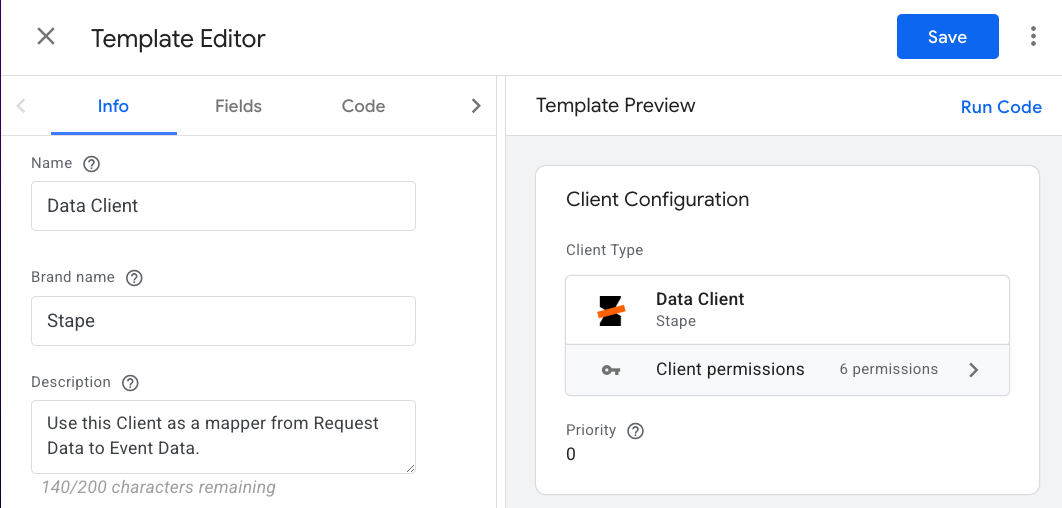
With the template imported, click the Clients section in the left-side navigation and create a new Client using this specific template.
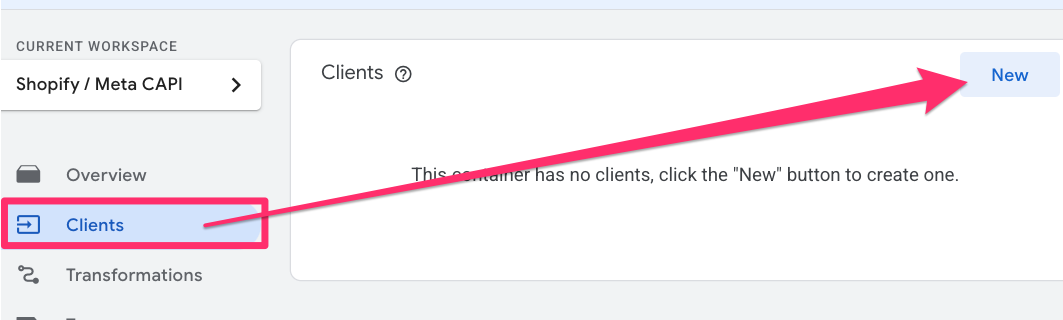
Name it “Data client” and save your changes. This step is essential because it allows your server to “listen” for the Data Tags we configured in the previous phase.

Create the Meta CAPI Page View Tag
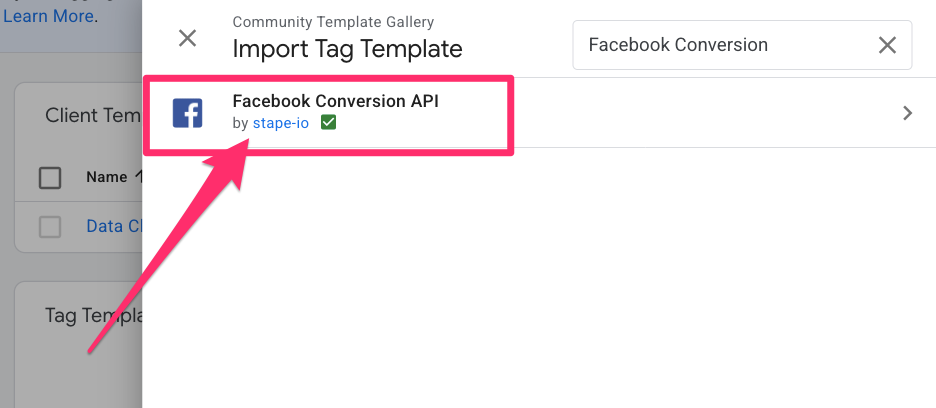
First, navigate to Templates > Tag Templates and add the “Facebook Conversion API” tag template from the Community Gallery to your workspace.
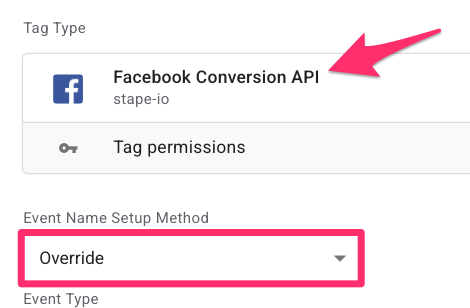
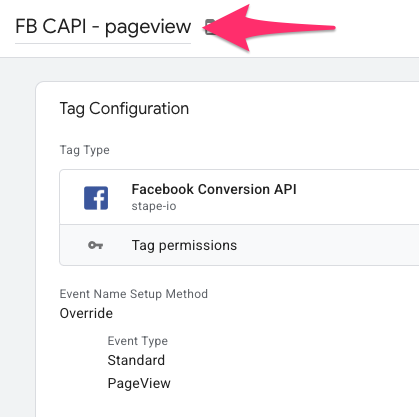
Once added, go to the Tags section from the left-side navigation and create a new tag using this template. Set the Event Name Setup Method to “Override.”
Next, you’ll need to create two constant variables to authenticate your data:
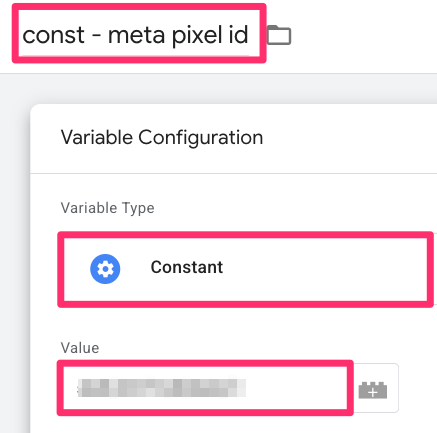
- Facebook Pixel ID: In Meta Events Manager, go to your Dataset, select your pixel, and find the Dataset ID under Settings.
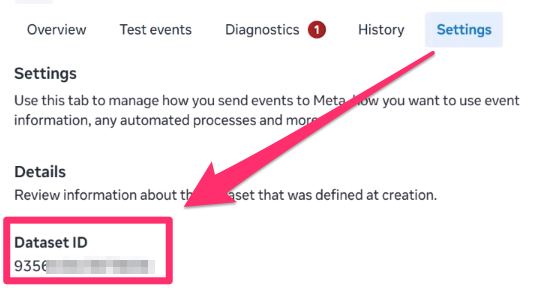

Back in your tag, click to create a new variable. Select Constant as the variable configuration. Paste the ID, and name it “const – meta pixel id”.

- API Access Token: In the same Meta Settings tab, scroll down to the “Set up direct integration” section. Generate a permanent access token (if you haven’t already) and copy it.
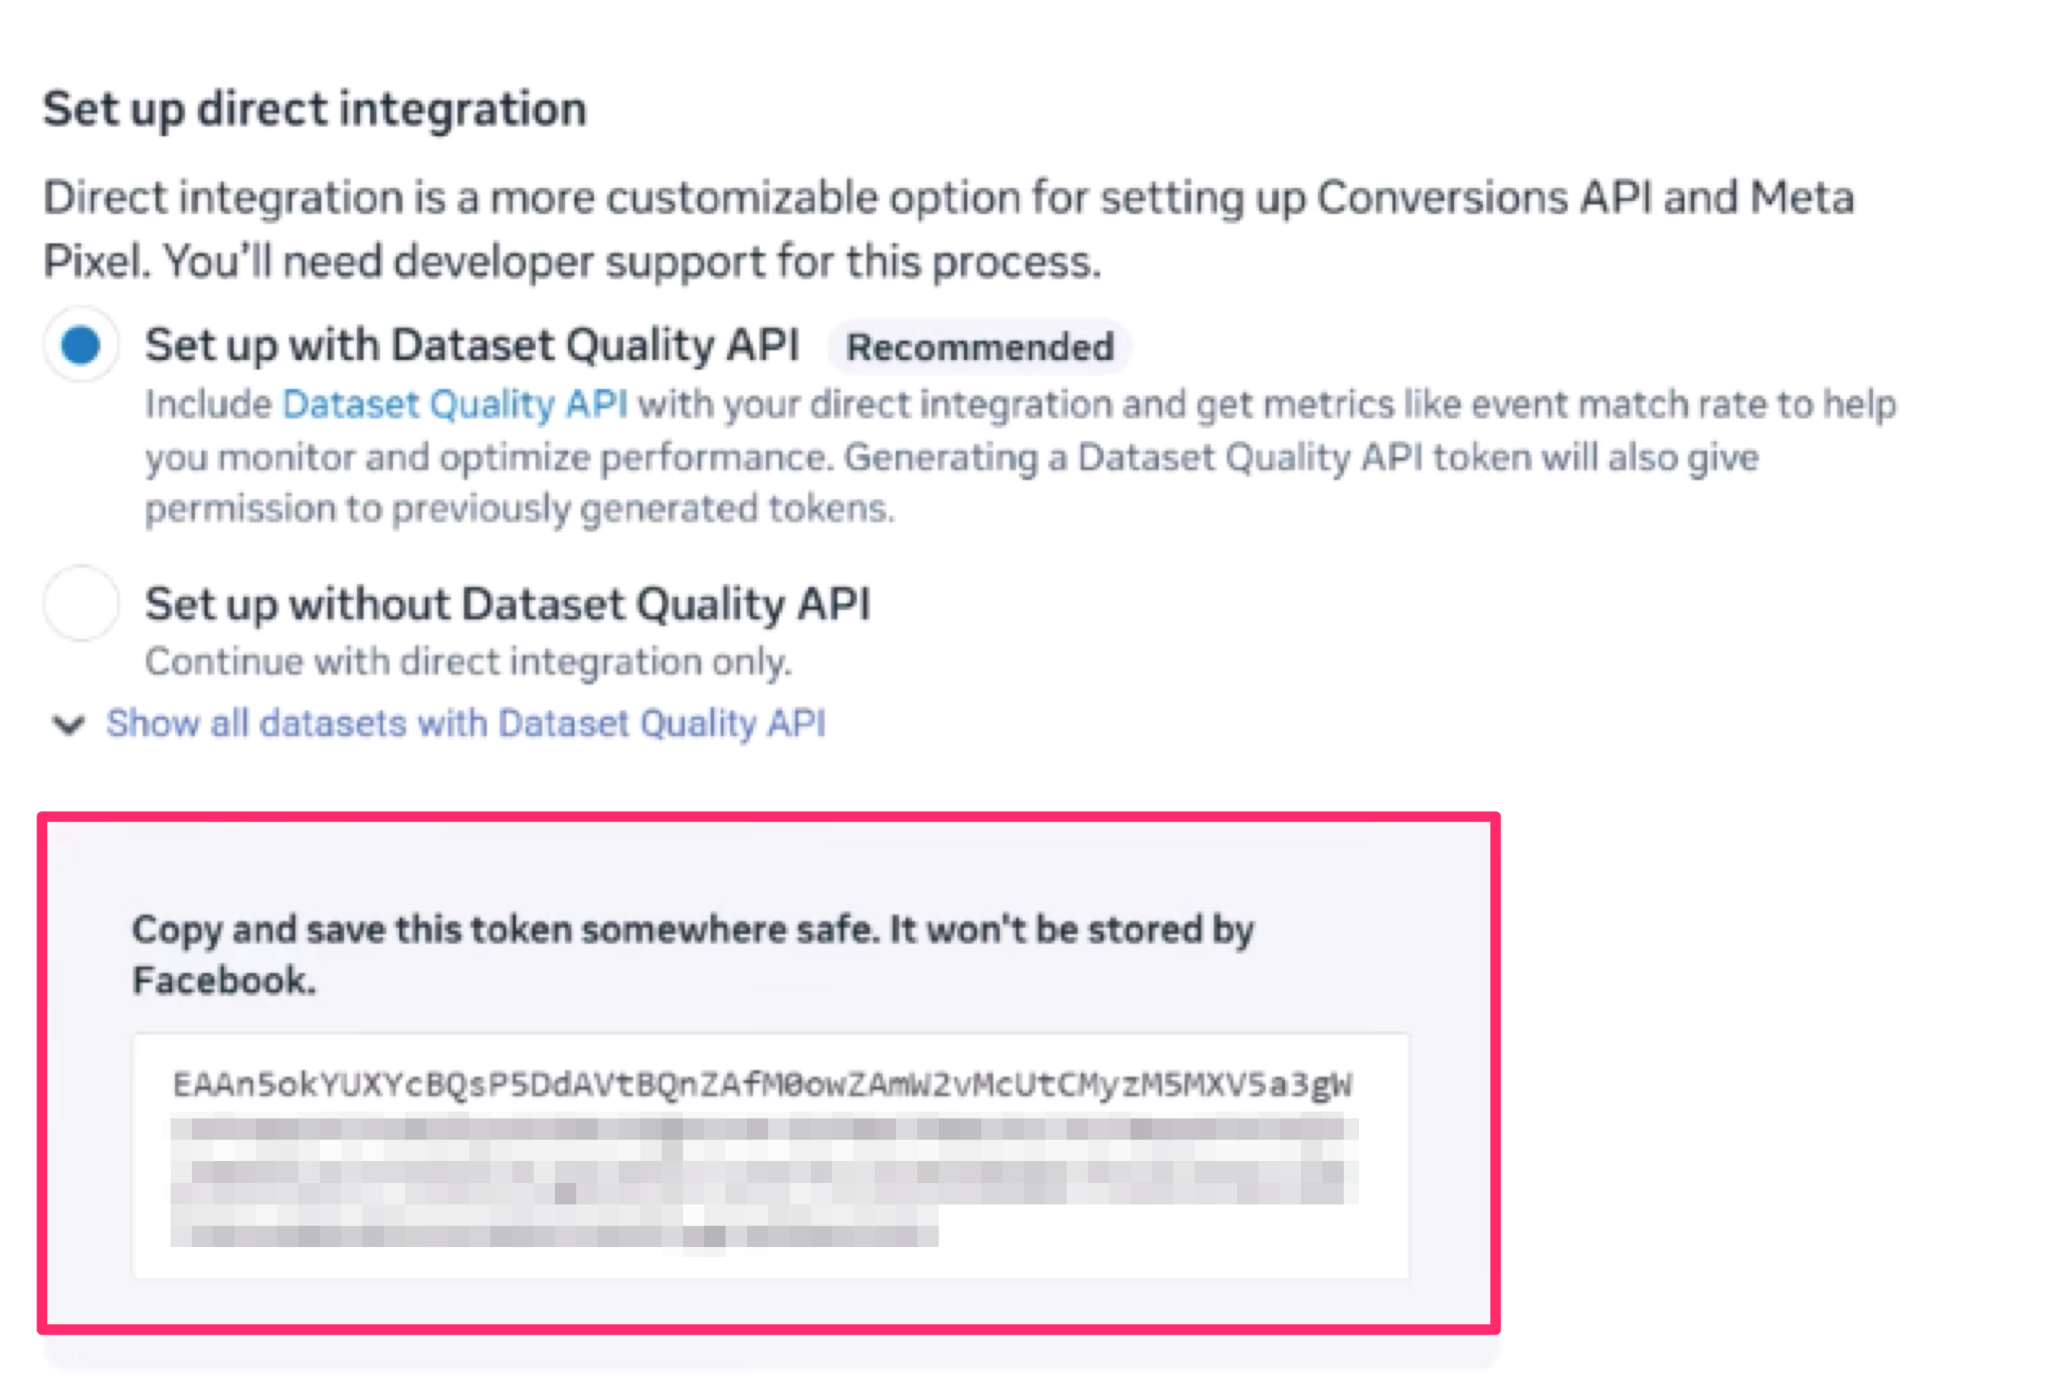

Create another Constant variable in GTM named “const – meta access token” following the same steps as above.


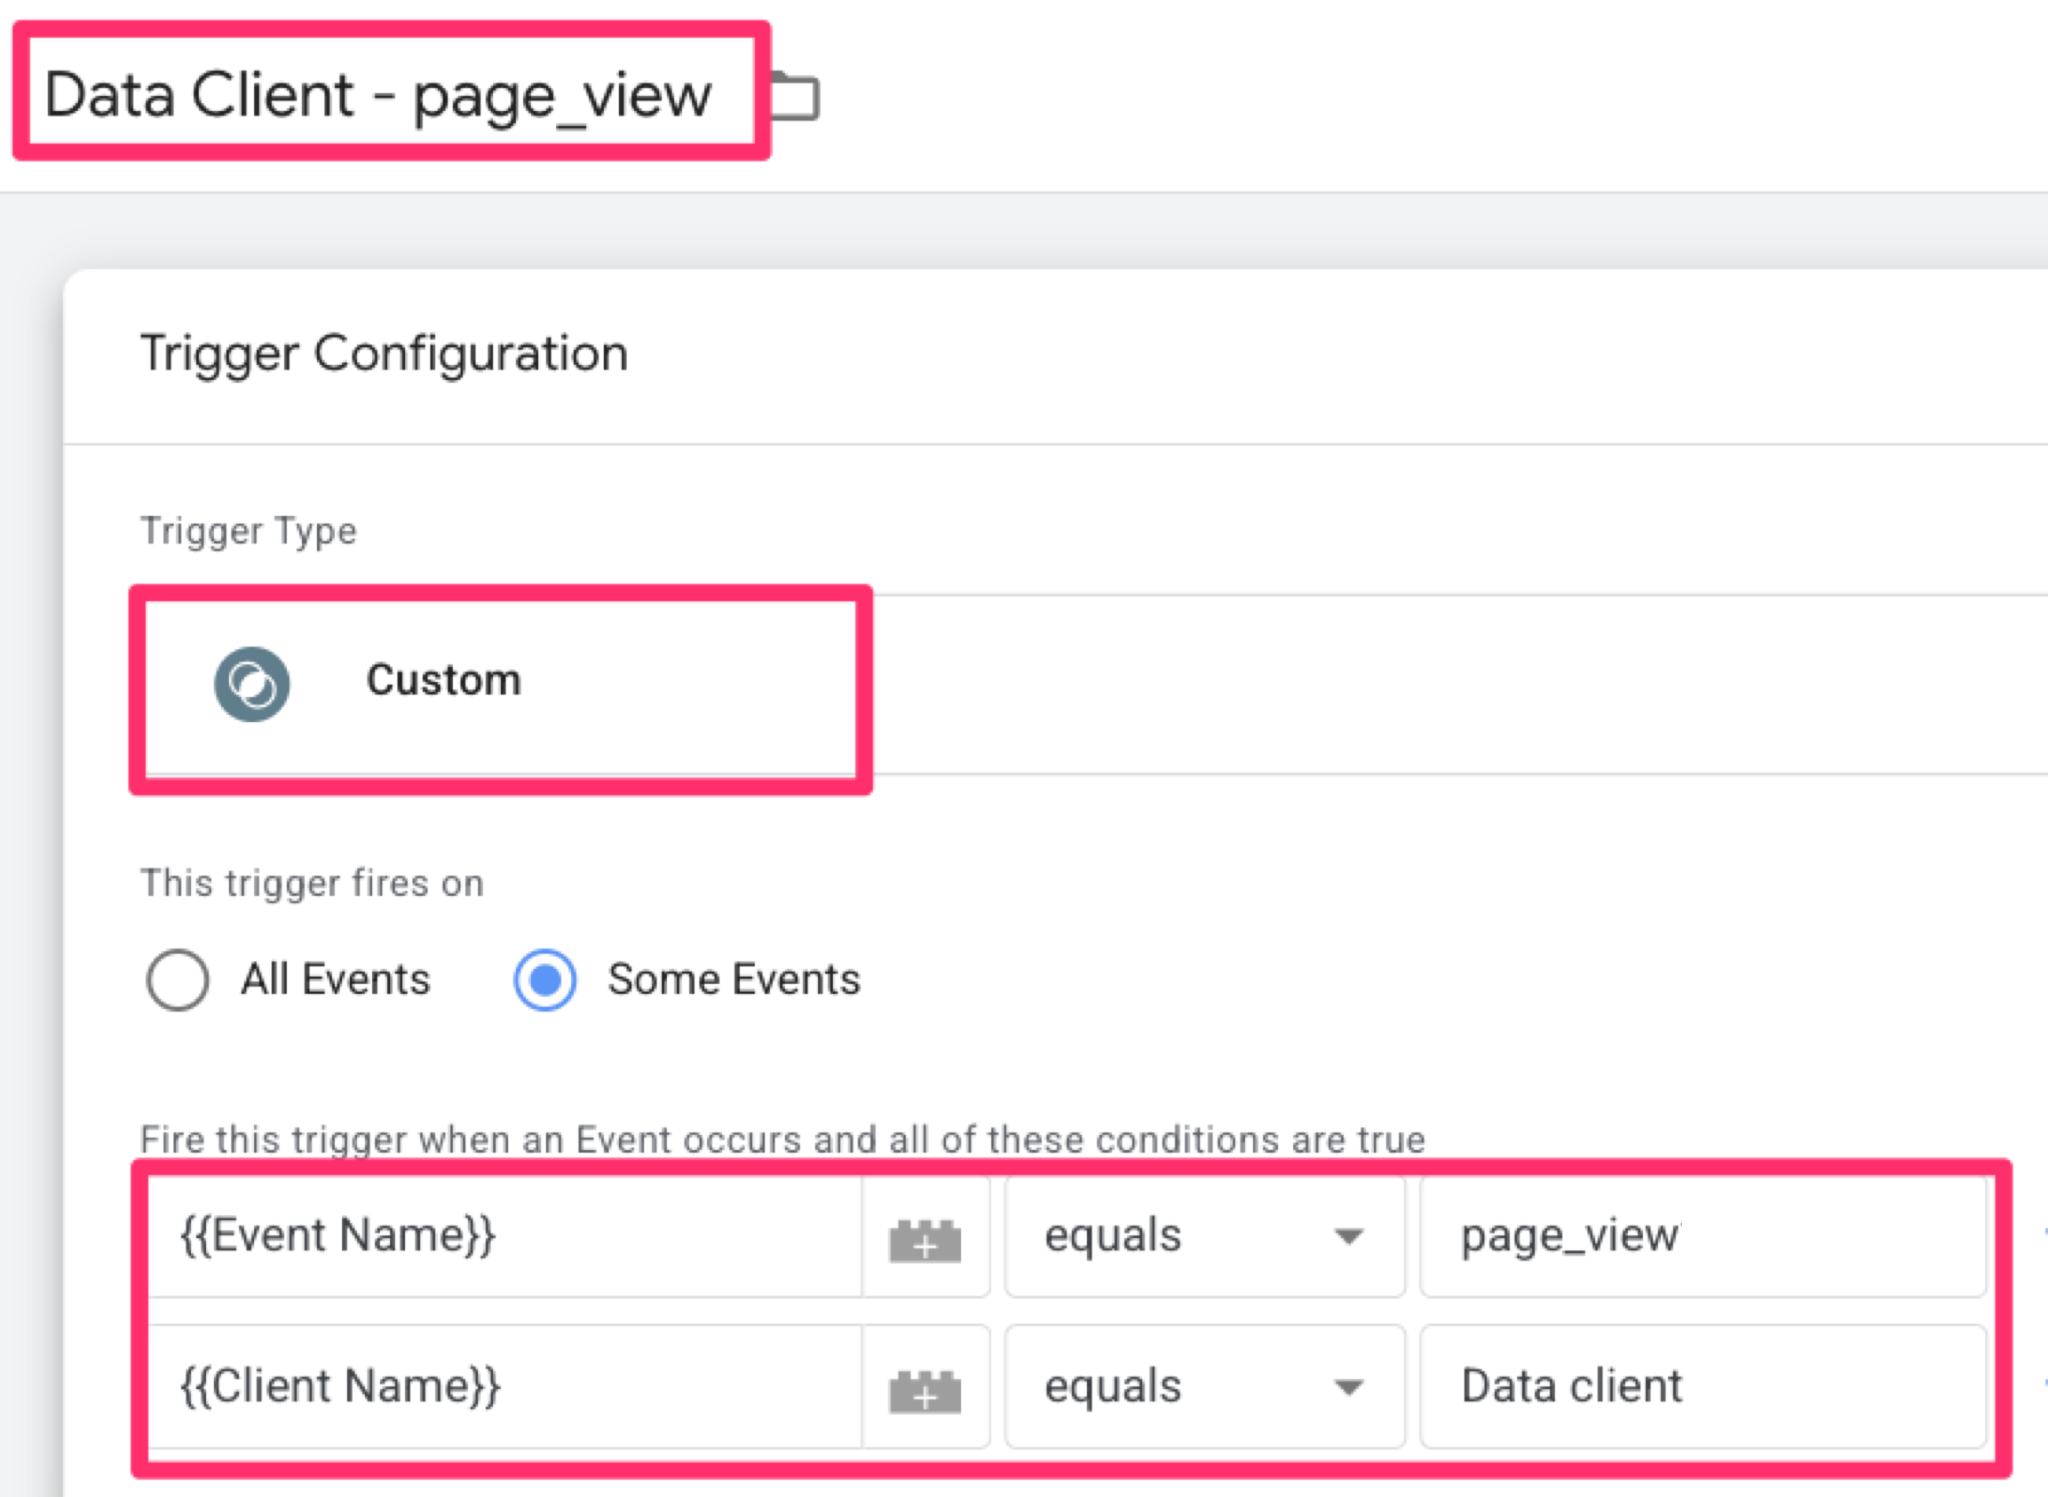
Now, create a trigger so the server knows when to fire this tag. Click Triggering to create a new “Custom” trigger and set it to fire on some events when:
- Event Name equals “page_view”
- Client Name equals “Data client” (Note: This is case-sensitive).
Name this trigger “Data Client – page_view” and save it.
To finish it off, name your tag “FB CAPI – pageview”, and save.
Testing and Validation
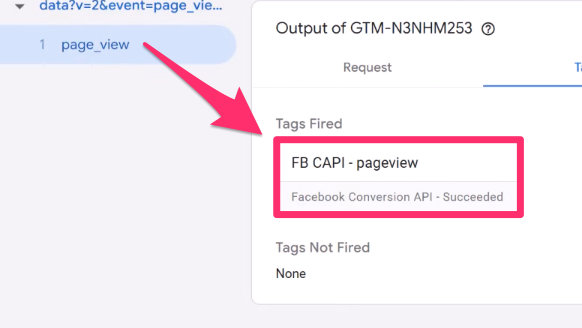
To verify the connection, click Preview in your Server container and load your website. In GTM Preview mode, you should see the “FB CAPI – pageview” tag fire under the page_view event.
For a final confirmation through Meta:
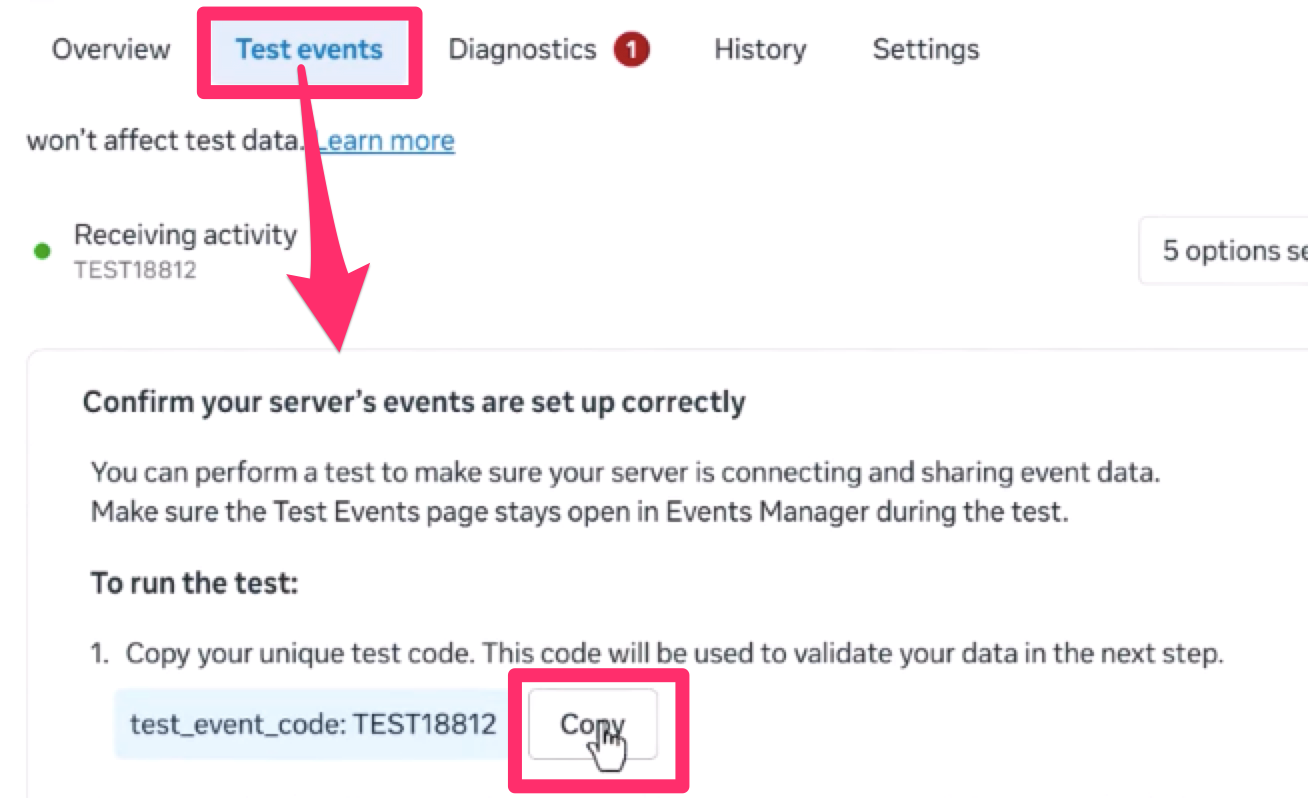
- Go to Events Manager > Test events tab. Expand the section “Confirm your server’s events are set up correctly” and copy the Test ID.

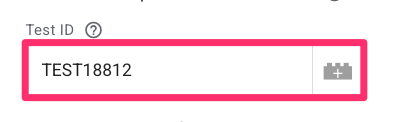
- Back in your GTM Server container, paste this ID into the Test Event Code field of your tag.

- Refresh the server container’s preview mode .
Enter Preview mode again and refresh your website. You should immediately see the page_view event appear in the Meta Events Manager under the Test events section, confirming that your server is successfully communicating with Meta.
Create the Meta CAPI Add to Cart Tag
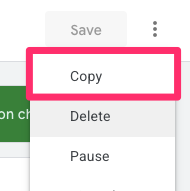
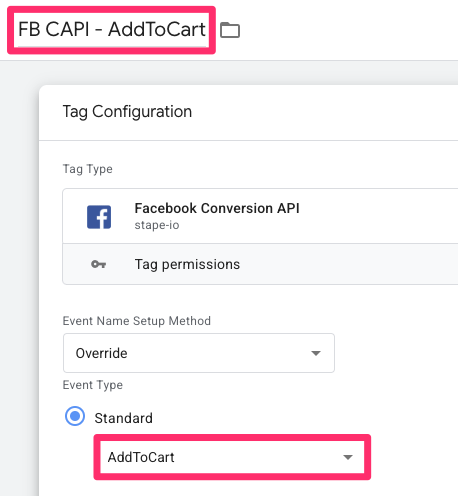
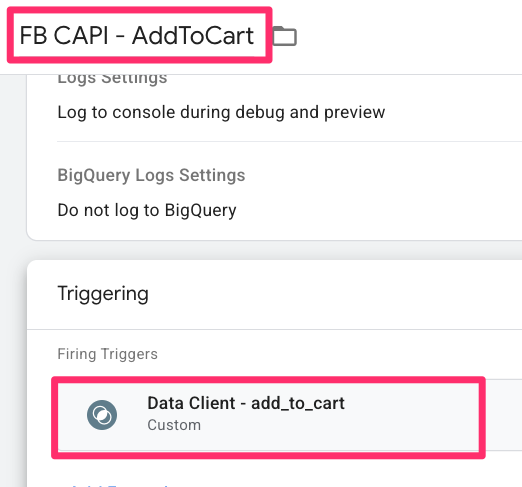
To set up the Meta CAPI Add to Cart tag, we will build upon the work we did for the Page View tag. Start by making a copy of the “FB CAPI – pageview” tag you just created by clicking the three dots in the top-right corner of the tag.
Rename this new tag to “FB CAPI – AddToCart” and change the Event Name Setup Method to “Override” using “AddToCart” as the event name.
Now, we need to map the specific product information that your Web container is sending to the server. To see exactly how this data is arriving, go back to your website and add an item to your cart. Open the Server GTM Preview mode, click the add_to_cart event and go to the Event Data tab to inspect the incoming data.
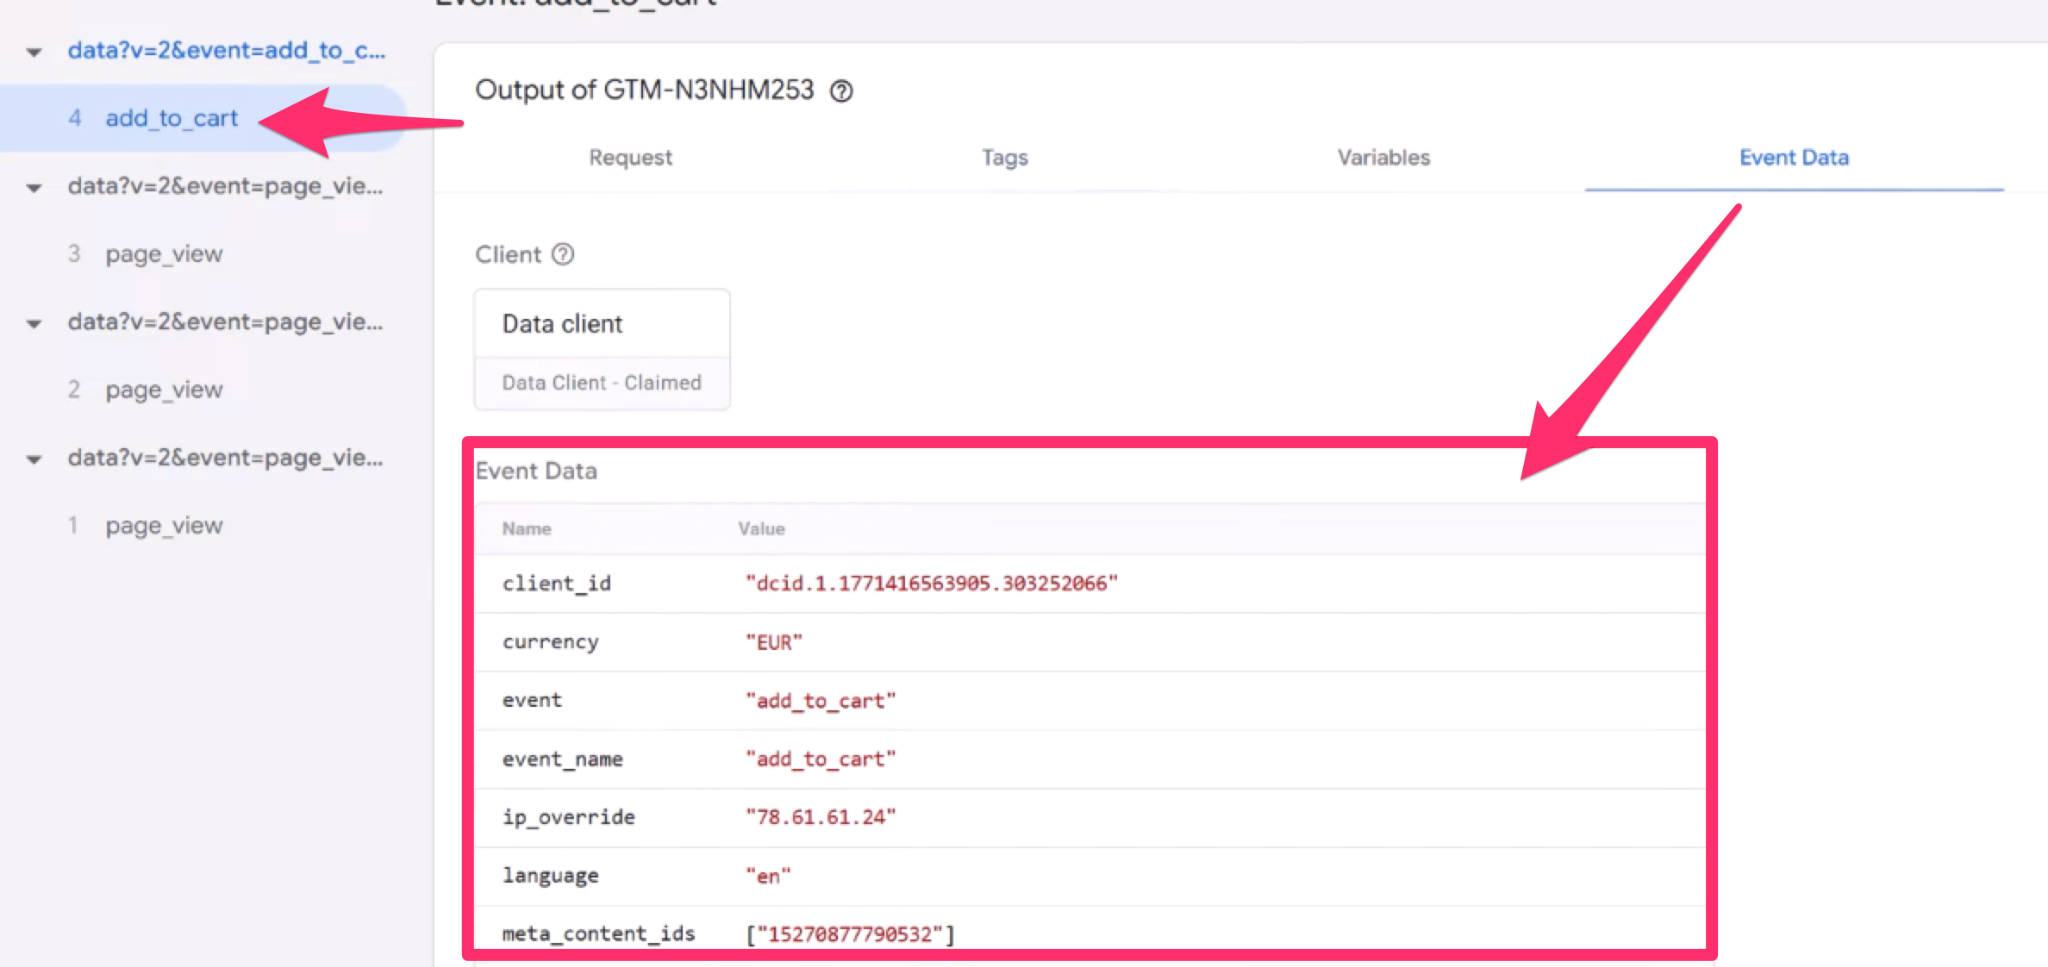
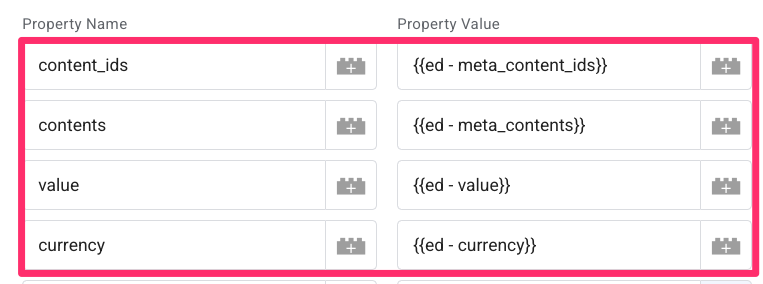
We need to extract the product details from the incoming request using Event Data variables. Expand the Custom Data section and add four new properties: content_ids, contents, value, and currency.
Here is how to create the first one:
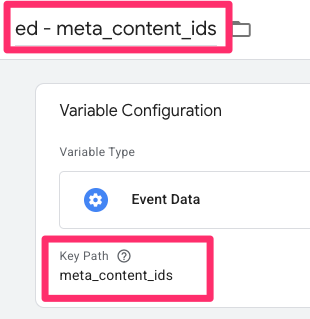
- In the Tag configuration, click the + icon next to the Property Value field for content_ids to create a new variable.


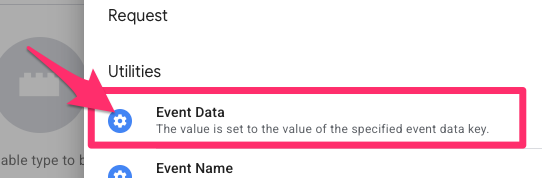
- Choose “Event Data” as the variable type.

- Enter the Key Path exactly as it appears in your Preview mode (in this case, “meta_content_ids”). This parameter was sent from our Web GTM container.
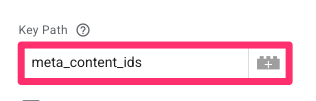

- Name the variable “ed – meta_content_ids” and save.

You will need to repeat these exact steps for the remaining parameters. Follow the same process to create Event Data variables for the following:
- Map “contents” to the key path “meta_contents”
- Map “value” to the key path “value”
- Map “currency” to the key path “currency”
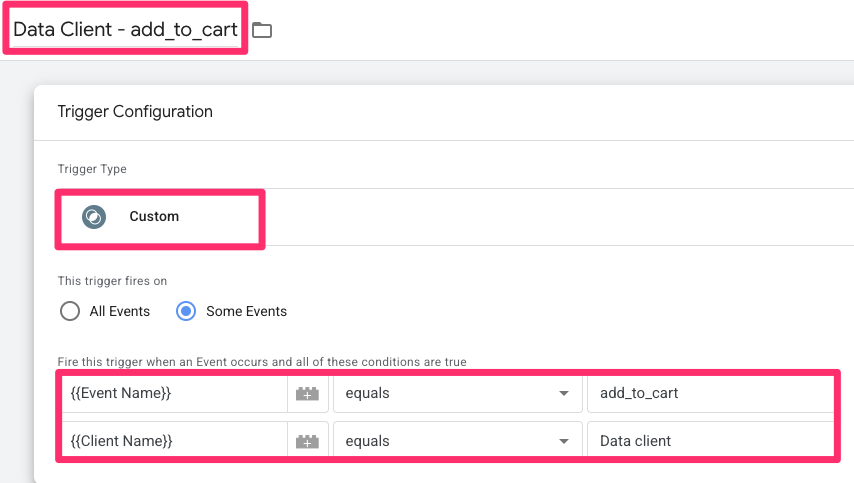
Next, update the trigger so this tag fires for the correct action. Click the Triggering section to create a new Custom trigger with the following conditions:
- Event Name equals “add_to_cart”
- Client Name equals “Data client” (remember, this is case-sensitive).
Name the trigger “Data Client – add_to_cart” and save it.
Make sure you have removed the existing trigger from copying the tag. Name your tag “FB CAPI – addToCart” and save it.
To test that the tag works, enter server-side container’s Preview mode. Add an item to your cart on your site and verify that the tag fires in GTM and that the event appears in the Meta Events Manager Test Events tool, just as we did with the Page View tag.

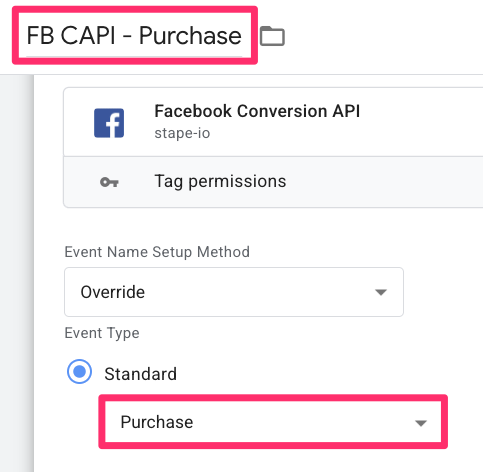
Create the Meta CAPI Purchase Tag
You’ll start to see a pattern that with each type of tag, we need to set it up for all the actions we want to track, but it gets easier as we go on, since you can copy the previous tag to simplify things! Start by making a copy of the “FB CAPI – AddToCart” tag you just created.
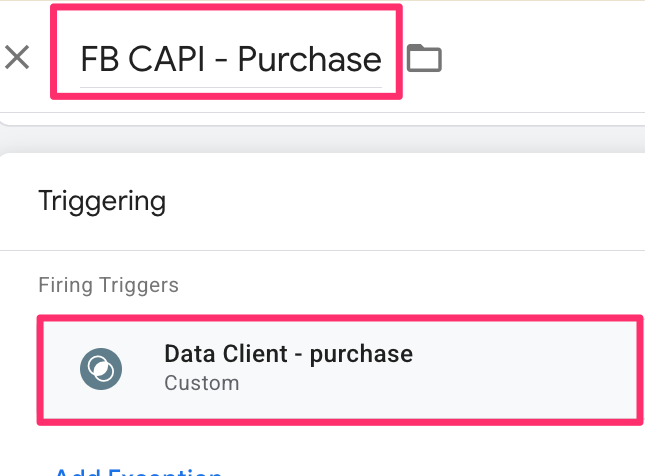
Rename this new tag to “FB CAPI – Purchase” and set the Event Name Setup Method to “Override,” using “Purchase” as the event name.
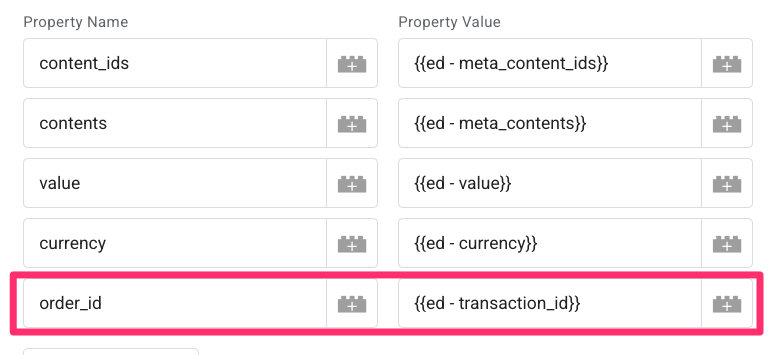
We need to add a few more specific details to this tag to make sure Meta can attribute the sale correctly:
- Order ID: Add a new parameter for “order_id”. Create a new Event Data variable for this, using “transaction_id” as the Key Path. This is the same process as the four parameters above (and you’ll keep these parameters, too).

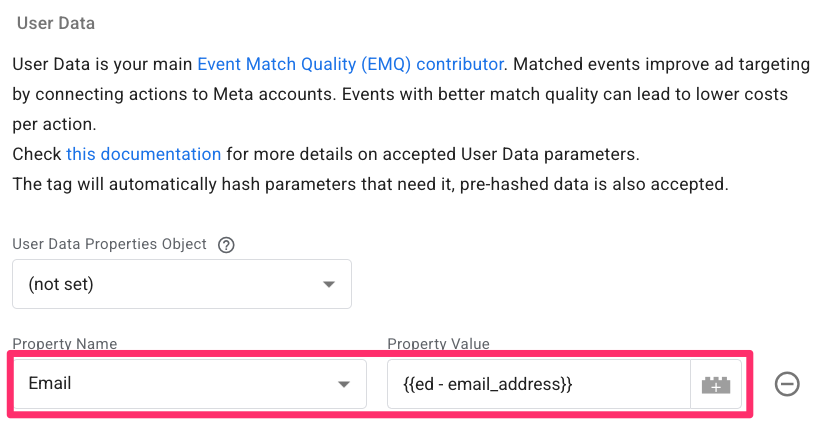
- User Data: To help with customer matching, go to the User Data section of the tag and click “Add Property”. Select “Email” and map it to a new Event Data variable with the Key Path set to “email_address”.

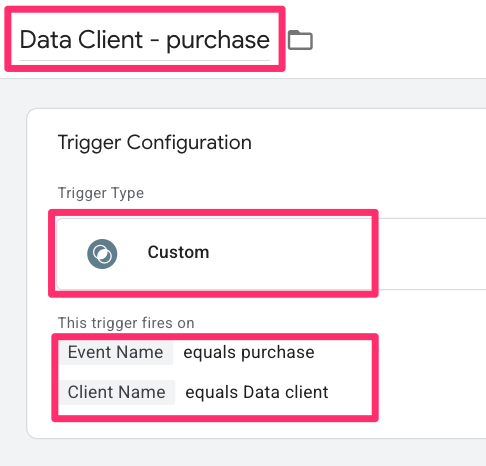
Now, update the trigger so it specifically captures the purchase event. Click the Triggering section to create a new Custom trigger with the following conditions:
- Event Name equals “purchase”
- Client Name equals “Data client” (this remains case-sensitive).
Name this trigger “Data Client – purchase” and save it.
Save the tag.
Go back to your Meta Events Manager and follow the same testing steps as before. Perform a test transaction on your store and verify that the purchase event appears in the Test Events tool with all the correct parameters, such as the value and transaction ID.
With this tag in place, your fundamental server-side setup is complete!
Combine the server-side setup with Facebook Pixel
To make sure your ad optimization is as strong as possible, Meta highly recommends a hybrid approach. While the server-side CAPI setup is powerful, running the client-side Pixel in parallel allows Facebook to potentially collect more data points. Here is how to set up the browser-side Pixel to work alongside your server tags.
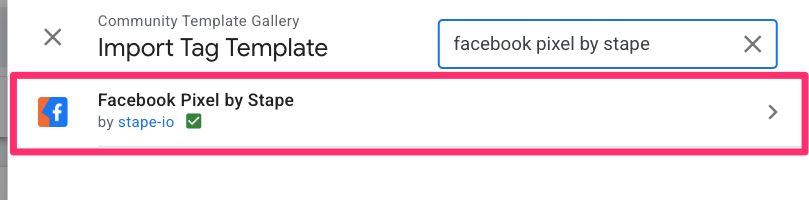
First, go to your Web GTM container. Navigate to the Templates section, search the tag gallery for “Facebook Pixel by Stape,” and add it to your workspace.
Creating the Pixel Pageview Tag
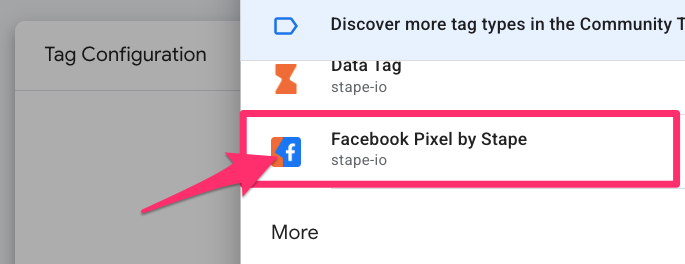
Go to Tags and create a new tag using the “Facebook Pixel by Stape” template.
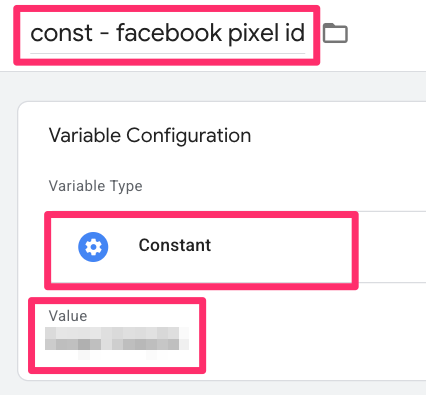
For the Pixel ID, you can find this in your Meta Events Manager > Settings under Dataset ID. To keep things organized, create a new Constant variable for this ID and name it “const – facebook pixel id”.
Deselect “Enable automatic User Data and Event Parameters mapping from the Data Layer.”

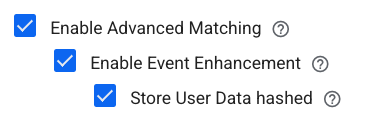
Select these three options:
- “Enable Advanced Matching”
- “Enable Event Enhancement”
- “Store User Data hashed”
These settings help enrich your data using information already available in your events.
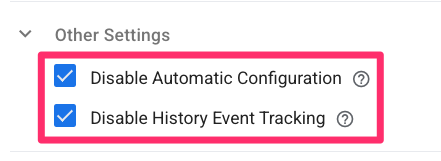
Under Other Settings, it is a good practice (in my opinion) to select “Disable Automatic Configuration” and “Disable History Event Tracking” to maintain full manual control.
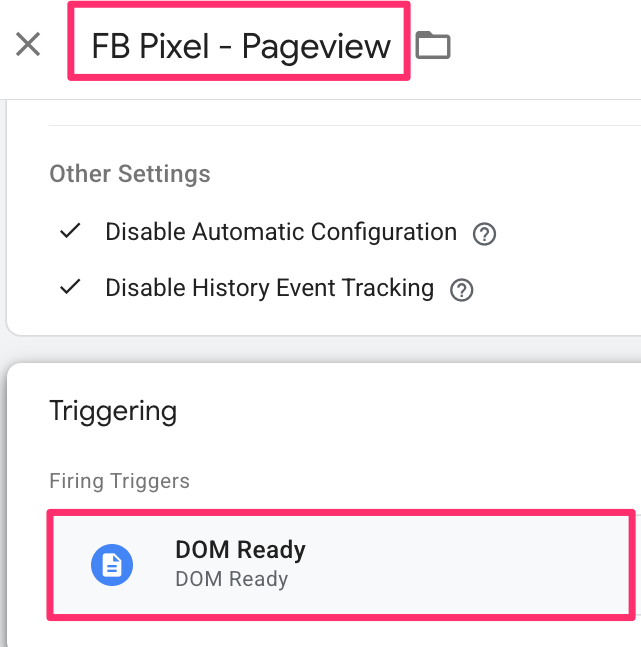
Set the trigger to the DOM Ready trigger. Name the tag “FB Pixel – Pageview” and save.
Creating the Pixel Add to Cart Tag
To track when items are added to the cart, make a copy of your Pageview tag, rename it to “FB Pixel – AddToCart” and change the event name to “AddToCart”.
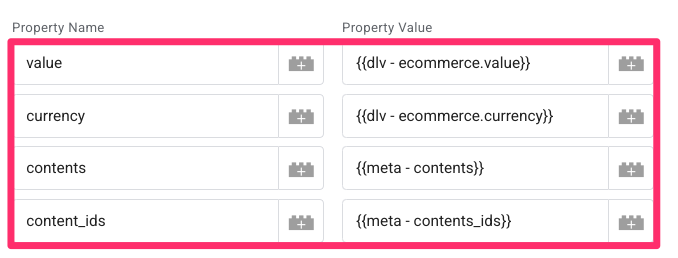
Under Object Properties, add the following parameters using the Data Layer Variables we created earlier in this guide:
- value
- currency
- contents
- content_ids
Use the same “custom – add_to_cart” trigger we used for the server-side data tag to make sure the browser and server events fire at the same time.
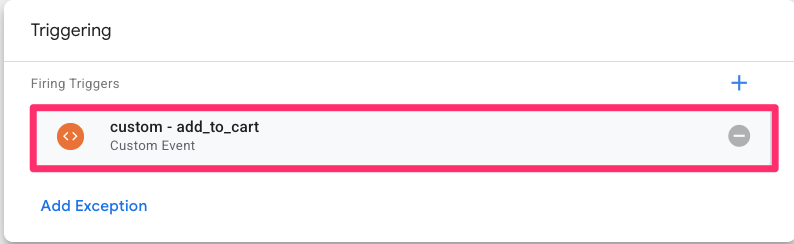
Save the tag.
Creating the Pixel Purchase Tag
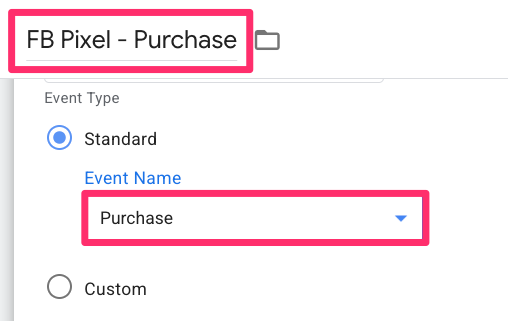
Finally, create the purchase tag by making a copy of the Add to Cart tag, renaming it to “FB Pixel – Purchase” and changing the event name to “Purchase”.
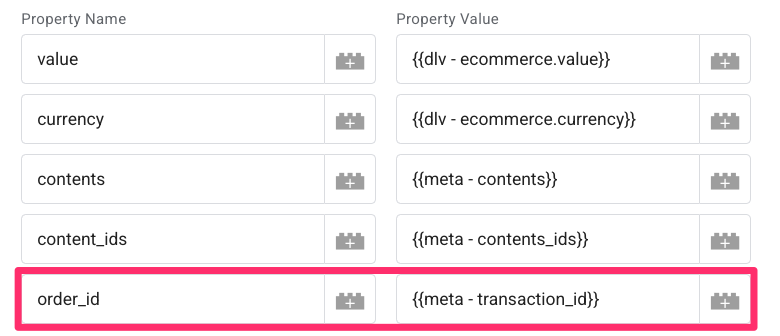
Add the order_id parameter using the same transaction ID variable created previously. Keep all the other parameters that were copied over.
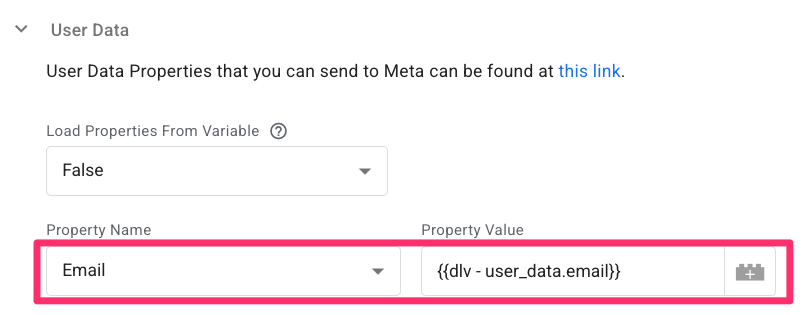
Under the User Data section, add a property for Email and map it to your email Data Layer Variable.
Use the same “custom – purchase trigger” we created for the server-side purchase tag. Make sure to remove the add to cart trigger that was copied over with the tag.
By using the same triggers for both your Pixel and your CAPI tags, you make sure that every action on your site is backed up by both the browser and the server.

Deduplication of events
Since we are sending data through both the server-side CAPI and the browser-side Pixel, we need to make sure Meta knows which events are duplicates. Without deduplication, your conversion data will be inflated.
The key to this process is the event_id. When Meta receives two events with the same name and the same unique ID, it will automatically discard the redundant one, preserving a 1:1 conversion count.
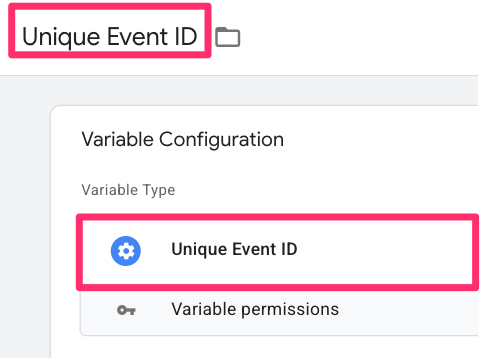
First, you need to add a specific template to generate these IDs. Navigate to Templates > Variable Templates in your Web GTM container, search for “Unique Event ID”, and add it to your workspace.

You must now add this ID to every tag we have created in the Web container:
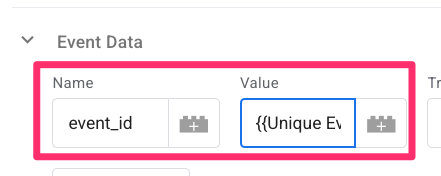
- For Data Tags (Server-side): Open one of your data tags. Under Event Data, add a new parameter called event_id.
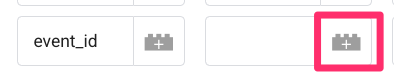

- Click the icon to create a new variable, select the “Unique Event ID” type, name the variable “Unique Event ID” and save.

Repeat this step for each of your Data Tags (Pageview, Add to Cart, and Purchase), but reuse the Unique Event ID variable instead of creating a new one each time.

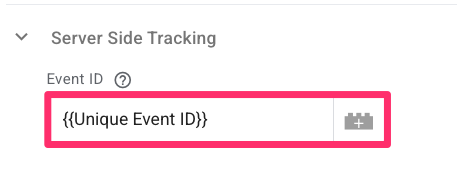
- For Facebook Pixel Tags (Browser-side): Open each of your FB Pixel tags. Go to the Server Side Tracking section and add the same “Unique Event ID” variable to the Event ID field.

To confirm this is working, head back to Meta Events Manager and clear any existing activity.
- Expand the section “Confirm your website’s events are set up correctly” and enter your website URL (if this does not work, you’ll need to publish the web GTM container first and then enter the website URL in Facebook’s “Test events” section).
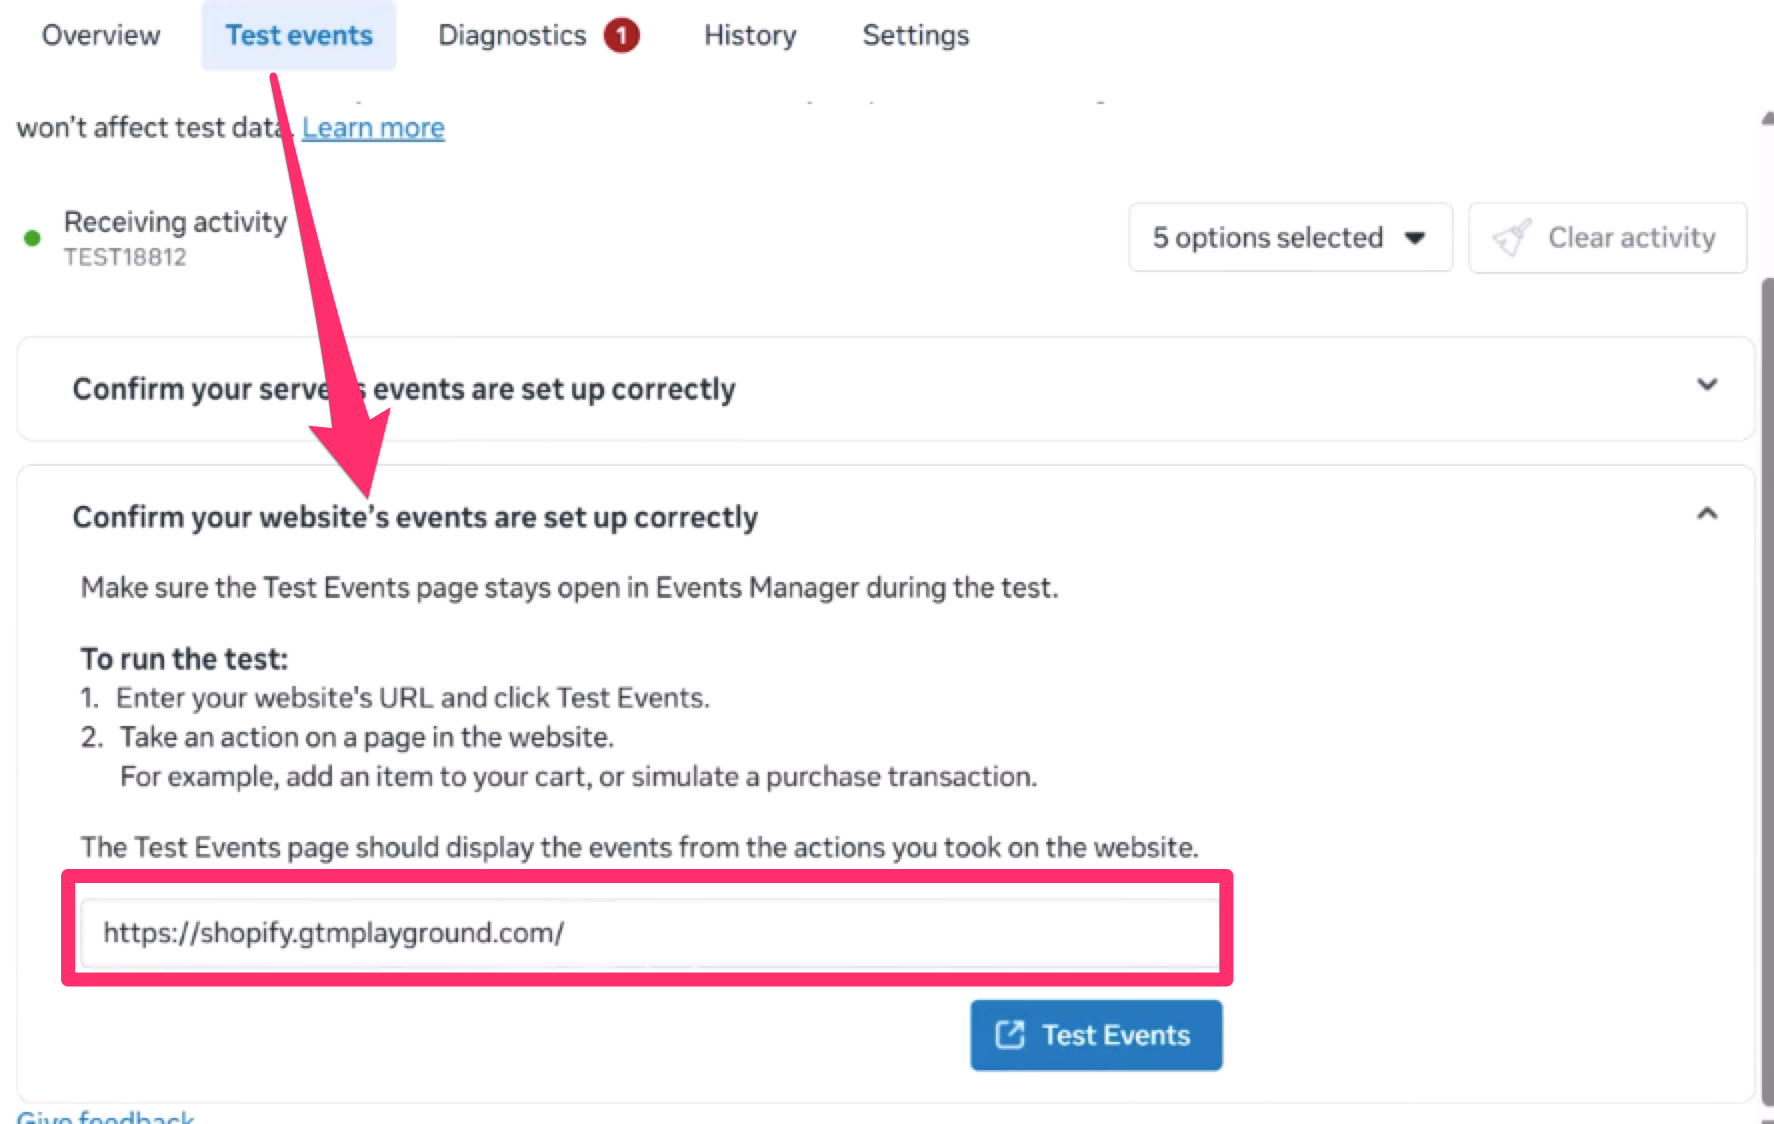

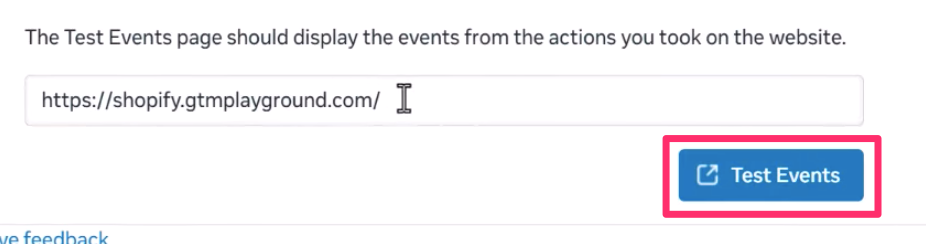
- Click “Test Events” and perform the three actions: a page view, an add to cart, and a purchase.

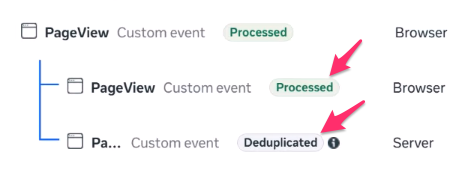
- In the Events Manager, you should see two entries for each event – one from the “Browser” and one from the “Server.” One of these should be labelled as “Deduplicated”, while the other is marked as “Processed”.

Note: Due to how Shopify handles the checkout sandbox, the browser-side purchase event may not appear in this test, but your server-side event will still capture the conversion reliably.
Go live
Before you finish, you must remove the temporary testing configurations to make sure your data is recorded as live production data. Follow these two final steps:
- Remove the Test ID: Go back to your Server container and open each of your Meta CAPI tags (Pageview, Add to Cart, and Purchase). Delete the Test ID from the Test Event Code field in each tag.
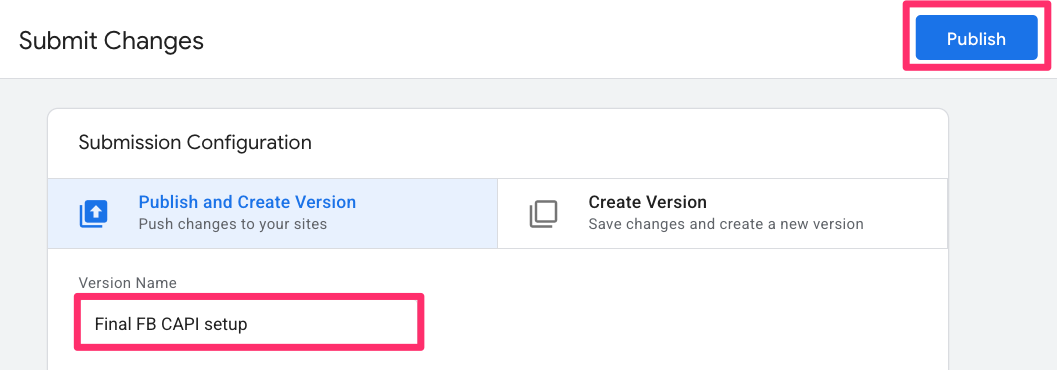
- Publish Your Containers: Click the Submit button in the top-right corner of both your Web GTM container and your Server GTM container. Give your version a name and click Publish.

Your Shopify store is now officially equipped with a robust, deduplicated, and server-side tracking system.
Facebook Conversions API for Shopify with Google Tag Manager: Final Words
By following these steps, you have successfully moved beyond basic browser-side tracking to a more resilient, hybrid measurement system. Your Shopify store can now capture conversion data through both the Meta Pixel and the Conversions API, ensuring your ad performance remains accurate even in the face of browser extensions and cookie restrictions.
Now that your events are firing, keep a close eye on your Event Match Quality (EMQ) scores in the Meta Events Manager. These days, your ad performance isn’t just driven by your creative, but by the quality of the data you provide as well.
0 COMMENTS