
Track Forms With the Help of Data Layer and Google Tag Manager
Updated: May 8th, 2025
In this post, I’ll show you one of the most reliable Google Tag Manager Form Tracking methods – with dataLayer.push. This blog post is part of a much more extensive and comprehensive guide – 7 Google Tag Manager Form Tracking Methods.
You are probably already familiar with the main GTM concept: every interaction you want to track needs a tag and a trigger. If you want to track all form submissions with Google Analytics, you must create a Google Analytics Tag and a Trigger (rule) when a tag must fire. Creating a tag is the easy part of this process. Let’s make one – you’ll need it in the next chapter of this blog post.
In this article, I presume you have already installed Google Analytics 4. This means your container contains the Google tag and the Constant variable (with your GA4 measurement ID). If not, read this blog post first.
-
- Go to Tags
- Press New button
- In Tag Configuration choose Google Analytics > Google Analytics: GA4 Event
- In the Measurement ID section, insert your constant variable (with Measurement ID). That way, the event tag that we are creating will reuse some of the settings from the Google tag.
- In the Event Name field, I enter generate_lead
- Leave the Triggering part empty (for now) and click Save. The choice of trigger type depends on the way a form was developed.


Let me quickly explain some of the choices. I used generate_lead as an event name because it is in the list of GA4 Recommended events. But if you want, you can name it something else.
Let’s Create a Trigger
If the standard Google Tag Manager Form listener does not work with your form, the next best thing is to ask the developer to implement a custom dataLayer.push() into the callback function, which will be invoked upon successful form submission. The piece of code could be something like this:
window.dataLayer = window.dataLayer || []
dataLayer.push({
 'event': 'formSubmission',
 'formType': 'Contact us',
 'formPosition': 'Footer'
});
You’ll need to prepare a short but well-written and clear task for a developer:
- First, choose a name for the event. In the example above, I chose formSubmission.
- Then think of any additional data you may need. Write those data points down and try categorizing them.
- My imaginary website has several forms – “Contact Us” and “Newsletter Subscription”. So I decided to have a dataLayer variable formType.
- Another useful parameter (in my opinion) is formPosition because some forms are in the footer, and others are in the website’s sidebar. Why not make it another dataLayer variable?
- If a developer is new to Data Layer events and Google Tag Manager, send this link to dataLayer.push documentation to them. Explain to them that you need an event and (if possible) two additional variables pushed into dataLayer after the successful form submission.
- Remember: Do not ask a developer to send any personal data. Google is strictly against PII (Personally Identifiable Information) stored in Google Analytics.
Done! After the developer implements dataLayer.push in all forms, you should test it. Open Preview and Debug mode, refresh the page with the form.
Try submitting the form:
- Leave at least one required field blank. In this case, the dataLayer event must not be pushed.
- Fill in all fields and try submitting again. Did the event appear in Preview and debug console? It should look like this:
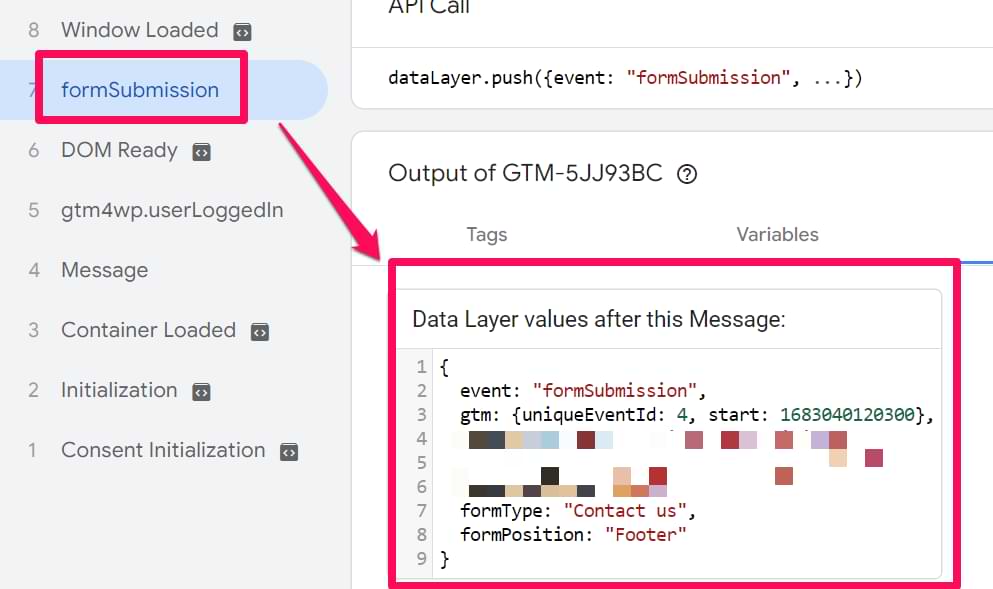

Check whether all data is correctly pushed to dataLayer. Click the formSubmission event and then open the Data Layer tab in the Preview console. Data should look like this:

Set up variables and triggers in GTM. In my dataLayer.push example, there are two data points I’d like to use as variables – formType and formPosition, so I need to include them in Google Tag Manager by creating Data Layer variables.
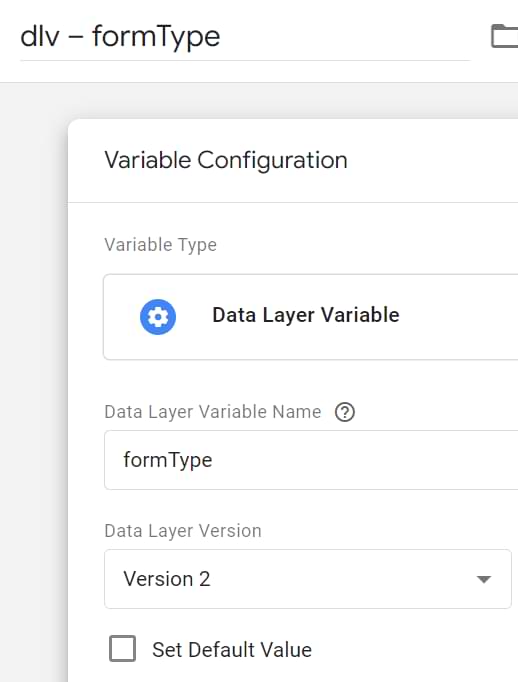
1st variable:
Title: dlv – formType
Variable type: Data Layer Variable
Data Layer Variable Name: formType
Leave all other settings as they are
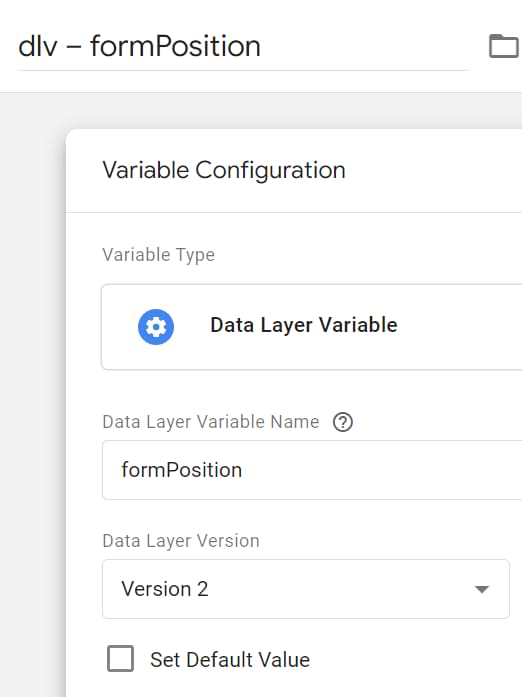
2nd variable:
Title: dlv – formPosition
Variable type: Data Layer Variable
Data Layer Variable Name: formPosition
Leave all other settings as they are
Now, let’s create a trigger. Go to Triggers and click New. Enter the following settings:
Trigger Type: Custom event
Event name: formSubmission (it may differ depending on your situation. Make sure you and your developer use the same name).
This trigger fires on All custom events. This means that all formSubmission events will be tracked.
Update the GA4 event tag
Since I have created two Data Layer variables (formType and formPosition), I can use them in my GA4 event tag. As I have said before in this blog post, there are no strict requirements for how those parameters should be named.
I decided to use form_type and form_position. Their values are those two Data Layer Variables I have just created.

Save the tag.
Let’s Test + GA4 custom dimensions
- Assign this new trigger to the Google Analytics 4 Tag you created at this blog post’s beginning.
- Open (or refresh) Preview and Debug mode, and navigate to the form you want to track.
- Then fill in the form and submit it. After successful submission, Google Analytics 4 Tag should fire (it will be displayed in Preview and Debug mode. You can also check Google Analytics 4 DebugView).
- When everything is tested, publish your Google Tag Manager container by clicking the Submit button at the top-right corner.


- Register form_position and form_type as Custom Dimensions in GA4 (if you plan to use them in the reports). Read this guide to learn more.
Form Tracking Reporting with Explorations
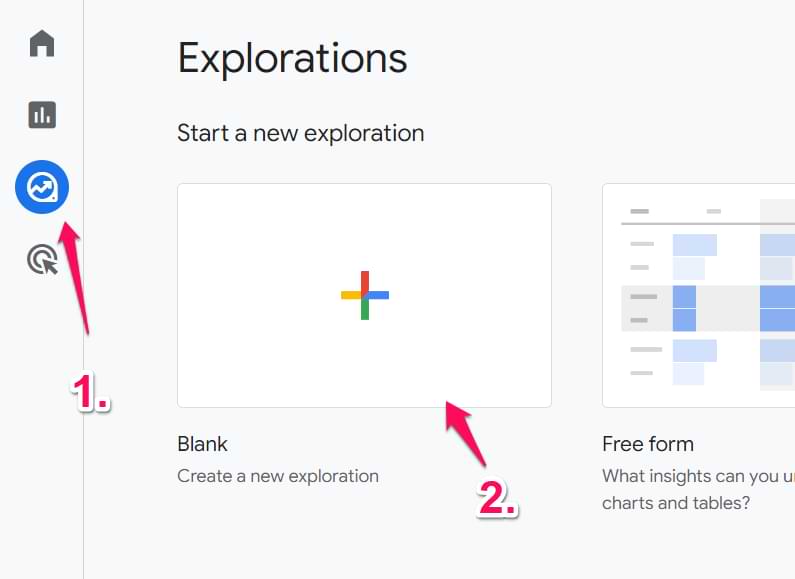
To view the details captured by form_type and form_position, the best way is to do it via a custom Exploration report.
To do this, head over to the Explore section and select Blank Exploration.
Now, since we want to break down the details captured during the form_submission event, we will add the Event Name as a dimension in the report. To get the complete count, let’s go ahead and add Event Count, Sessions, and Events per session as metrics.
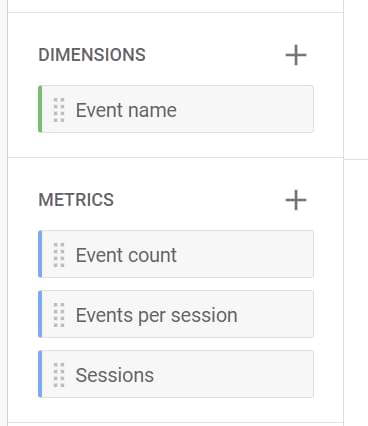
From here, we need to add the respective fields as rows and columns. In this case, the Event name should be in the row and the remaining metrics as columns, since they will be numeric in nature.
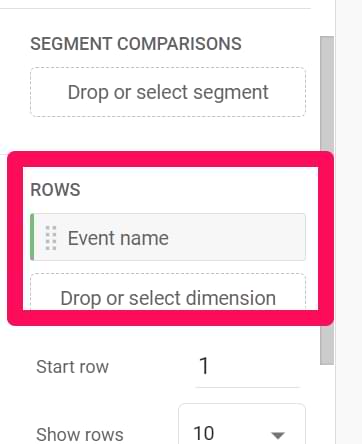
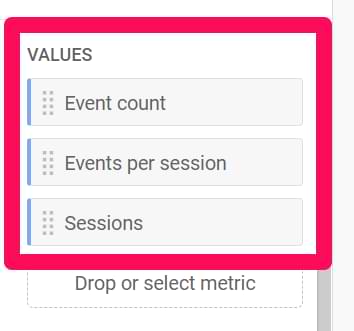
Add Event name dimension to the Rows section and the respective metrics in the Columns section, as in the screenshots below:
The resulting table should look like this.
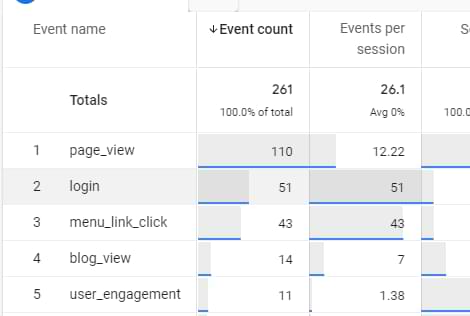
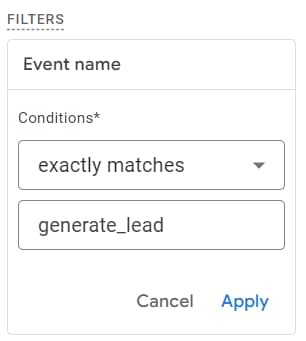
This list of events isn’t useful to our case since we only need the form_submission event. For this, navigate to the Filters option and set the condition Event name exactly matches generate_lead (or another value if you use something different).
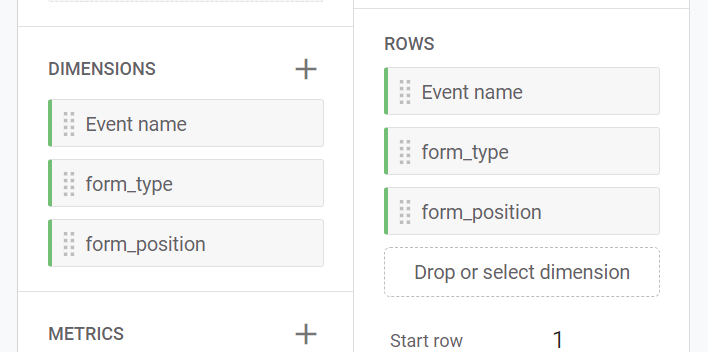
 Now, to utilize the values stored in form_position and form_type. Add both custom dimensions to the Dimensions option firstand then to Rows.
And voila! You should start seeing the report populate with the details captured by form_type and form_position. You can then use this data to understand how users interact with your forms and which interactions can be leveraged to meet business objectives. If you want, you can remove the “Event name” dimension from the report (so that you can see only form_type and form_position).
If Form Tracking with Data Layer Events Isn’t the Right Method for You
I created a detailed Google Tag Manager form-tracking guide with five different form-tracking techniques. If you want to track forms without the developer’s input, check other GTM Form Tracking options mentioned here.
If you have questions, feel free to contact me via social media accounts or write a comment on this blog post.