
February 11, 2025
How to Track Webflow Forms with Google Tag Manager and GA4
If you followed my tutorial on installing GTM and GA4 on a Webflow site, you may now be ready to expand your site’s tracking beyond the basic out-of-the-box solution GA4 provides. In this tutorial, I will show you the next step: how to track WebFlow forms with Google Tag Manager and send those events to Google Analytics 4.
Table of Contents
Here’s what you will learn in this article
- Assumptions
- Create the form listener
- Create a tag to send data to GA4
- Send the event to GA4
- Test the event
- How to find event data in GA4
- Create custom dimensions for form ID
- Use the built-in standard report
- Final Words
Assumptions
Before getting into the tutorial, I assume that you have already installed GA4 using GTM on your Webflow site. If not, check out this tutorial on how to install GTM and GA4 on a Webflow site. I also assume that you have basic knowledge of GA4 before getting into this tutorial.
Create the form listener
First, we must create a form listener using a custom HTML tag in Google Tag Manager. This will “listen” for when users complete a form and push the information to the Data Layer. Once the information is in the Data Layer, we can create a GA4 event tag to capture it.
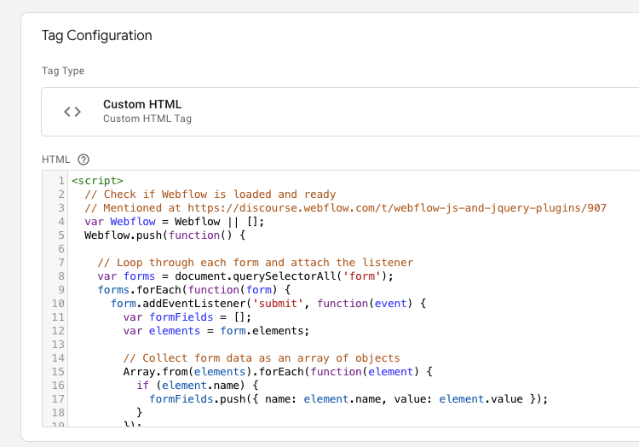
The JavaScript code we need is below (copy this):
<script>
  // Check if Webflow is loaded and ready
  // Mentioned at https://discourse.webflow.com/t/webflow-js-and-jquery-plugins/907

  var Webflow = Webflow || [];
  Webflow.push(function() {

    // Loop through each form and attach the listener
    var forms = document.querySelectorAll('form');
    forms.forEach(function(form) {
      form.addEventListener('submit', function(event) {
        var formFields = [];
        var elements = form.elements;

        // Collect form data as an array of objects
        Array.from(elements).forEach(function(element) {
          if (element.name) {
            formFields.push({ name: element.name, value: element.value });
          }
        });

        var formFieldsObject = formFields.reduce(function(result, formField) {
          result[formField.name] = formField.value;
          return result;
        }, {});

        // Push data to the dataLayer
        window.dataLayer.push({
          event: 'form_submission',
          form_id: form.id,
          form_fields: formFieldsObject
        });
      });
    });
  });
</script>
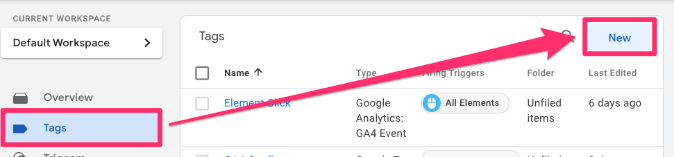
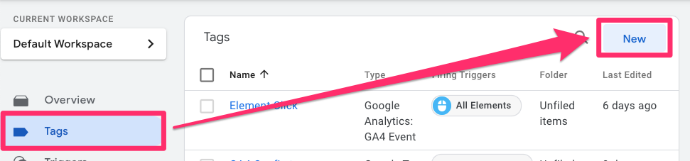
In Google Tag Manager, go to Tags in the left-side navigation and click “New”.
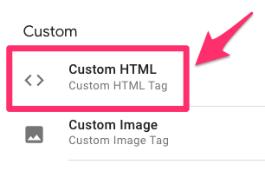
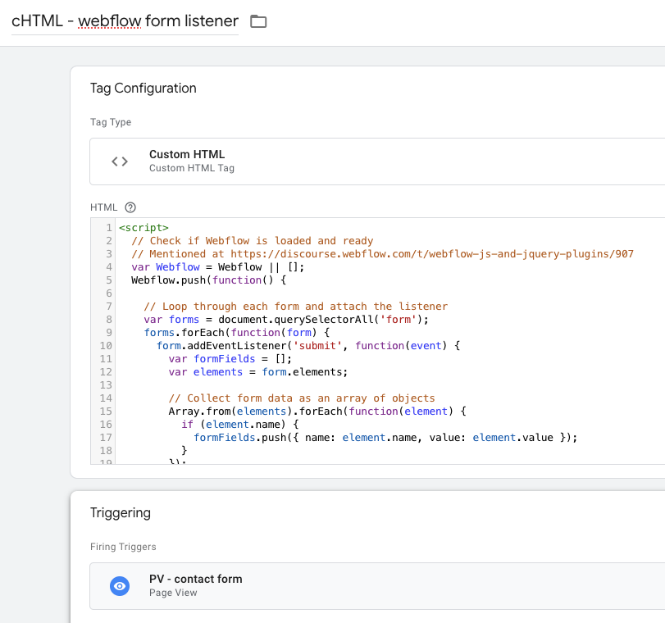
Select Tag Configuration, then choose Custom HTML tag.
Paste the code from above in the textbox.
Scroll down to the Triggering section. Here, you have two options depending on what suits your needs better: (1) Trigger the event on all pages or (2) Trigger the event on some pages.
If you want to trigger that event on all pages, select the “All pages” Page View trigger, which comes default in your GTM container.

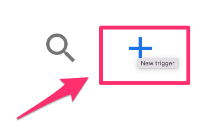
Otherwise, if you want only to trigger the event on certain pages, click the plus sign to add a trigger. Then, on the “Choose a trigger” page, click the plus sign (in the top-right corner) to create a new trigger.
Click “Trigger Configuration” and select the “Page View” trigger type. Fill in the information needed to capture the page(s) you’re interested in. Be sure to select “Some Page Views” under “This trigger fires on” to prompt the filter.
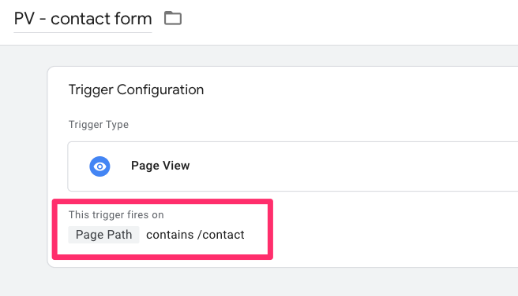
Name your trigger (using proper naming convention) and save.
Now that you have the trigger in the tag, name it “cHTML – webflow form listener” (cHTML = custom HTML) and save.
Test the form listener
Test the form listener by clicking the “Preview” button in the top-left of the interface.
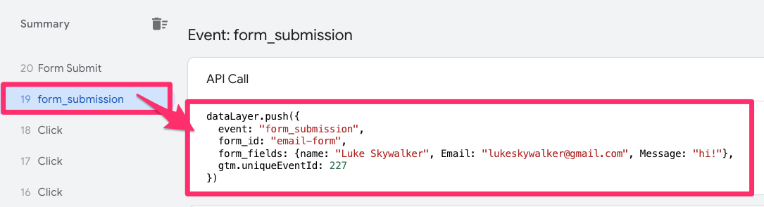
When directed, enter the URL where the form is present and submit the form on your site. Once you see the success message (indicating the form was successfully submitted), look for the form_submission event in Tag Assistant.
Expand the event and see what information it has collected.
Note: You may see a Form Submit event above the form_submission event. This will appear if you have the default Form Submission trigger in your GTM container, but you can ignore it for this tutorial.

Create a tag to send data to GA4
Adding the custom code (aka the custom HTML) to our GTM container made the information we wanted to track available in the Data Layer. However, we still need to create an event to actually collect and send the data to Google Analytics 4.
Create a custom event trigger
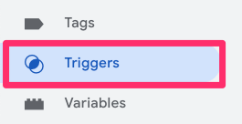
To create a trigger (which tells the tag when to fire), go to Triggers in the left-side navigation of GTM and click the “New” button.
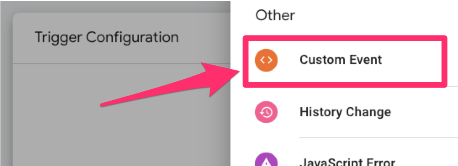
Click “Trigger Configuration” and select “Custom Event” under Other.
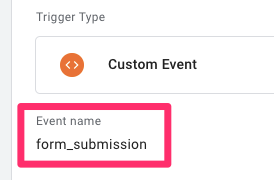
In the Event name textbox, enter the event name as it appears in the form listener code from before: “form_submission”. It must be exactly the same, so double-check it before saving!
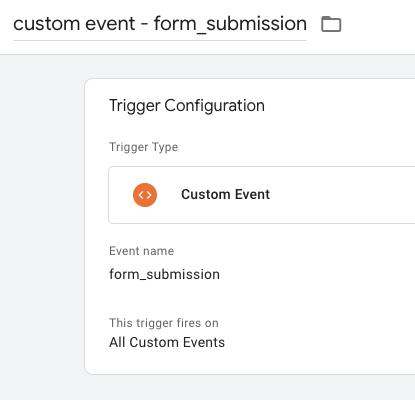
Name the trigger “custom event – form_submission” and save.
Create data layer variable for form ID and other fields
You may have noticed that a form ID and the user-inputted fields appear in the data from the Webflow form submission.
Collecting the form ID allows you to segment your event data based on the form. If you’re importing key events to Google ads as conversion, you can also collect the email address.
Go to Google Tag Manager > Variables and click “New” in the User-Defined Variables.

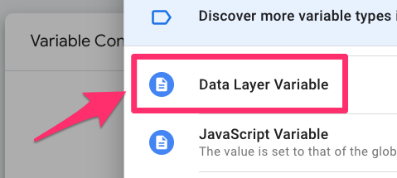
Click the “Variable Configuration” and select “Data Layer Variable”.
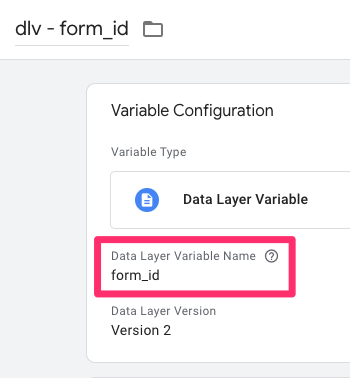
In the textbox, you need to enter “form_id” (again, same as what is seen in preview mode). Name the variable “dlv – form_id” and save.
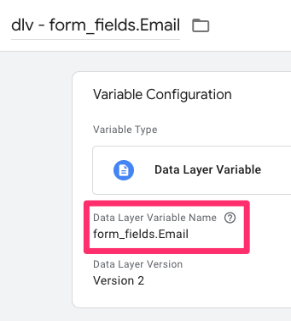
Following the same steps, create another data layer variable. This time, you must enter “form_fields.Email” since we want to access the “Email” key in the form_fields object. Name the variable “dlv – form_fields.Email” and save.
The next step will vary depending on the parameter: the email parameter can be sent to Google Ads (if you use it), while the form ID needs to be sent to Google Analytics 4.

Send the event to GA4
Now that we have all these pieces, we can combine them into a GA4 event tag! To do so, go to Google Tag Manager > Tags (in the left-side navigation) > New.
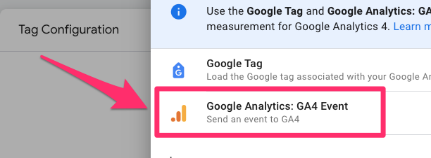
For the Tag Configuration, select Google Analytics > GA4 Event.
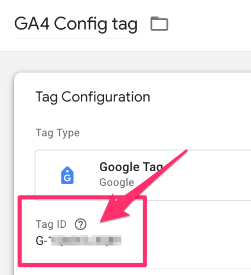
The first input box will require you to enter the measurement ID.
Measurement ID
If your measurement ID isn’t saved as a constant in your container, you need to get it from the GA4 config tag in your GTM container. Copy this value.
To organize your container, you should create a new Constant variable to hold the measurement ID. Back in the GA4 tag, click to add a new variable.

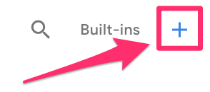
Then, click on the plus in the top right to create a new variable.
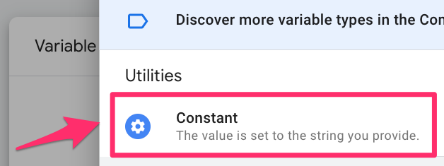
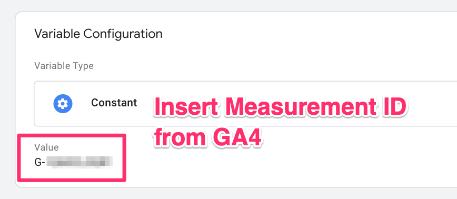
Click on Variable Configuration and select “Constant” as the variable type.
Copy the Measurement ID and paste it into the Value of the constant variable. Save your new variable as “Constant – G-XXXXXXXXXX” (or whatever makes sense to you). Read this blog post to learn more about the constant variable in Google Analytics 4.
Event name and parameters
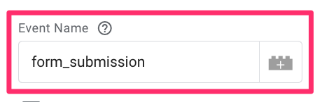
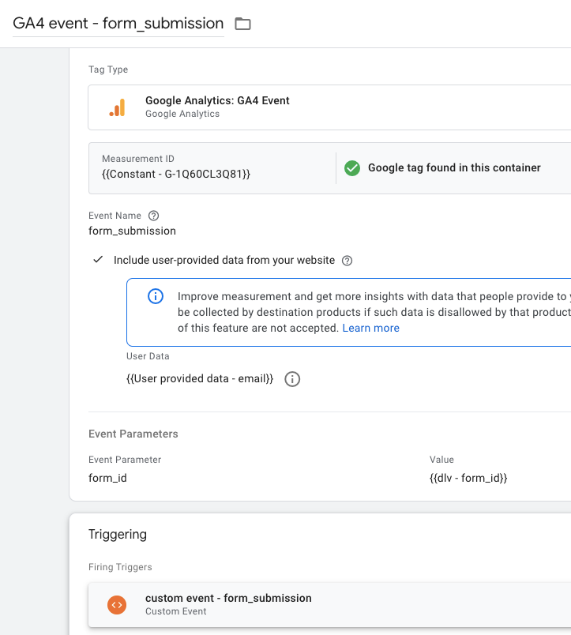
For the Event name, enter “form_submission” to keep things simple.
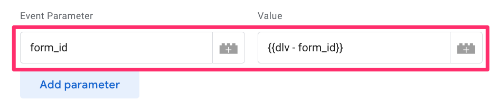
Under Event parameters, enter “form_id” as the key and then the data layer variable that we created above as the value.
User-provided data
This step is only required if you import key events from GA4 to Google Ads as conversions and want to send user’s email address with it. I assume you have linked your Google Analytics property to your Google Ads account.
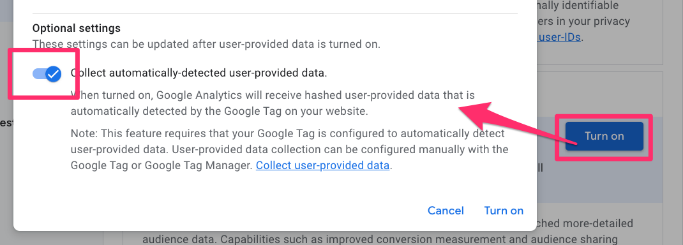
The first thing you need to do is enable “user-provided data” collection by going to Admin > Data collection and modification > Data collection. Select “Turn on” and click the toggle.
In the GA4 event tag (that’s in Google Tag Manager) underneath the Measurement ID, check the “Include user-provided data from your website” box.
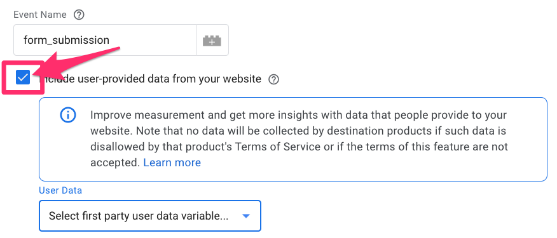
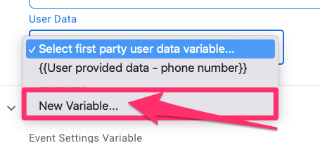
From the Select user-provided data variable drop-down, select “New variable”.
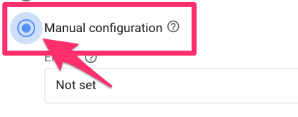
Next, choose “Manual configuration” (this gives you more control over what you track)
Under Email, select the data layer variable that you already created for the “Email” key in the form_fields object.

Name this “User-defined variable – email” and save.

Triggering
Under Triggering, select the custom trigger you created before to ensure the tag fires when we want it to.
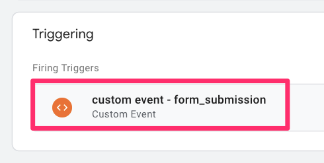
Name the tag “GA4 event – form_submission” and save.
Test the event
The process for testing the event is the same as when we tested the custom HTML tag: preview the GTM container, enter your website’s URL, and complete the Webflow form submission.
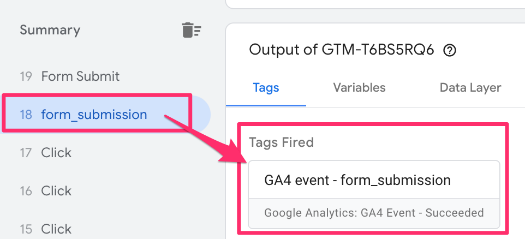
Once you see the success message, enter Preview mode and check for the form_submission event (dataLayer push). Your tag should appear under “Tags Fired”.
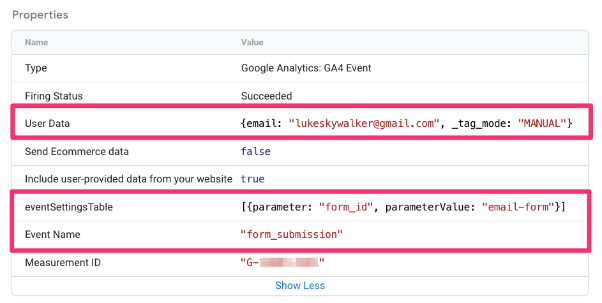
Check that the event is captured along with its parameters. You can see both the data for the user-provided data under “User Data” and the form ID as an event parameter under “eventSettingsTable”.
To test the event in the GA4 interface, you must download and enable the Google Analytics Debugger Chrome extension to activate Debugview. Once downloaded, you need to enable the extension by clicking on the icon in the Extensions toolbar.
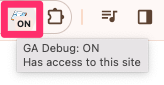
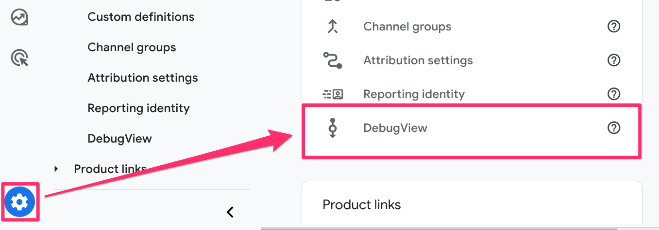
Once you turn on the extension (the icon will say “On”), go to Google Analytics 4. Go to Admin and select “Debug View” under Data Display.
All your events come through here, including the form_submission event.
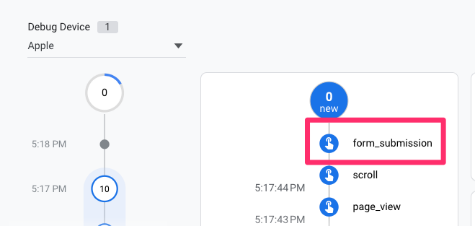
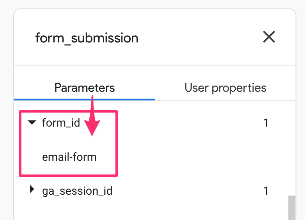
Click on an event to see the parameters (and user properties) included in the data collection. Note: user-provided data is not displayed in the debugview.
If DebugView is not working, check out this article for some possible solutions.
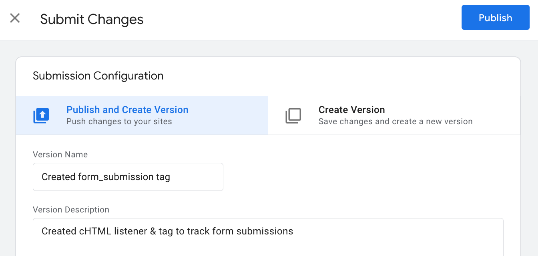
To finish everything off, publish the GTM container (the data will not start to collect until you publish the container).
How to find form_submission event data in GA4
Google Analytics 4 has some handy built-in reports that you can use to quickly find data, and it also offers the ability to create custom reports if you have more specific needs. However, if you want to use the Form ID parameter you included with the event, you must add it as a custom dimension.

Create custom dimensions for form ID
For each new parameter that you add to an event in GTM (we will do this in the next chapter), you need to ensure that it’s registered as a custom dimension in GA4 so that you can view it in any reports. If you haven’t already, create an event-scoped custom dimension in GA4 for the Form ID.
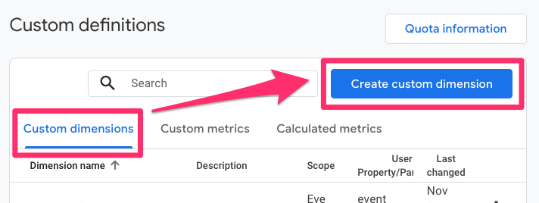
In GA4, go to Admin > Data Display > Custom Dimensions. Click “Create Custom Dimension”.
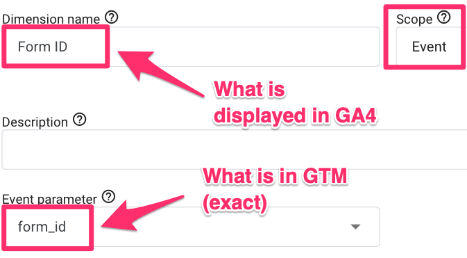
There are three elements that you need to consider:
- The Dimension name is the name that will be displayed in GA4 reports
- The Event parameter needs to be the same name as in Google Tag Manager
- Set the scope to “Event”
To quickly find how many users complete the form submission (and how many times), you can use one of the built-in Google Analytics 4 reports. You can view all the available reports in the Reports tab.
Note: you will need to wait anywhere from 24 to 48 hours to see the data in the GA4 reports after publishing your GTM container and creating a custom dimension.
Use the built-in standard report to find data
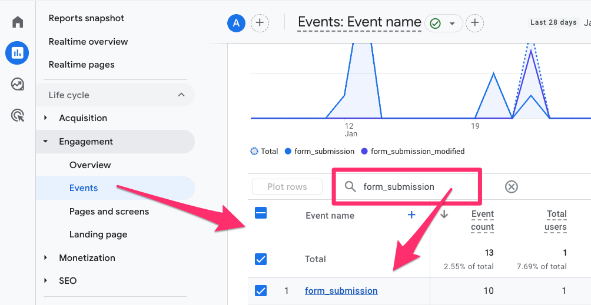
In this case, you should go to the Events report under Engagement and enter “form_submission” in the search bar to filter the event data.
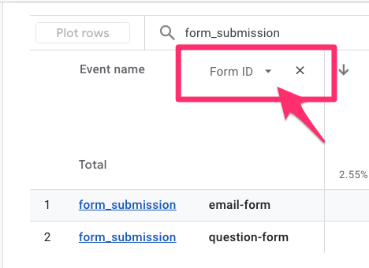
If you want to segment the data by one of the parameters, such as Form ID, click the “+” next to the Event name and select the dimension name.
GA4 also allows users to create custom reports called Explorations. To learn more about these, check out my comprehensive guide to GA4 Explorations.
Track Webflow Forms with Google Tag Manager: Final Words
If this is your first time working with Google Tag Manager and Google Analytics 4, it may seem a bit overwhelming, but you’ll quickly catch on. Remember a few important points as you begin working with this tracking setup:
- Always test your tracking implementation thoroughly before publishing. Use the Preview mode in GTM and DebugView in GA4 to ensure everything is working as expected.
- If you’re not seeing data in your GA4 reports right away, don’t worry – there’s typically a 24 to 48-hour delay before new events and custom dimensions start appearing in your reports.
0 COMMENTS