
July 29, 2024
Site Search Terms with Revenue in Google Analytics 4
Even though you can track site searches with Google Analytics 4, it doesn’t automatically attribute revenue to search terms. So, if the search for “white t-shirt” or “games for kids” results in the most revenue from purchases, you wouldn’t know!
Knowing what terms lead to the most revenue can help you determine how to spend time and energy on the design of your site and advertising.
This tutorial will show you how to attribute revenue to site search terms and build a simple report to view the data.
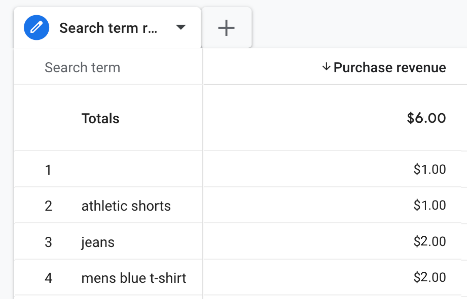
Table of Contents
Here’s what you will learn in this article
- Prerequisites
- #1. Create a purchase event
- #2. Capture search term in a cookie
- #4. Sending the search term with the purchase event
- #5. View search terms with revenue in a GA4 report
- Final Words
Video tutorial
If you prefer video content, here’s a tutorial from my Youtube channel.
Prerequisites
Before getting into the tutorial, I will assume that you have GA4 installed with GTM on your website and have a basic understanding of GA4.
#1. Create a purchase event
To begin, you need to set up an e-commerce event that collects each time a visitor makes a purchase. If you have already done that in the past, you can skip to Chapter #2.
#1.1. Implement the purchase in the Data Layer
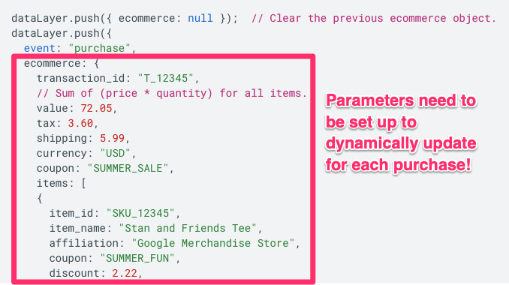
Suppose you’re using the recommended purchase event by Google (which is what we’ll be referencing in this tutorial). In that case, your developer will need to add the event into your website’s code (Data Layer) so that it fires each time a purchase is made and ensure that the event’s parameters are collecting the relevant information (e.g., the transaction and item information).
For the remainder of the tutorial, I will assume that you or a developer has implemented a Data Layer push event named purchase. If you’re using the GA4 purchase event, you don’t need to include every parameter that Google lists in the event. My recommendations are:
- From the ecommerce object, include at least the currency, value, transaction_id parameters, and the items object.
- From the items object, include at least the item_name, item_id, price and quantity parameters.
Please review this list to confirm whether it applies to your business needs and adapt it to your own needs.
#1.2. Set up purchase tag in GTM
Now, when a user makes a purchase, the information will be available in the Data Layer for you to collect. To do so, you need to set up a tag in GTM. If you already have a tag and trigger set up to track purchases, then you can skip this step and move to the “Capture search term in a cookie” section.
#1.3. Create a trigger
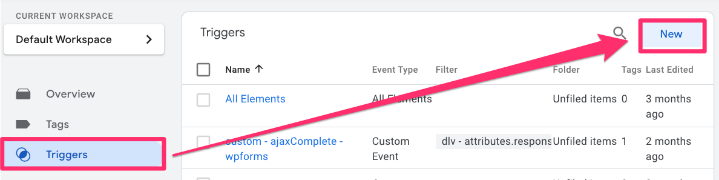
We will begin by creating a trigger to tell our tag when it should fire. To make a trigger, go to Triggers in the left-side navigation of GTM and click the “New” button.
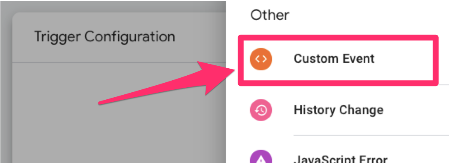
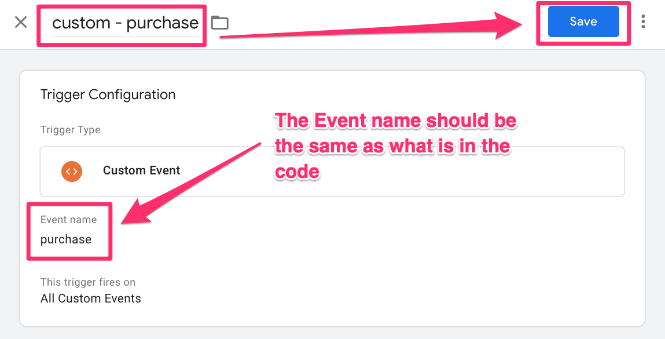
Click “Trigger Configuration” and select “Custom Event” under Other.
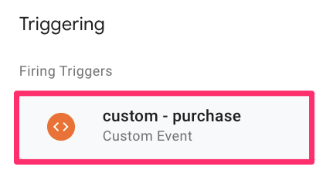
In the Event name textbox, enter purchase. Name the trigger “custom – purchase” and save.
#1.4. Create the tag
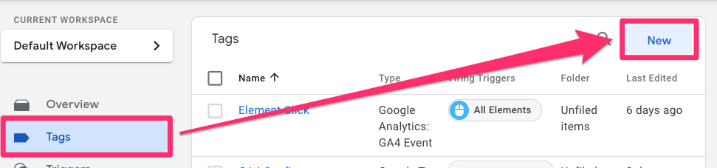
Go to Google Tag Manager > Tags (in the left-side navigation) > New.
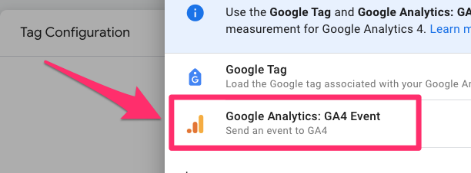
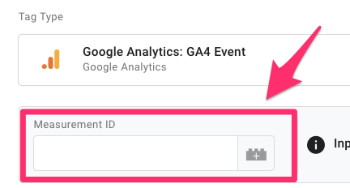
For the Tag Configuration, select Google Analytics > GA4 Event.
The first thing you’ll have to enter there is Measurement ID.
#1.4.1. Measurement ID
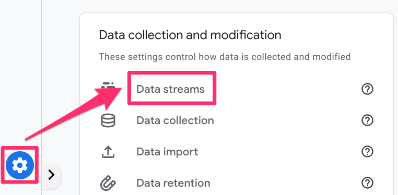
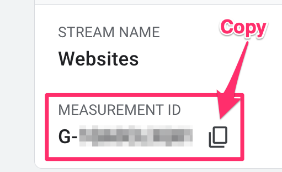
If you don’t have your measurement ID saved as a constant in your container, you need to find it in your Google Analytics 4 data stream. Go to the GA4 interface, then Admin > Data collection and modification > Data streams.
Click the data stream you are interested in and find the measurement ID.
To keep your container more organized, you will want to create a new Constant variable to hold the measurement ID. Click to add a new variable.
Then, click on the plus in the top right to create a new variable.
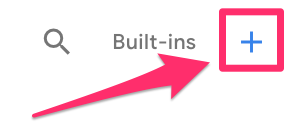
Click on Variable Configuration and select “Constant” as the variable type.
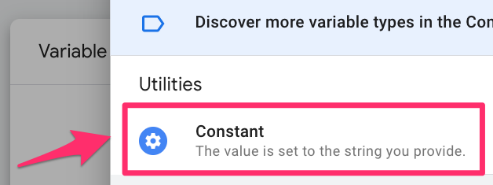
Copy the Measurement ID and paste it into the Value of the constant variable. Save your new variable as “Constant – G-XXXXXXXXXX” (or whatever makes sense to you). Read this blog post to learn more about the constant variable in Google Analytics 4.

#1.4.2. Add the other elements
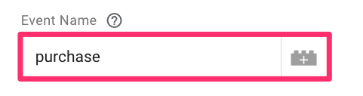
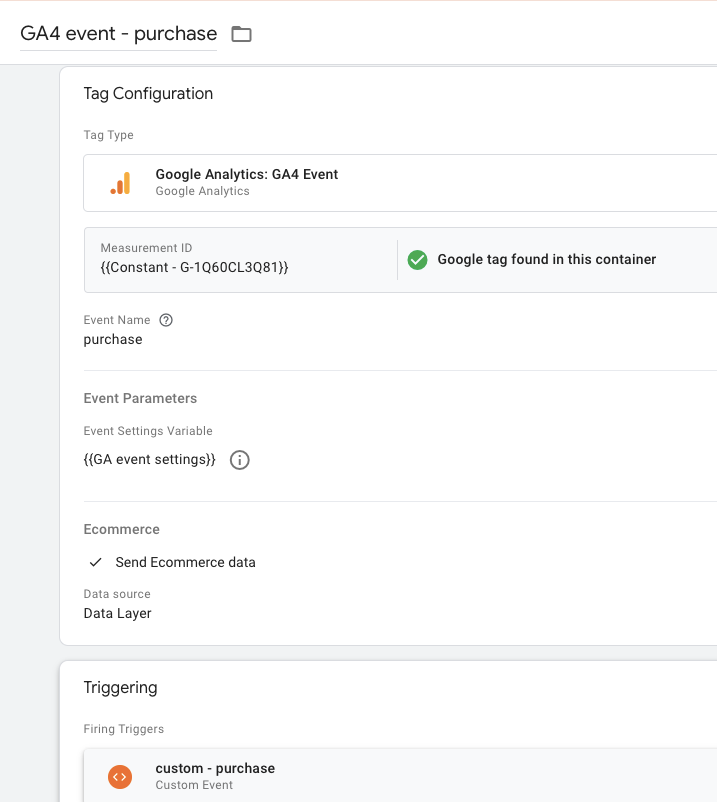
First, you can add an event name. In this case, it’s purchase.
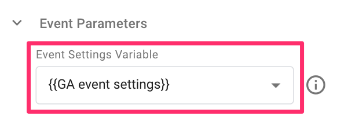
The next part is adding the event settings variable (we have no additional parameters to add). If you use the event settings variable, I highly recommend adding it to all your events, including this one. Check out this article if you don’t have this set up yet!
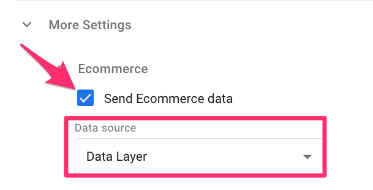
Under More Settings, select “Send Ecommerce data”. Keep the Data Layer as the Data source. This will only work if your Data layer push event follows the GA4 documentation from above, aka the parameter names are the same (you don’t need to use all of them, though)!
Lastly, add the trigger we just created.
Name the event “GA4 event – purchase” (check out this article on naming convention), save it, and let’s check to see if it works!
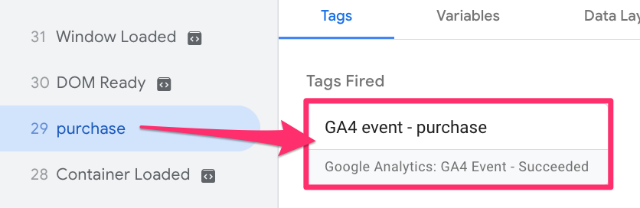
Go to Preview mode, enter your site’s URL and make a purchase. Back in Preview mode, confirm that the tag appears under the purchase event.
This is just the first step. The second step is collecting and adding the search keyword to this tag. Let’s get into how we can capture the search term in a cookie so that it can be sent alongside the purchase event.

#2. Capture search term in a cookie
If you type a word into the search on your site, you will see that the keyword will appear in the URL, so we want to store this temporarily in a cookie. Then, when a purchase is made, we will send that keyword with the purchase event.
If the search keyword is not visible in the URL, you will need to get more creative. This article about site search tracking with GA4 and GTM will explain alternative ways to retrieve the search keyword.
But, in this tutorial, we’ll focus on the most common situation: URL query parameter.
#2.1. Create a variable for the search term
To create a variable to return the keyword in the URL, you first need to identify the query parameter that collects the search term, which will be located after the “?” in the URL. In this case, the search keyword appears after “s=”.
![]()
![]()
In GTM, go to Variables in the left-hand navigation and select “New” under the User-Defined Variables.

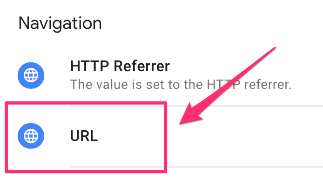
Click “Variable configuration” and choose “URL”.
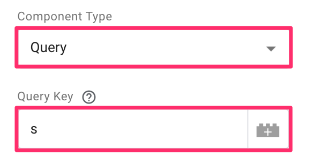
In the Component Type dropdown, select “Query” and enter the name of the query parameter, e.g. “s” (this may be different on your site, so be sure to adapt to what is relevant for you).
Name the variable as “url – s” and save. We will go into Preview mode for testing and search for a term on your site.
![]()
![]()
Back in Preview mode, click Container Loaded and then Variables.
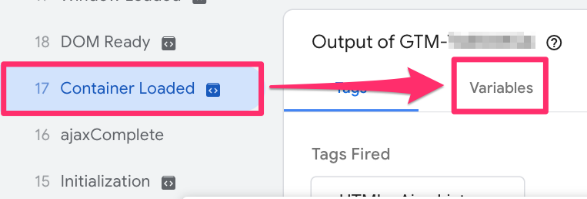
Search for the keyword and confirm that it was collected.
![]()
![]()
#2.2. Create a cookie to collect the search term
Now that we have the keyword as a variable, we want to create the cookie that will store this value.
From a previous blog post on how to set and read cookies with GTM, we are reusing the code but with a few adjustments (you should update these as you please):
- The cookieName to be more relevant to what the cookie is capturing
- The cookieValue to the query parameter we made above
- The expirationTime to be a shorter period so that the search term is not associated with the purchase for too long (this value is in seconds). For example, if someone does a search and doesn’t purchase anything but comes back two days later and makes a purchase, I don’t want the purchase associated with that keyword from two days ago. In this example, I chose one day, but, in reality, I would select a shorter period of time, e.g. one or two hours.
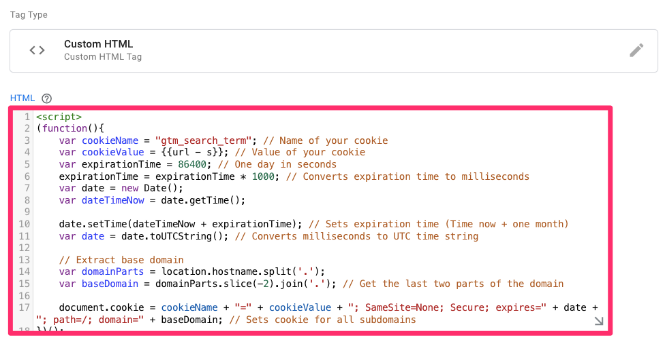
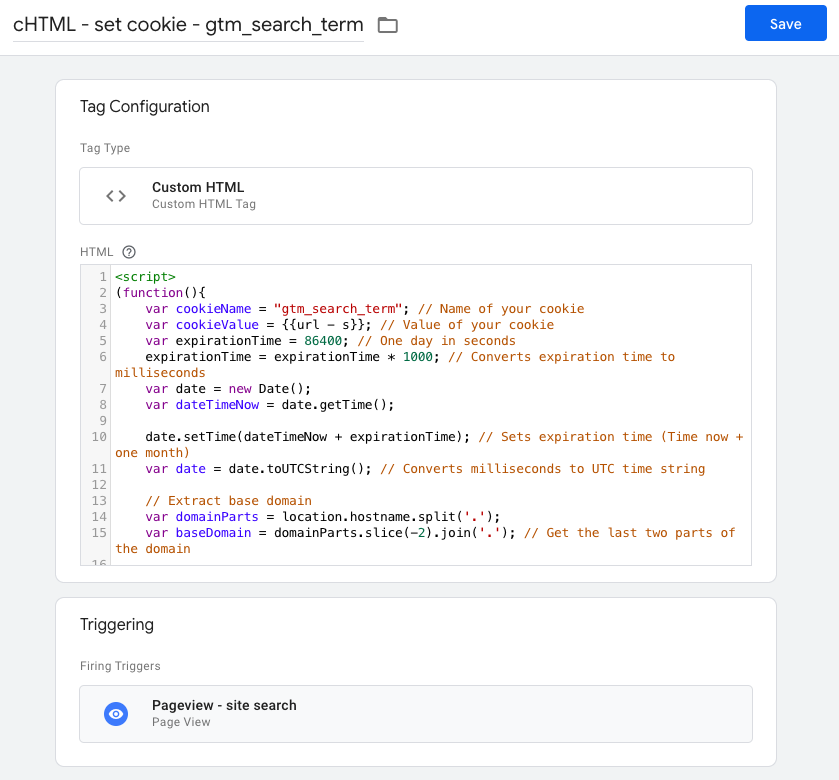
You can find the updated code below:
<script>
(function(){
  var cookieName = "gtm_search_term"; // Name of your cookie
  var cookieValue = {{url - s}}; // Value of your cookie
  var expirationTime = 86400; // One day in seconds
  expirationTime = expirationTime * 1000; // Converts expiration time to milliseconds
  var date = new Date();
  var dateTimeNow = date.getTime();date.setTime(dateTimeNow + expirationTime); // Sets expiration time (Time now + one month)
  var date = date.toUTCString(); // Converts milliseconds to UTC time string// Extract base domain
  var domainParts = location.hostname.split('.');
  var baseDomain = domainParts.slice(-2).join('.'); // Get the last two parts of the domain
  document.cookie = cookieName + "=" + cookieValue + "; SameSite=None; Secure; expires=" + date + "; path=/; domain=" + baseDomain; // Sets cookie for all subdomains
})();
</script>
In GTM, go to Tags in the left-side navigation and click “New”.

Select Tag Configuration, then choose Custom HTML tag.
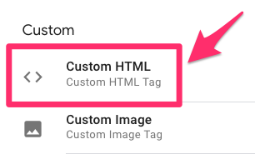
Paste the code from above.
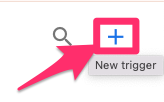
Set the trigger so it only fires when the query parameter is in the URL by clicking “Triggering” at the bottom of the tag and then “+” at the top right.
Click “Trigger configuration” and choose “Page view”.
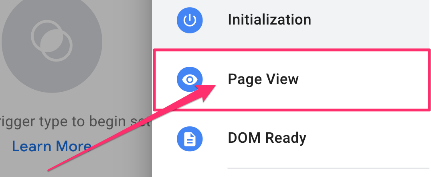
Since we want the cookie only to be triggered when the search query parameter is present in the URL, we will limit the trigger to fire on only some page views. Select “Some page views”.
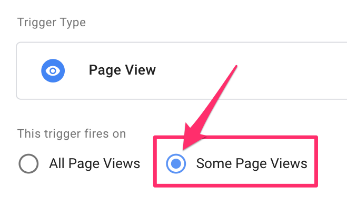
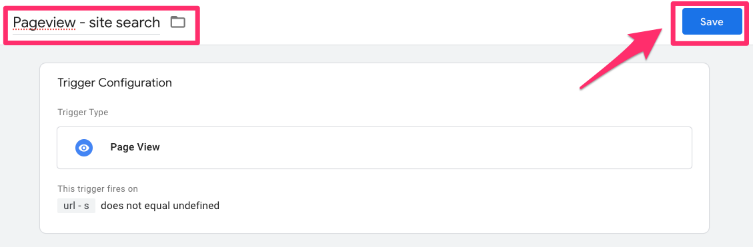
In the conditions, select “url – s”, then “does not equal” and type “undefined” in the textbox. This means the cookie will only collect the search term when available.

Name the trigger “Pageview – site search” and save.
Back in the tag, set the name to “cHTML – set cookie – gtm_search_term” and save.
#2.3. Test the cookie
To test the cookie, you will, again, need to open Preview mode. Once your website has loaded, check that the cHTML tag didn’t fire on the first page that opens (since there is no site search query parameter in the URL).
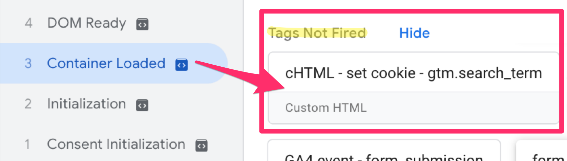
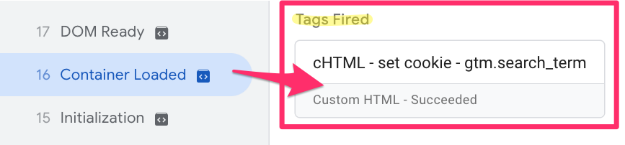
Complete a search on your site and confirm that the tag is loaded on the Container Loaded event (since the URL now contains the query parameter).
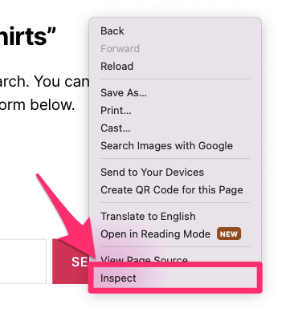
Go to the developer tools (right-click on your page and select “Inspect” or navigate there through the browser menu).
Open the Application tab (along the top menu), select “Cookies” (in the right-hand menu) and click on your site’s URL in the dropdown.
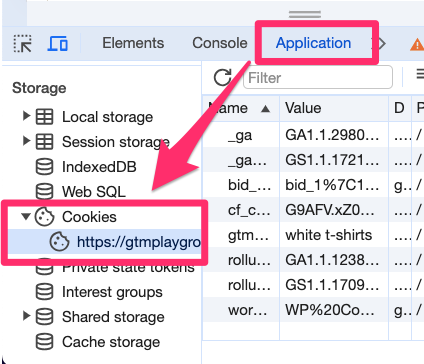
In the search box, type “gtm_” to find the gtm_search_term cookie (or whatever you decided to name the cookie). The Value will collect the keyword that you searched.
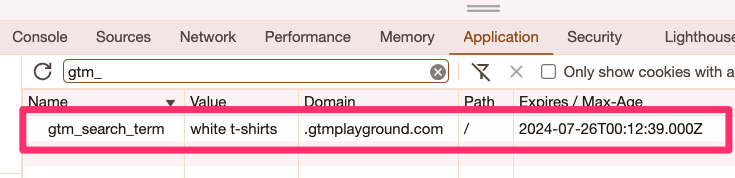
You’ll notice that if you enter a new keyword, the value of the cookie should update, so this tells us that the cookie will always contain the most recent term the visitor searched.

Here, you can also confirm the cookie expiration. Since we set it to one day (24 hours), the cookie will not show up when you search if you come back in, say, 25 hours.

#4. Sending the search term with the purchase event
Now that we have the search term, we want to send this along with the purchase event to attribute the revenue from a purchase to a specific search term (if the user made a site search before the purchase).
In GTM, go to the “GA4 event – purchase” tag (from before).

Under the Event parameters, add a parameter with the name exactly matching “search_term” (a standard parameter that GA4 recognizes). Click the “+” at the end of the row to create a new variable to hold the value of the search term cookie.
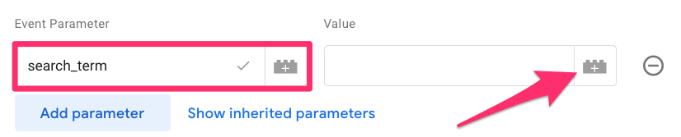
In the top-right corner, click the “+”.
![]()
![]()
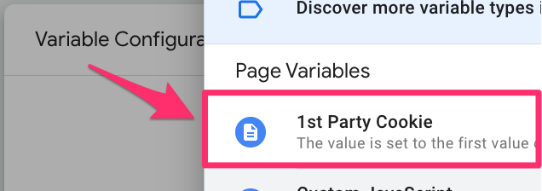
Click “Trigger configuration” and select “1st Party Cookie”.
Name the cookie the same as the cookie we created above, e.g. “gtm_search_term”.
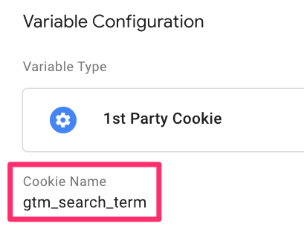
Name the variable “Cookie – gtm_search_term” and save. You will be sent back to the GA4 event – purchase tag so you can save the changes you have made (adding the search_term parameter).
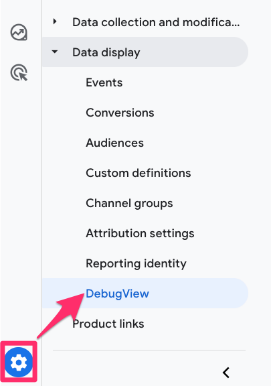
Click Preview in GTM and go to DebugView in GA4 (in GA4, go to Admin > Data Display > Debugview).
On your site, search for a keyword followed by a purchase. Then:
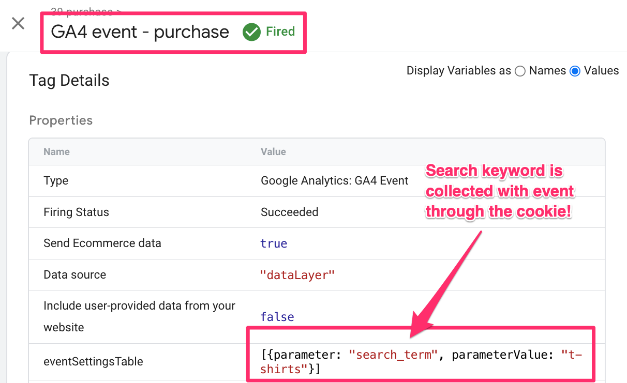
- Check the purchase event in Preview mode to confirm that the tag was fired and that the search term and other parameters (from the purchase event) have been collected.
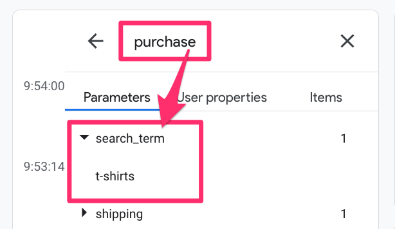
- Check the same information in GA4 DebugView to confirm that the event (and its information) has been collected. In the DebugView tool, click on the event and go to the Parameters tab to find the search_term.
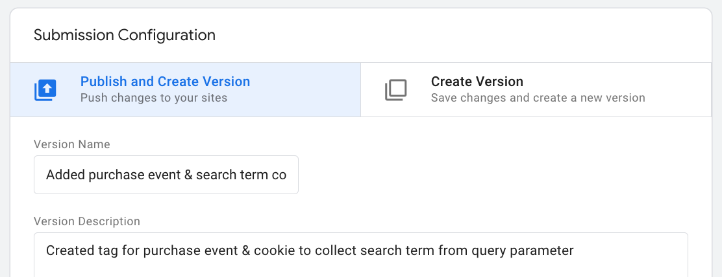
Submit and publish the changes in your GTM container (don’t forget to name your version and add a short description)!
#5. View search terms with revenue in a GA4 report
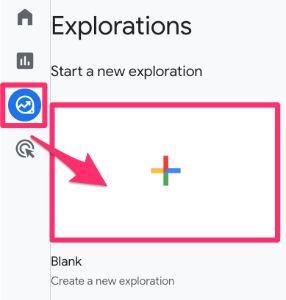
I’m sure you’re eager to see your new data coming through, but you must wait at least 24 hours to see the data in the GA4 interface. Using GA4 Explorations, you can view the new data you’re collecting. In GA4, go to Explore and select “Blank“.
In the Variables tab, select:
- Dimensions: Search term
- Metrics: Purchase revenue
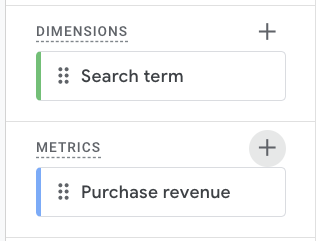
Double-click on the Search term and the Purchase revenue to add them to your report. Now, you can see the revenue associated with each keyword.
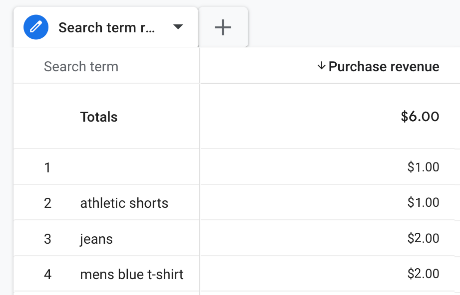
You may notice some blanks under the Search term. These are just visitors who didn’t make a site search before making a purchase or those who did make a site search, but it was before you set everything up to collect this information.
While I think this data is great, you should take it with a grain of salt. Just because the visitor used search feature before a purchase, does not mean that the search feature directly forced the user to buy. Instead, you should look at this report just as a simple way to see which keywords were the final step before a purchase.
Explore away!
Site Search Terms with Revenue in Google Analytics 4: Final Words
While Google Analytics 4 offers a lot of out-of-the-box event tracking and data for you to explore how users interact with your site, by starting to customize some of your tracking using other tools, like Google Tag Manager, you can gather more meaningful insights.
By having the ability to attribute revenue to site search keywords, you can effectively bridge the gap between user intent and actual purchase behavior. It’s as close as we can get to reading the minds of our users (which would be great, right?)
0 COMMENTS