
It’s quite evident that users sometimes face difficulties while navigating through a website. As users, we hate that part when we have no solution even after a few attempts. Many websites have a help-desk, but it’s quite a long and tedious process to pick up the phone and make a call, or send an email and wait hours for a response.
That’s where online chats come in handy. They are a great way to engage visitors and possibly turn then into customers. But let’s not forget web analytics. Do you know which pages generate chat conversations the most? No? That’s why I decided to publish a Zopim Google Analytics guide which explains how to track interactions and push them as events to Google Analytics.
A quick disclaimer before you continue reading: this page is a part of a more comprehensive guide How to install, control and track Zopim Chat. It explains how to employ Google Tag Manager in order to install Zopim Chat, control its appearance/behavior and track interactions with Google Analytics. Give it a try!
OK, let’s get back to the main topic, shall we?
Zopim is a real-time chat solution for websites, which enables you to easily add a chat widget to your website or SaaS interface. In 2014, the startup was acquired by Zendesk and is now called Zendesk Chat.
How to Track Zopim with Google Analytics?
First of all, you’ll need Google Tag Manager for that. It is a free tool which empowers you to control all you tracking scripts in one place + you’ll be able to add/edit/remove those script without developers (in most cases).
If you’re new to it, I have prepared several resources you should start from.
Google Tag Manager to the Rescue!
Disclaimer: the method I’ve described below is available for Paid Zopim plans only. If you’re using Zopim Free plan, consider upgrading.
Zopim Javascript API lets you do some wonderful things, for example, catch particular events, which is very convenient for those who are interested in seeing that data in Google Analytics.
In my opinion, the most important interactions are when the chat starts and when it ends. That’s where the Zopim Listener jumps in.
For your convenience, I have published a ready-made Zopim Google Analytics recipe for Google Tag Manager which listens to these two interactions and pushes them as events to Google Analytics. Just click the button below, follow the instructions and start tracking events in minutes. If you’re interested in learning how the recipe works, continue reading.
Zopim Custom Auto-event Listener
I have written a little piece of code which listens to Zopim Chat’s interactions (Chat started and Chat ended, in particular).
My most loyal readers know that I’m no developer. And that did not change, actually. But I am always looking for ways to learn some new things, and Javascript is one of them. Although I am still a total JS beginner and learning in baby steps, I hope to have some decent skill in the future.
But that does not change the essence of this blog – to help non-developers track what they want with little or no help from developers.
Anyway, let’s get back to Zopim Listener. I wrote a little piece of code which was later reviewed by one of my colleagues/developers. So you can be sure that this code won’t break anything on your site.
<script>
  $zopim(function() {
      $zopim.livechat.setOnChatStart(function() {
        // trigger when chat starts
        window.dataLayer.push({
          "event": "zopimChat",
          "zopimChatAction": "zopimChatStarted"
        });
    });
    $zopim.livechat.setOnChatEnd(function() {
        // trigger when chat closes
        window.dataLayer.push({
          "event": "zopimChat",
          "zopimChatAction": "zopimChatClosed"
        });
    });
  });
</script>
Once the chat conversation is started or closed, this listener fires zopimChat event with attribute zopimChatAction. Attribute’s possible values are zopimChatStarted or zopimChatClosed.

Copy listener’s code and head over to Google Tag Manager. Go to Tags and create a custom HTML tag, paste the code there.
As for triggering, create a new trigger with the following settings:
- Type: Pageview – DOM Ready.
- This trigger fires on – All DOM Ready events.
Important: This listener must fire after the main Zopim widget script was initiated. So if you’ve set the main script to fire on DOM Ready event, then you can:
- Either set the Zopim Listener to fire on Window Loaded event (Trigger type: Page view – Window Loaded).
- Or fire listener and main script on DOM Ready event, but set main script’s priority to 1 (while listener remains at 0). The tag with higher priority will fire first. You can set Tag Firing Priority under Advanced Settings of the Tag.
In my case, main Zopim script fires with All Pages trigger, while Listener fires with DOM Ready trigger.

Let’s Create Variables and a Trigger
After the tag is created, save it. Refresh Preview and Debug mode, and then refresh the website you’re currently working on.
Start a conversation in Zopim chat widget.
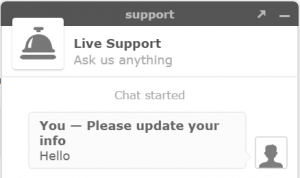
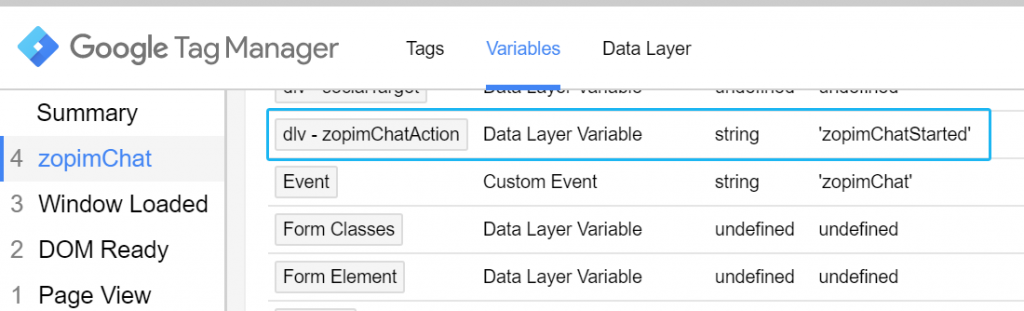
After Chat started message appears in the chat window, you should see zopimChat event in GTM Preview and Debug console. That event will be our trigger. Click it and then navigate to Data Layer tab.

What you see if all information which is available with the event:
- Event name. It always will be zopimChat.
- zopimChatAction. In this case, it’s zopimChatStarted.
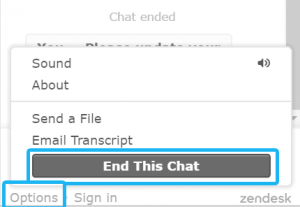
If the visitor ends the chat, you’ll get an event of which zopimChatAction attribute equals to zopimChatClosed.
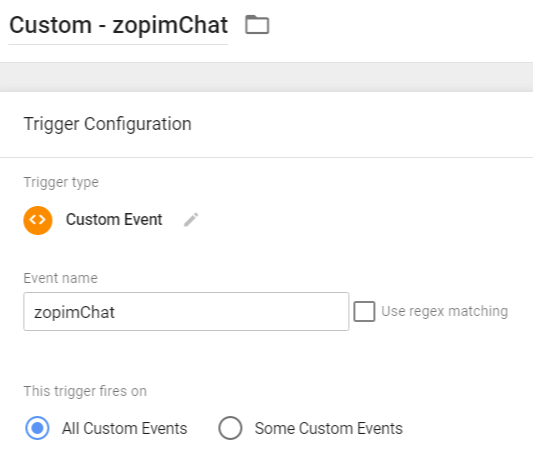
What we should do next is to “teach” Google Tag Manager how to catch zopimChat events and to read zopimChatAction values. That’s where triggers and variables come in.
In Google Tag Manager, create a trigger with the following settings:
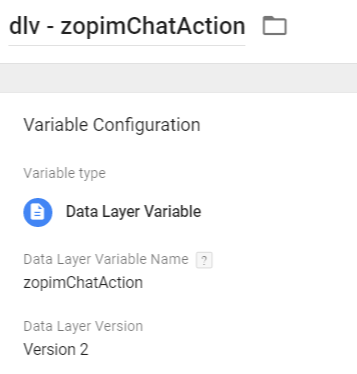
Then, create a variable:
While you can’t test the trigger without having it assigned to a tag, you can easily check whether Data Layer variable was created properly. Refresh Preview and Debug (P&D) mode, then refresh the website you’re currently working on.
Start or end a chat conversation. After zopimChat event appears in P&D console, click it and go to Variables tab. If your newly created variable dlv – zopimChatAction contains either zopimChatStarted or zopimChatClosed, you’re good to go. This variable will be important for us in Google Analytics tag, that we’ll create in the next chapter.
Google Analytics Event
We’ve come to the last part of Zopim Google Analytics guide – let’s create a tag which sends interaction data to Google Analytics.
In Google Tag Manager, go to Tags and create new Universal Analytics tag with the following settings:
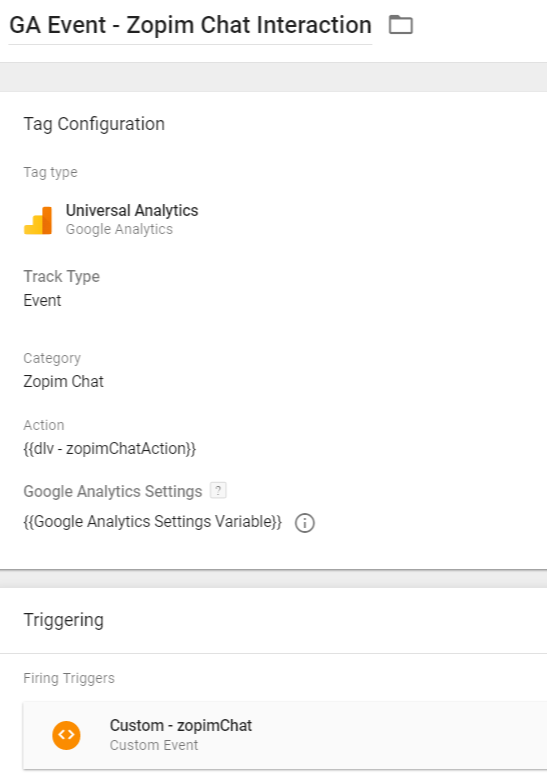
This tag fires only when zopimChat event is pushed to the data layer and passes the following data:
- Event Category – Zopim Chat
- Event Action – either zopimChatStarted or zopimChatClosed (depends on the context).
Don’t forget to test this event with Google Analytics. After the Universal Analytics tag is fired, you should see it in Google Analytics Real-time reports as well.
Zopim Google Analytics Guide: Conclusion
Google Tag Manager is an irreplaceable tool when it comes to installing various scripts, tracking certain activity and pushing data/interactions to other 3rd party tools/platforms.
In this Zopim Google Analytics guide, I’ve explained how you can use Google Tag Manager in order to catch Zopim chat interactions and push that data to Google Analytics as events.
However, keep in mind that the ability “to listen for Zopim interactions” requires a paid Zopim plan.
This page is a part of a more comprehensive guide How to install, control and track Zopim Chat. It explains how to employ Google Tag Manager in order to install Zopim Chat, control its appearance/behavior and track interactions with Google Analytics. Give it a try!