
January 31, 2025
Install Google Tag Manager and Google Analytics 4 on WebFlow
Depending on how much control you want over your tracking, there are two main ways to install Google Tag Manager and Google Analytics 4 on Webflow (which is quite a popular CMS).
You can go with a simple GA4 setup for basic, out-of-the-box tracking or use GTM if you need more flexibility and customization in your tracking. Both options are effective, but one is quicker and easier, while the other one offers more advanced features.
In this article, I will show you how to complete either installation process.

Table of Contents
Here’s what you will learn in this article
- Create a new Google Analytics 4 property
- Native Google Analytics 4 integration
- Using Google Tag Manager
- Benefits of GTM
- What’s next?
- Final Words
Create a new Google Analytics 4 property
Regardless of the method that you are using to track your Webflow site, the first step will be to create a new property.
Log into Google Analytics and click “Start Measuring” to create a new account. Follow the steps of the form, which will take your through both account and property creation. While naming these is not the most important thing in the world, it will make things easier to understand if named properly. You can check out this chapter of my article on naming convention that focuses on accounts and properties.

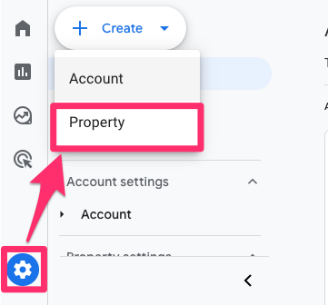
If you have a GA4 account but want to create a new property, click on “Admin” at the bottom of the left-hand navigation and then click on “Create”. Select “Property”. Follow the steps.
Now that your new Google Analytics 4 property is ready, you can move on to the installation of GA4 on your site!
Native Google Analytics 4 integration
Even though this blog post’s title says “install GTM”, maybe your goal is just to install Google Analytics 4 and track everything that GA4 offers out of the box (e.g., pageviews or outbound clicks). In this case, it’s enough to use the built-in GA4 integration in WebFlow, and I’ll show you how to do that in this chapter.
To tell Webflow where to send the data, you need the measurement ID. This is a unique identifier for a web data stream (a website registered in your GA4 property), which you can find in the Admin section of GA4.
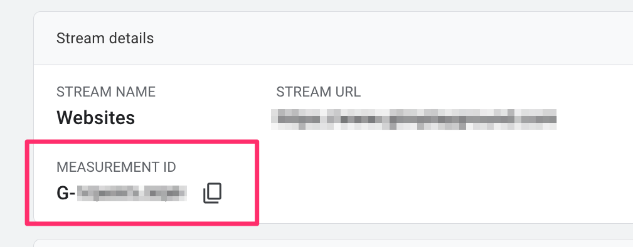
From the Admin section of your GA4 property, go to Data collection and modification > Data Streams and click on the stream to view its details.

In the stream details, you will find the Measurement ID. Copy it.
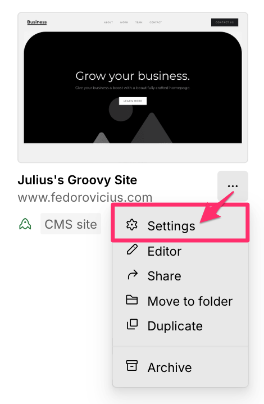
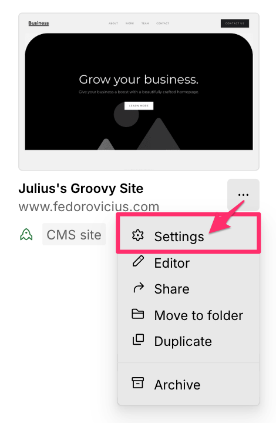
Now, head over to your Webflow account. In the dashboard, click the three-dot menu icon next to your website’s name and select “Settings”.
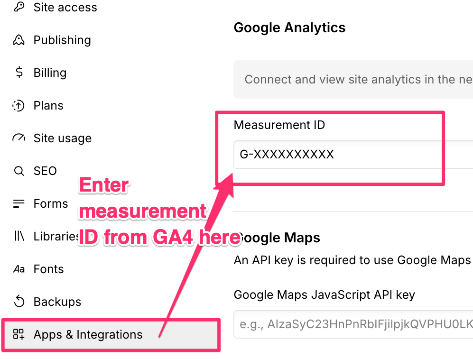
From here, go to Apps & Integrations and paste the Measurement ID in the input box.
Test the GA4 integration
One of the most important things when doing anything with tracking is to make sure you test that things are properly working. Here, there are two ways we can do this.
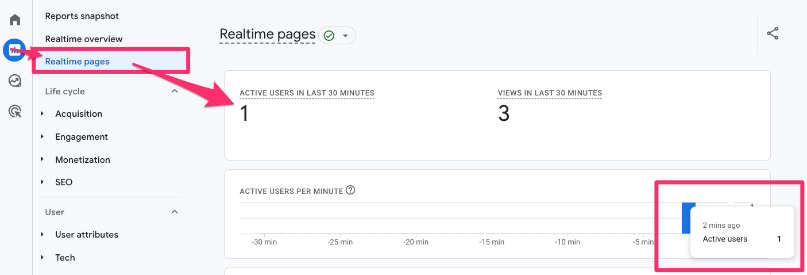
First, you can go to GA4 > Reports > Realtime pages. Once you have the report open, go to your site and navigate through some pages. Then, you should start seeing data coming in in the real-time report.
If your real-time reports are not working, check out this article.
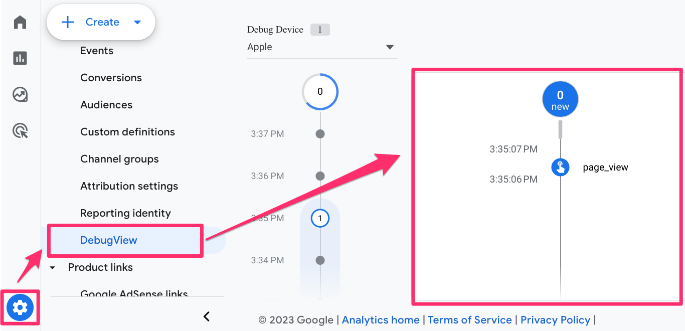
Secondly, you can go to Admin > Data display > DebugView. DebugView is a tool that allows you to see real-time event data as it’s sent from your website. It displays incoming events and their parameters, making testing and troubleshooting your tracking setup easier.
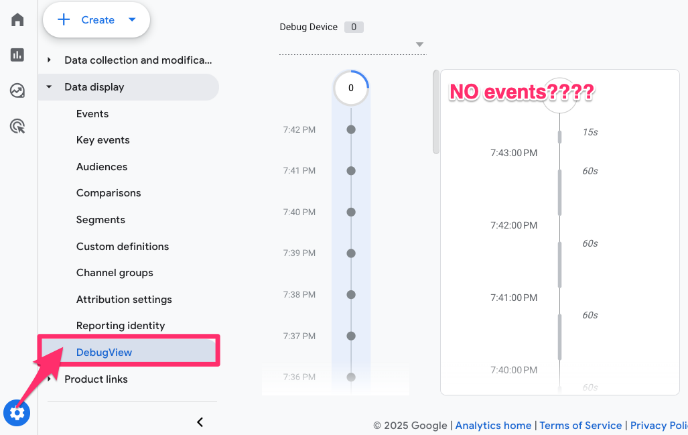
You might notice that no events are showing up in the timeline—this is because DebugView isn’t enabled by default. If you’re familiar with DebugView, you’ll know that events usually appear as you interact with your site.
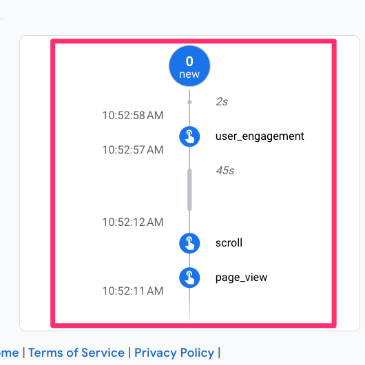
You’ll need to install the Google Analytics Debugger Chrome extension to fix this. Once installed, activate it by clicking the icon in your extensions (it should say “On”). After that, perform some actions on your site (e.g., refresh the page, navigate from one page to another) and return to DebugView in GA4 to see if the data is coming through.
![]()
![]()
For each action, like a click or pageview, you will see an event and its parameters (click on the event to see its parameters and user properties collected alongside it).
If you’re having issues, check out my article on why DebugView in GA4 might not work.
As you will notice, the built-in GA4 integration is pretty basic. If you also want to track things like form submissions, this simple integration will not work for that. That’s where Google Tag Manager adds more tracking possibilities.
Using Google Tag Manager
If your tracking needs go beyond what the out-of-the-box tracking with just GA4 can provide, you should consider installing GA4 using Google Tag Manager.
Google Tag Manager (GTM) is a tool that helps you manage and deploy various tracking codes (tags) on your website without needing to modify the code directly. It supports a wide range of tags, including Google Analytics, Meta Pixel, and other third-party analytics and marketing tools.
To install GA4 with GTM, there are two steps:
- Install Google Tag Manager: First, set up GTM on your website by adding the GTM container code to your site’s code.
- Implement GA4 within GTM: After you install GTM, create a new GA4 configuration tag inside your GTM container and add your GA4 measurement ID.
Let’s try it!
One thing to note is that this is only available to paid plans, and if you have connected a custom domain, e.g., it won’t work if the domain is something.webflow.io.
Install GTM
If you have never used Google Tag Manager, you must create a new account and container. To set up a new account, follow the Google Tag Manager tutorial for beginners (go to the Create a Google Tag Manager Account section).
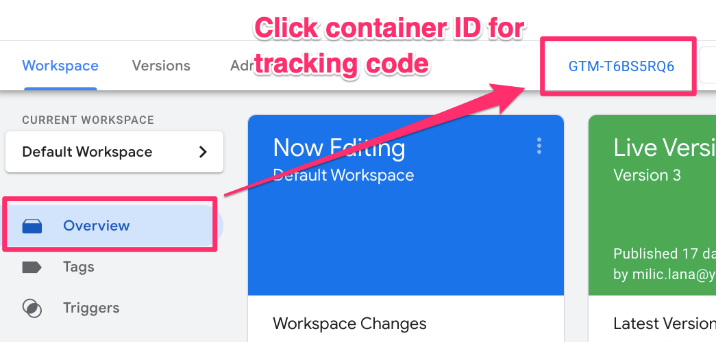
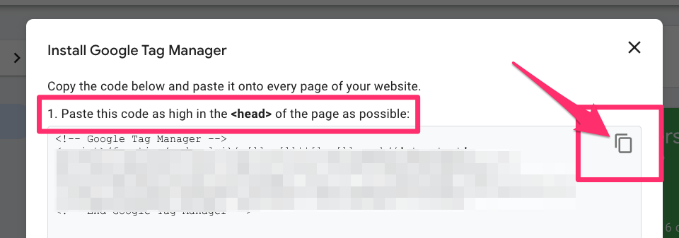
Once you have created your GTM account and container, then you can find the tracking code by clicking on the container ID on the Overview page.
Copy the first block of code.
In Webflow, click the three-dot menu icon next to your website’s name and select “Settings”.
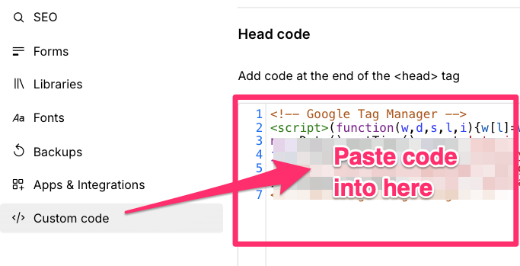
Go to Custom code, paste the code from GTM and click “Save”.
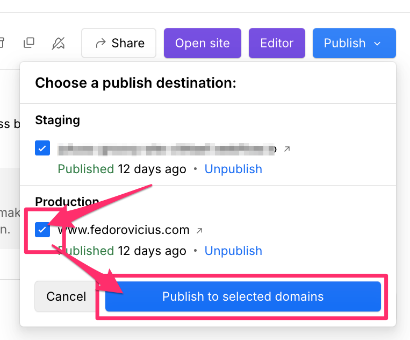
In the top-right, select Publish > Publish to selected domains and ensure you publish to “Production”!
Test the GTM installation
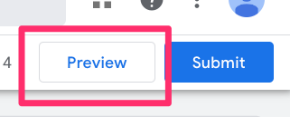
To test the installation, go to GTM, click “Preview”, and enter your site’s URL.
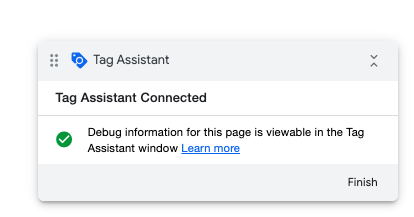
If you see the tag assistant connected, you know GTM has been properly installed. However, this does not mean you have installed GA4 on your site, so keep reading to complete the process.
Install GA4
To start the data flow from your site to Google Analytics 4, you need to create a Google Tag in your GTM container to tell the data where to go.
Create a Google Tag
In the left-hand menu, click “Tags” and “New”.

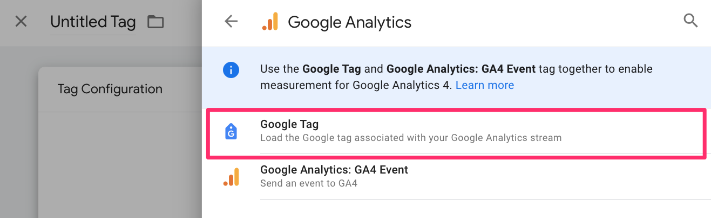
Under Tag Configuration, select “Google Analytics” > “Google Tag”.
Create a constant variable for the measurement ID
To organize your container, you will want to create a new Constant variable to hold the Measurement ID, which, in this case, is the measurement ID from GA4. The measurement ID must be included with all tags, so creating a constant makes it easier to reference.
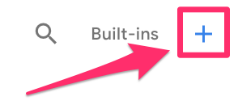
Click to add a new variable.
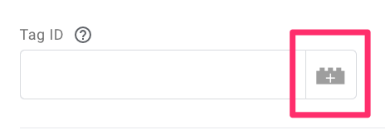
Then, click on the plus in the top right to create a new variable.
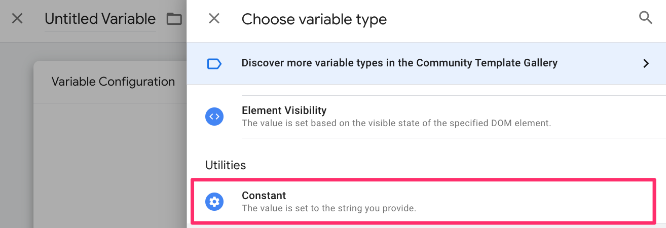
Click on Variable Configuration and select “Constant” as the variable type.
From the Admin section of your Google Analytics 4 property, go to Data Streams and select your website.
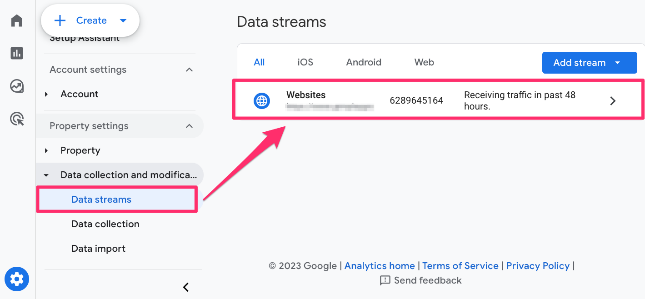
In the stream details, you will find the Measurement ID.

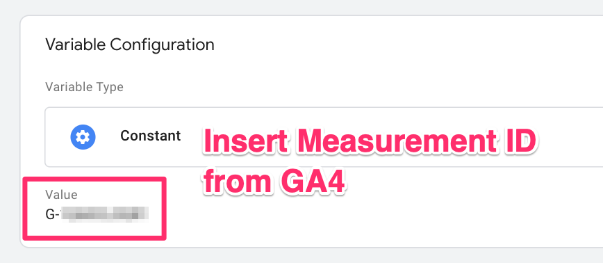
Copy the Measurement ID and paste it into the Value of the constant variable. Save your new variable as “Constant – G-XXXXXXXXXX” (or whatever makes sense to you).
Create a trigger
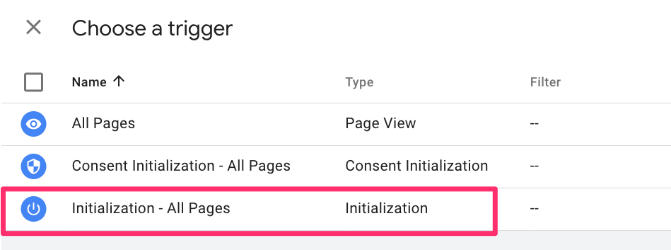
Next, you want to set up a trigger so that the Google Tag loads on each page of your site. Click “Triggering” at the bottom of the tab, and then click “Initialization – All Pages” to ensure that the Google Tag is fired before all other triggers.
Now, you can name and save the Google Tag!

Test the GA4 implementation
To check that the code was installed correctly, you can Preview your Google Tag Manager container using Tag Assistant to confirm that the tracking is in place.
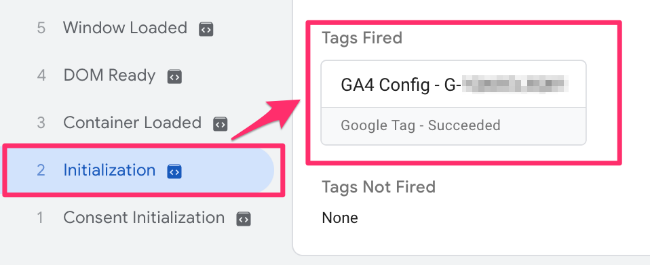
Once you have entered your site’s URL and the Tag Assistant has loaded, click on “Initialization” and confirm that the Google tag has been fired.
You can also go to Debugview in Google Analytics 4 to confirm that there is incoming data, but you don’t need it since you have installed GTM on your site and can just use Preview mode.
Now that you have confirmed that the Google Tag has been correctly implemented, you can publish the container in Google Tag Manager to save your changes (following proper naming convention)!

Benefits of GTM
While I have written a detailed guide on the benefits of using Google Tag Manager that you can read through, some highlights include:
- You can quickly deploy your events based on user actions without needing any coding skills. For example, if a pop-up appears on your site, you can use an Element Visibility trigger, or if a user scrolls to the bottom of the page, you can set up a Scroll trigger to capture that action.
- GTM’s Preview mode provides more detailed insights than DebugView, making testing and debugging your events easier. It shows you exactly what’s happening with your tags in real-time so you can ensure everything is firing correctly.
- GTM offers both built-in tag templates and custom templates created by the community that you can download and use.

What’s next?
If you’re looking for more support, my Google Tag Manager Tutorial for Beginners article is a great place to start. And if you want to deepen your knowledge, consider taking my Google Tag Manager Course for Beginners.
Also, here are some articles you may find helpful:
- General Google Tag Manager Event Tracking: This guide will get you started on all things event tracking with GA4 and GTM.
- Scroll Tracking with GA4 and GTM: This guide will show you how to track when a user scrolls down a certain percentage of a page.
- GTM Video Tracking: This guide will explain how to set up YouTube video tracking, Vimeo video tracking, and several other players.
- GTM Form Tracking: This guide will lead you through how to track forms in multiple ways, including the GTM built-in method, using a URL, and using an Ajax auto-event listener.
- GTM Click Tracking: While GA4 can track some events automatically, it does not cover all possible scenarios, so this guide takes you through how to take advantage of click tracking and customize it to your needs.
Install Google Tag Manager and Google Analytics 4 on Webflow: Final Words
The world of GA4 and GTM is vast, which can feel overwhelming when you’re just starting out. Fortunately, there are plenty of resources to help guide you through it.
You can explore Analytics Mania for more in-depth articles on a wide range of topics related to GA4 and GTM. For a more visual approach, the Analytics Mania YouTube channel offers detailed video tutorials, often with accompanying blog posts.
If you want to dive even deeper, check out some of the other courses I offer for GTM and GA4 to further expand your knowledge and skills.

0 COMMENTS