
October 13, 2025
Track Contact Form 7 with Google Tag Manager and GA4
Updated: October 13th, 2025
Contact form 7 is yet another pretty popular form plugin for WordPress. What do good marketers do with forms? They track submissions with Google Analytics 4 and then measure the overall performance: where do those conversions come from? Which forms perform better? etc.
Nowadays, one of the most popular ways to track any interaction on the website is …surprise, surprise!… with Google Tag Manager. If for some reason, you haven’t tried it before, you definitely should (here are some reasons why).
Anyway, back to the topic. Contact Form 7 is no exception, and you can track it with Google Tag Manager. You can:
- Either read this long (but very useful) guide and learn more about the magic of form tracking
- or you can continue reading this blog post because today I’ll explain how Contact Form 7 event tracking with Google Tag Manager and Google Analytics 4 works.
Why this guide?
I’ve already seen some guides on the web covering Contact Form 7 event tracking with GTM. However, they have some issues/limitations:
- Some offer an inaccurate solution (by using Click Trigger!!!?, which is a big NO in form tracking)
- Others are not giving enough. I mean, they show how to track form submissions (which is good), but I’ve found that it’s pretty easy to also get values of each submitted form field which can give you much more insight!
- Many of the guides are quite outdated (google-analytics-wise)
Interested? I hope that after reading the previous paragraph, you felt like this:

Google Tag Manager template
I also prepared a Google Tag Manager container template (a.k.a. recipe) to save you some time. You can download it here.
Table of contents
– Hide table of contents –
- Video tutorial
- Things to keep in mind
- Contact Form 7 DOM events
- The most common mistakes setting this up
- Final Words
Video tutorial
Here’s a video tutorial to quickly track Contact Form 7 with Google Tag Manager and Google Analytics 4. However, continue reading this guide if you get stuck somewhere or want to learn more technical details.
Things to keep in mind
This solution works with AJAX-based forms (built with Contact Form 7), which means that if the page does not refresh after the successful submission, then go ahead and continue reading.
Also, this guide is mainly targeted at single-page forms. Multi-page forms fire events of successful form submissions after each step. Their tracking is not covered in this guide.
Before You Begin: A Quick Checklist
This tracking method is pretty reliable, but it depends on a few key prerequisites. Before you start the configuration, quickly run through this list:
- Confirm your form does not refresh the page. This technique is designed for AJAX-based forms, meaning the “thank you” message appears without a full page reload. If your page reloads after submission, this solution will not work, and you should consult with your developer to enable AJAX for your forms. Or use a “Thank you” page tracking option then.
- Verify you are using Contact Form 7. Some websites use multiple form plugins. To confirm, right-click on a form field, choose “Inspect”, and look for code containing “wpcf7”. If you don’t see it, you are likely using a different form plugin.
- Have GTM installed and working. This guide assumes you have Google Tag Manager installed correctly on your WordPress site and that your GA4 configuration tag is already set up.
- Have Admin access to your GTM container. You will need full permissions to add new tags, triggers, and variables.
Contact Form 7 DOM events
So, what is a DOM event? The Document Object Model (DOM) is the structure of a webpage. When a user interacts with a page (or when a plugin like Contact Form 7 performs an action), it can dispatch a “DOM event” as a signal to the browser.
Think of it as the form plugin raising a flag to announce, “Hey, I just tried to send an email!” or “Hey, I just detected a validation error!”. As you’ll see, the tracking method (described in this article) relies on listening for the specific “flag” that signals a successful submission.
In their documentation, Contact Form 7 developers have listed several DOM events that are dispatched after a particular form interaction occurs:
- wpcf7invalid — Fires when an AJAX form submission has been completed successfully, but mail hasn’t been sent because there are fields with invalid input.
- wpcf7spam — Fires when an AJAX form submission has been completed successfully, but mail hasn’t been sent because a possible spam activity has been detected.
- wpcf7mailsent — Fires when an AJAX form submission has been completed successfully, and mail has been sent.
- wpcf7mailfailed — Fires when an AJAX form submission has been completed successfully, but it fails to send mail.
- wpcf7submit — Fires when an AJAX form submission has been completed successfully, regardless of other incidents.
To make Contact Form 7 event tracking come true, at first, I tried listening to wpcf7submit event, but what I ended up with was that this DOM event was being dispatched even if required form fields contained errors. As a result, I switched to wpcf7mailsent event.
1. Contact Form 7 Event Tracking: Auto-Event Listener
The first ingredient of form tracking is a piece of code that will be listening and waiting for a successful form submission. That code is also known as an auto-event listener. The listener will be waiting for wpcf7mailsent DOM events, and if one occurs, it will push some useful data to the Data Layer (event name, form id, and values of all form fields).
<script>
document.addEventListener( 'wpcf7mailsent', function( event ) {
 window.dataLayer.push({
 "event" : "cf7submission",
 "formId" : event.detail.contactFormId,
 "response" : event.detail.inputs
 })
});
</script>
This custom listener is the key that unlocks form tracking when standard GTM methods fail. Instead of guessing when a form is submitted by tracking clicks on the submit button (which can fire even if the form has validation errors), we are listening for the specific success signal that the Contact Form 7 plugin itself sends out.
By pushing this information to the data layer, the listener creates an event that we can easily use to build our triggers, making it a much more robust option.
Compared to other solutions found online, this will not only create a Data Layer event called cf7submission but will also return a full response, an array of every form field and its value. More on this – a bit later.
This custom listener is the key that unlocks form tracking when standard GTM methods do not work. Instead of guessing when a form is submitted, we listen for the specific success signal that the Contact Form 7 plugin itself sends. By pushing this information to the data layer, the listener creates an event that we can easily use to build our triggers in Google Tag Manager. It is a much more robust option than just tracking clicks on the submit button.
In order to implement this code, go to your Google Tag Manager account, then a container, and create a Custom HTML tag that fires only on those pages that contain forms. Let’s say that, in our case, a form is in the footer of each page, so we’ll fire it on All Pages.

1.1. Test the listener
Before we continue, it’s crucial to test if the listener can capture a successful form submission. In GTM, enable Preview and Debug mode by clicking the Preview button at the top-right corner.

Then you will be asked to enter the URL of the page where your Contact Form 7 is located. Do that.
Now, you will be redirected to that website, and you will notice a widget appear at the bottom-right corner. It must say connected.

If it doesn’t, please read this guide. Now, it’s time to submit the form. Enter all the required fields and click SUBMIT (or whatever is the text of the form button). Once you see the form success message, go to the GTM preview mode’s browser tab (or window). Its URL contains tagassistant.google.com.
If everything worked smoothly, you should see a cf7submission event on the left side (just like in the screenshot below).

Click that cf7submission event and go to the Data Layer tab. What you’ll see is an array of all form fields, field names, and their values (which were entered by a visitor). So not only will you be able to track successful form submissions, but you’ll also have a chance to capture form field values too. P.S. Keep in mind that Google Analytics does not allow you to store PII on their platform (but that data might be sent to other tools).

2. Variables and a Trigger
So, what have we done so far? Well, we have some data in the Data Layer that we could use:
- cf7submission is a Data Layer event that should be turned into a trigger. No tag will fire without a trigger.
- Just for demonstration purposes, we’ll also want to capture a subject line of the form submission and pass it to Google Analytics 4 later on. We can fetch that field’s value by creating a Data Layer variable.
If you want to turn some Data Layer event (in our case, it’s cf7submission) into a tag-firing condition, you need to create a custom trigger.

Now, it’s the variables’ turn. Let’s take a closer look at what’s happening in the Data Layer after the cf7submission event occurred. In addition to event and formId, the Contact Form 7 listener also pushed the response, which is an array containing 5 objects. Each object represents a form field. In JavaScript, indexes start from 0, not from 1, so if we want to fetch your-subject field’s value (which is the third object), we’ll have to choose index 2, not 3.

In one of my previous blog posts, how to pull data from the Data Layer, I explained 3 different data structures:
- When all data points are on the same level
- When there are different levels (children-parents)
- And when there are arrays.
In this case, we have to choose the 3rd option, pulling data from arrays in the Data Layer. In order to do so, we first have to define the parent key, which, in this case, is response. Then we have to set the index (in order to tell Google Tag Manager in which object we are interested). This time, it’s 3 (because it is the 4th object in the array, and in JavaScript, indexes start from 0 (0, 1, 2, 3, 4)). And finally, we choose the final key – the field’s value.
As a result, our Data Layer Variable name is response.3.value

Another variable that I would recommend creating is formId. If you have several forms on a website, it will help you distinguish which form was submitted (and you won’t have to create separate triggers and tags for each Contact Form 7).

Save both variables and test them. The best way to do it is to refresh the Preview and Debug mode, refresh the page with Contact Form 7, and try submitting it again.
After that, click the cf7submission event again and go to the Variables tab. You should be looking for two newly created Data Layer Variables.
In the screenshot below, everything is working just as we expected: one variable contains the actual subject line while the other one fetched ‘9′ which is the ID of my test form. If you got an undefined value, double-check if you entered all variable settings correctly. Remember that Data Layer variable names are case-sensitive.

If you are still facing issues with any of those two variables, read this guide on how to pull data from the Data Layer.
3. Google Analytics 4 Event Tag
The first two steps of the Contact Form 7 event tracking are done! Now, let’s send the form submission event to Google Analytics 4 with the following settings. Also, if you are new to Google Analytics 4 event tracking, I would recommend reading this guide afterward.
Go to Tags > New > Google Analytics > Google Analytics: GA4 Event. I presume you already know some of the Google Analytics 4 basics and already have the Google Tag created in the GTM container (if not, read this article).
In that tag:
- Enter GA4 measurement ID or a constant variable that contains the ID.
- Enter the name of the event (the recommended value if generate_lead, but you can name it whatever you want)
- Then expand the Event parameter and enter two parameters:
- form_id and set its value to be the Data Layer variable (that returns the ID): {{dlv – formId}}
- form_subject and set its value to be the Data Layer variable (that returns the ID): {{dlv – Form Subject}} (although, keep in mind that I used this just for demonstration purposes. In reality, it does not make a lot of sense to track form subjects in tools like GA. Data cardinality will be too high).
- Set the tag to fire on the cf7submission Custom Event trigger.

4. Let’s test
Save all changes and refresh the Preview and Debug mode (by clicking the PREVIEW button at the top-right corner of the GTM Interface). Then, you will be redirected to the page where your Contact Form 7 is implemented. Submit it and look closely at what’s happening in the Preview mode tab (or window).
Expected result: The Google Analytics 4 event tag must fire only when the form was submitted successfully (in other words, when the cf7submission event is present on the left side of the preview mode). But the Custom HTML tag must fire on any page (regardless of whether the form was submitted or not).

Once the tag appears in the section of fired tags, head over to the DebugView of Google Analytics 4 and try to find your device (in the top-left corner’s selector) if there is more than one.

Then you should start seeing events coming from your device (including the generate_lead). If you are facing some issues with DebugView, read this guide.
Click the event, and you will see the parameters that were sent together with it. Click any of those parameters to check the values.

But our job is not done yet. Even though you see custom parameters in the DebugView, you won’t see them in regular GA4 reports (or Analysis Hub). If you want to use/see them (and I bet you do), you must register them as custom definitions. Read the next chapter to learn more.
5. Register custom dimensions
This applies to any custom event parameter you send to Google Analytics 4 (and apparently, Form ID is still considered a custom parameter). If you want to see/use them in things like Funnel reports, Free form exploration, see their reporting cards in standard reports, etc., you must register custom parameters in the GA interface.
In Google Analytics 4, go to Admin > Custom Definitions. Since we sent 2 custom parameters with the form submission event, we must register them here (because right now, GA4 does not offer built-in form dimensions (like Form ID).

Click the Create Custom Dimensions button and then enter the name of the first parameter you sent. In my case, that is form_id. Save it. Make sure the scope of the dimension is Event.

Then register a second parameter (in my case, that was form_subject) and save it. Important: I am tracking form_subject here only as an example. In a real-life project, I would not do it because:
- form_subject will have way too many unique values, which can trigger the (other) row
- form_subject might container personally identifiable information which must not be sent to GA4 as custom dimensions
By the way, I sometimes use the words “custom parameter” and “custom dimension” interchangeably. In general, custom metrics and custom dimensions are both grouped as custom parameters.
And now we wait. Within the next 24 hours, the custom parameters will start appearing in your Google Analytics 4 reports.
If you want to learn where to find the CF7 event data in GA reports, read this tutorial about event tracking in GA4.
A Quick Warning: PII and High Cardinality
In our example, we captured the subject line of the form, but I must strongly advise against doing this in a real-world project for two critical reasons.
- Personally Identifiable Information (PII): Google’s terms of service strictly prohibit sending any data that could personally identify an individual to their servers. This includes names, email addresses, phone numbers, and any other user-generated text (like a form subject or message) that might contain such information. Capturing a form_subject field is risky because a user could easily type their name or other PII into it. Stick to sending non-PII data like form_id or pre-defined dropdown values.
- High Cardinality: Cardinality refers to the number of unique values a dimension can have. A dimension like form_id has low cardinality because you probably have only a few forms (e.g., values could be ‘9’, ’15’, ’27’). A dimension like form_subject has extremely high cardinality because every user will type something different, creating thousands of unique values. When a dimension has too many unique values, Google Analytics will group the less common ones into a row labeled “(other)”, making your reports less useful.
6. Configure a key event in GA4
The last step of the Contact Form 7 event tracking: create a key event (previously known as conversion) in Google Analytics 4. This is unnecessary, but if you want to treat every form submission as an important interaction, you should do it.
I assume you want to treat every generate_lead event as a key event . You should log in to your Google Analytics 4 interface and go to Admin > Key events.

Then click New key event event and enter generate_lead. Hit save.
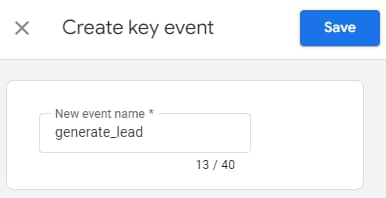
Then, submit the Contact Form 7 once again and check the GA4 DebugView. From this moment, the generate_lead event will be displayed with a green icon. This means that GA4 now treats this as a key event.
If you want GA4 to track key events ONLY of certain Contact Form 7 forms (and not all generate_lead events), read this chapter on a feature called “Create event” in GA4). If you want to learn where to find the key event data in GA4 reports, read this part.
The most common mistakes setting this up
If you haven’t worked a lot with Google Tag Manager before, some parts of this guide might be confusing. If you have followed all the steps of this blog post and something is still not working, here are the most common mistakes that people make.
Hopefully, some of them will apply to your case, and you can resolve the issue.
Mistake #1. Your form is not a Contact Form 7
Sometimes, WordPress websites use multiple form plugins. Even if you have installed CF7, maybe the form that you’re dealing with is using a different plugin.
The easiest way to check whether your form is Contact Form 7 is to right-click on any form field.

Then check the code of that form field. If you see something related to wpcf7, that’s a Contact Form 7. If not, then this blog post will not help you. Read another guide instead.

Mistake #2. Misconfigured triggers
When you configure everything, here is how the final setup must look:
- The Custom HTML tag must use ONLY the All Pages trigger. DO NOT add the Custom Event trigger to the Custom HTML tag.

Why is this necessary? The “CF7 Listener” tag (our Custom HTML tag) needs to be present on the page before a user can submit the form. Setting its trigger to “All Pages” makes sure that the listener is always ready and waiting for the wpcf7mailsent event. The “GA4 Event” tag, on the other hand, should only fire after a successful submission. By setting its trigger to our cf7submission custom event, we make sure it only sends data to Google Analytics at the exact moment the listener tells us the form was submitted successfully. - Google Analytics 4 event tag must have only the Custom Event trigger.
- Check if you have correctly entered the event name in the Custom Event trigger. It must be exactly cf7submission. If you are not sure what I am talking about, revisit step #2 of this guide.

Mistake #3. If you cannot see the cf7submission event in the preview mode
This is crucial. The cf7submission event MUST appear in the preview mode. If it does not happen, the setup will not work.
There are two main reasons why you don’t see it in the preview mode:
- Your form is not a Contact Form 7
- You have added a tag, but it does not fire on the Pageview (a.k.a. Container Loaded) in the preview mode.
- Click the Container Loaded event in the preview mode and check if your Custom HTML tag has fired. If it hasn’t, refresh the preview mode and start again.
- Also, check if the trigger of that Custom HTML is All Pages (because it should be).
Mistake #4. Your Contact Form 7 refreshes the page after it is submitted
The solution that is described in this blog post applies ONLY if the form submission does not refresh the page. The form success message should appear without reloading or redirecting.
If the form reloads the page, consult your developers to fix it, or you can refer to CF7’s website. Here is an article from the CF7 blog. If the link is not working, try to google for something like “Contact form 7 AJAX is not working”.
Other CF7 + GTM guides online rely on AJAX too (when the form does not reload the page).
Looking for other form-tracking alternatives? Read this.
Contact form 7 event tracking: Final Words
And there you have it. In this blog post, I’ve explained how to track single-page AJAX-based Contact Form 7 with Google Tag Manager and Google Analytics 4. The process is similar to another WordPress Plugin, Gravity Form:
- Implement a custom auto-event listener that listens to successful form submissions.
- Create variables and a custom trigger.
- Set up a Google Analytics Analytics event tag that sends the event of a successful form submission to Google
- Register parameters as custom dimensions/definitions
- Finally, configure a key event (optional)
As mentioned before, you might face some difficulties if your form is multi-page (consists of two or more steps, and each one of them refreshes the page). What I’ve noticed so far is that usually, each step has its form ID. Therefore, you can track submissions by updating the custom cf7submission trigger. Set it to fire when form ID equals XX (replace XX with the ID of the last step’s form).
If you still face issues with Contact Form 7 event tracking (by using GTM), read this guide: how to track form submissions with Google Tag Manager. I bet you’ll find something useful.
71 COMMENTS
Another great post!! thank you Julius
Thank you, John!
Hi,
I ahve tried this. Everything is fine except formID. It is showing undefined.
Could you help me out?
Also form id is build in variable. Why we have created new one?
'Form Submission' is built in trigger. Why we have created new one?
Hi, Built-in Form ID variable is not the same as Contact Form 7 formId, therefore you need to create it separately. Also, "Form submission" trigger usually fails me as it supports not enough forms. So in this case, I'd recommend using this CF7 listener.
When you created a Data Layer Variable, make sure that "formId" is entered precisely (with uppercase I letter). "formID", "formid" will not work, only "formId"
Hey Julius, Thanks so much for this great info. I have been trying to troubleshoot GTM events with Contact Form 7 a number of different ways now but your tutorial looks the most comprehensive.
On Step 1.1 my CF7 Listener Tag fired, but "If everything worked smoothly, you should see a cf7submission event in the Preview and Debug Console (just like in the screenshot below)." the cf7submission event did not. Any ideas where to go from here?
Hey,
If the event did not appear, that can mean many things:
1. You did not refresh the preview and debug mode + a website you're working on.
2. Maybe, by mistake, you did not copy the entire code of the listener?
3. Are you sure you're looking at the right container?
4. In preview and debug mode, click Pageview event. Do you see a CF7 Listener Tag fired?
Hi Julius. This information is really helpful. I have followed the configuration but my GA form submission tag is not firing when the form is submitted. I have reconfigured, refreshed and re-tested several times but I have an error somewhere. Grateful for any help.
Hey, does the cf7submission event appear in GTM Preview and Debug mode (on its left side)?
Just wanted to say thanks! I have been looking for a GTM solution in contact form 7 for a long time. Well done!
Hi Julius,
First thank you for detailed information and I was successfully able to track from.
I have one query.
By mentioning 'response.3.value' in Data Layer Variable name, it can track 4th response value.
What should I mention in Data Layer Variable name if I want to track two values altogether (means 4th and 5th)?
Hi, create two separate data layer variables
Dear Julius,
Thank you for the great recipe.
I've stopped on the first step:
Event cf7submission does not appear in GTM preview mode.
What can be the reason?
Many reasons. Without knowing more, my guesses are:
- Your form is not Contact Form 7
- The form redirects to another page after the submission
- After implementing the listener Custom HTML tag, you did not properly refresh the preview and debug mode
Julius, form redirects the user to booking engine (another domain), right.
Your recipe will not work in this case?
Yes, I have mentioned this at the beginning of the blog post.
Hello Julius
Thanks a lot for your fantastic tutorials ! Especially this one for Contact Form 7 catching conversions.
I'm not using GA on my customer's website, I need to fire a trigger catching CF7 validations in an environment that does not seem to be Ajax based.
I was thinking of trying to catch the popup message "Votre demande.." because the event listener fires but my conversions don't on this page : https://www.opengst.fr/demande-de-devis/
Would you please have a recipe for non Ajax CF7 conversions ? Thanks !
I don't have. However, you can track the appearance of the popup with the help of Element Visibility trigger.
Greetings Julius!
I got as far as #1 (Testing Listener) and the event did not appear.
Checked all the comments and can verify that everything fired (via Preview and Debug mode), so I'm left with one last possibility: my CF7 forms do have a Thank You followup page.
Your video indicates that this CF7 method won't work if that's the case ie a Thank You page followup.
What method will work? Based on previous attempts with "Thank You Page Tracking with Google Tag Manager", that didn't work for me either.
I'm stumped. Any assistance or directions would be most appreciated.
THX in advance.
Tom
Hi,I see that you have the access to my GTM course for beginners. Have you tried all the form methods explained there? Things like element visibility might be an option.
However, that might require css selector knowledge. My intermediate/advanced gtm course has a whole module on that.
Hi Julius, thanks great work and I love your videos.
One small question, I'm using GA4 so slightly different but your tutorial is so clear that it works perfectly fine.
However, is there a way to associate a name to a form id ? Indeed, I'd rather have "Newsletters_homepage" than "form id 40" in my report.
Thanks if you have any tips for that,
Jerome
You can use whatever is in the data layer. If your list of forms is finite, you can use a lookup table variable to map IDs to form names
Hi, thanx for the great tutorial!
I have created a lookup table, but how to use it to track which form was submitted via explorations in GA?
Hi Julius, thanks for this.
Could you please let us know what would be the auto-event listener for Gravity Forms? (For GA4).
Thanks again for your help.
María
The listener does not care whether it's GA4, UA, of something else. Use the search feature on my blog and you will finf the gravity form for UA. Adapt it to work with GA4.
Really helpful post, thank you very much. The only trouble I had was with item 5. Register custom dimensions, as I don't appear to have the option to manage custom definitions. Nonetheless, this has been really helpful in helping me set up event tracking with GA4, and I'm sure I'll refer back to it again in the future!
Custom dimensions are now moved to a separate section in GA4. Keep looking for them in the UI.
i want all my form data inputs giv me like name , subject , message and all pls give how to all data event to show analytics using gtm..
i try this video steps but its show only parameter in form id not show in inputs..pls help
The code should provide all the inputs too. If it does not, then something is wrong in the form configuration (not sure what)
how to show all input value in analytics like form subject form messege and all
create data layer variables for all values you want to get and then include those variables in some event parameter, e.g. form_submission_data.
Remember, you cannot include personal information in such events. GA terms do not allow that.
Hi Julius,
Hope you're doing well,
I have 2 contact forms,
And want to track submissions.
How can I separate them in Google Analytics GA4?
I just have one generate_lead.
I have already explained that in the blog, use form_id dimension
Hello Julius!
We have same problem like Roberto! The CF7 Listener tag is fired, but we can´t see the cf7submission event. The script in tag is ok. We tried everything (reinstall the tag, clear the cache, another browser).
Thanks
Maybe CF7 redirects a visitor to another page (or reloads the page)? Then the listener will not work
Hi Julius.
The generate_lead tag was output correctly in the tag manager however in the GA4 debug view it is not reflected.
Greetings
Maybe this will help https://www.analyticsmania.com/post/debugview-in-google-analytics-4-not-working/
Hi there,
Is there any way to do this so that it distinguishes between different contact forms? It is definitely picking up the different form IDs, but I'd like to have separate form submissions for different forms on the website, so I can track it separately in GA4 and GAds.
Hi
Why some of the contact form 7 entries missing in ga4, like in a day 4 entries submitted but only 3 are there what could be the reason can you please help me
many possible reasons, for example, maybe a the visitor was using ad blocker. Don't expect your analytics to be 100% accurate.
Hello Julius, I have a curiosity about the tracking: I'm currently tracking contact form 7 submission to my website with the GA4 event tag type but I use as a trigger the type "Form Submission" specifying the form class and the page path (just on the contact page).
So far it works, even though it doesn't fully match with the "form_submit" events automatically collected by GA4.
I was wondering if this was a decent configuration or if it was better to switch to an implementation with a custom event as a trigger.
Many thanks for your amazing work!
Hi Julius
Is there any way to do this so that it distinguishes between different CF7 forms? It is definitely picking up the different form IDs, but I'd like to have separate form submissions for different forms on the website, so I can track it separately in GA4.
Many thanks,
Michael
Form ID is used to distinguish the forms. I am not sure what do you mean by saying "to have separate form submissions for different forms on the website"
Ok, for example:
Form 1: visible as form 1 submission in GA4
Form 2: visible as form 2 submission in GA4
So all the form submissions can be distinguished from each other in GA4 (to see which form has been submitted).
Do you know what I mean?
Create two separate triggers (each using a different form ID).
Create two separate GA4 events tags. Give different event names in those tags, e.g. "contact_form_submission", "other_form".
Use tag 1 with trigger 1, tag 2 with trigger 2
Thanks a lot Julius, works perfectly! Cheers
Hi Julius
Great post as always. I am having an issue though as I have multiple forms on my site and they don't always have the same fields so my datalayer variables are named incorrectly. For example:
Form 1 fields
Name
Email
Website
Form 2 fields
Name
Company
Telephone
This means by putting response.1.value, one time it is pulling in the email and one time the Company name. Is there a way you can see as a workaround to this so my variables can be named consistently?
Thanks
Jonny
Hi! "This solution works with AJAX-based forms (built with Contact Form 7), which means that if the page does not refresh after the successful submission, then go ahead and continue reading." What if the page directs after submission to the thankyoupage? And the form is based on CF 7?
Then this solution will not work. Try creating a page-view based trigger that fires on the URL of the thank you page.
I'm having a problem setting up event tracking. in debug mode there is an event that fires when i do a preview via gtm. But when I or the user send the form simply through the site - the event is not transmitted. That is, when setting up - everything works. When used - no. Can you help?
Dear Julius,
I would like to express my gratitude for your comprehensive and clear content.
Regarding this post, I have followed all the steps and successfully set up form submission tracking on my Google Analytics. However, I’ve encountered an issue where the event seems to be firing twice per user, resulting in 4 events for a total of 2 users. Could you kindly assist me in understanding why this might be happening?
Great post. You are saying that "cf7submission is a Data Layer event that should be turned into a trigger. No tag will fire without a trigger". That makes sense. But at the moment we are redirecting to a thank you page after form submission. Is that equally good as a trigger?
Then use "pageview" as a trigger if "thank you" page's URL is unique
Hi,
Thanks for this guide. The Enhanced Measurement feature in GA4 captured form_start for my CF7 form but not form_submit, so I turned it off and followed your guide to create the form submission event. But I would also like to create a form_start event aswell for my form. Is this possible?
Hey, Julius,
How about multi step contact forms with e-commerce? In this specific case we have availability to make a donation on the form and it has 3 steps. The page reloads after the bank and it goes to a thank you page. But I don't see the listener in preview after the first step (filling info and going to the next page to enter card details).
Thanks for such a great post - I used this technique for form scouring.
I have a field in my forms for number of users - the more users the better
Thank you Julius!
But what about consent for the HTML tag in order to let it work with Advanced Consent Mode? Should it be set to not set, not necessary or necessary?
no additional consent required. or not set
Hi Julius,
Do you have to use GA's recommended event names for them to show up in the Analytics dashboard under Conversions? I have two different forms (appointments_form & contact_form) so I need to make that distinction. Not sure if I need to use generate_lead for both?
Are there any workarounds? Thanks very much!
Kevin
You can use custom event names
Hi Julius,
been using your tutorials for months. Just wanted to change those array indexes into some better "accessible" form and came with following:
<script>
document.addEventListener('wpcf7mailsent', function(event) {
var responseArray = event.detail.inputs;
var formattedResponse = {};
responseArray.forEach(function(input) {
formattedResponse[input.name] = input.value;
});
window.dataLayer.push({
"event": "cf7submission",
"formId": event.detail.contactFormId,
"response": formattedResponse
});
});
</script>
It works and instead of this:
{name: "inqiury_message", value: "I would like..."},
{name: "inqiury_persons", value: "a person"},
{name: "inqiury_date", value: "some date"},
I got this:
response:
{
inquiry_message: "I would like...",
inquiry_persons: "a person",
inquiry_date: "same date",
}
Now I can access variables like 'response.inquiry_message'.
This is more suitable for my needs as I don't have complicated forms and I hate arrays :-D Hope it can help someone else.
Thanks for your help with Analytics.
Hello Julius,
I was wondering if this code would also work for a normal Hubspot form, I tried to use it did not work.
I used the one that you previously showed, however, with this one I can not collect the FORM FIELDS information:
<script type="text/javascript">
window.addEventListener("message", function(event) {
if(event.data.type === 'hsFormCallback' && event.data.eventName === 'onFormSubmitted') {
window.dataLayer.push({
'event': 'hubspot-form-success',
'hs-form-guid': event.data.id
});
}
});
</script>
Could you Help me understand how to do it?
Hi Julius,
Thanks for the detailed instructions.
In my case, I'm setting this for Google Ads Conversion Tracking. Currently I've used GTM where I'm redirecting the user to Thank You page and thereafter firing the conversion with GTM.
Sometimes, this gets recorded and sometime this doesn't get recorded.
So shall I implement the event parameters and then link it with Google Ads Conversion tracking?
Hi, Thanks for your post.
I have question about it, Can i track invalid input? Like someone click submit button without provide required information, generally its show a message beside or below the submit button.
can i trace this without using element visibility method??
Hi & Thank you for your very helpful tutorial.
I'm having an issue pulling data out of the data layer due to the formatting which I'm assuming is standard with CF7.
The "response" is followed by an array of values formatted like this...
-----
{name: "Title", value: "test"},
-----
The problem I'm having is that I have checkboxes in the form which all have the same name. So, I can't retrieve the values of the array considering some users may select one checkbox while others could select more. Multiple checkbox example below...
----
{name: "checkbox-111[]", value: "Checkbox1"},
{name: "checkbox-111[]", value: "Checkbox2"},
----
Is it possible to somehow retrieve all my fields in a clean way with this setup?
Have I misunderstood the purpose of this event tracking for the form, I want to know where each form came from eg CPC or Organic. Currently we have 100 forms a month and no way of knowing exactly which enquiry came from where :(
This can tell us the broad numbers 50 from cpc 50 from organic but not which individual form from where?
Awesome walk through by the way :)
Hi, I get a CF7 submission sent to the data layer without adding the custom listener. When I add the custom listener, the tag gets fired twice. Can I do all the other steps, a custom event, and tag without adding the listener? Many thanks
Yes, because it looks like you already have some plugin that added the listener
This was very helpful! Question though - is it possible to redact or hash PII (personally identifiable information) so that a user's data doesn't appear in the Data Layer? I removed the '"response" : event.detail.inputs' line from the JavaScript, but the form inputs still appears in the dataLayer in Chrome Developer Tools (i.e. in the Console section, enter dataLayer command).
Removing "response" : event.detail.inputs is enough. If they still appear, then maybe you did not refresh the GTM preview mode or maybe you a plugin that is also listening to CF7 submissions
You're a genius, thank you! I noticed that the form_start event was already being tracked but not form_submit - which seems like the wrong way around to me! I followed your tutorial and it is now all set up correctly.
Thank you for the great and detailed guide! However, I'm still running into an issue..
I feel like I'm almost here, I'm at step 4 where to test the submitting of the Tag Event to GA4.
In the Tag Assistant I finally see the generate_lead being sent (Hits sent when clicking the activated tag at the cf7submission), but I don't see it entering the DebugView in GA4. I also do not see the device appear in the top left corner of the DebugView.
I already switched back to an 'empty' Chrome installation (I normally use FireFox) which helped getting the tag to actually transmit, but still it doesn't show in the DebugView.
Any suggestions? Because I assume it needs to enter the DebugView to automatically create the parameters to select in step 5.
Thanks!