
December 11, 2025
Track WP Forms with Google Analytics 4
Updated: December 11th, 2025
If you’ve been struggling with how to track WP forms on your site, you are not alone! While implementing WP forms is supposed to be “easy and powerful,” adding tracking may not always seem as simple.
There are two primary ways to track WPForms, depending on how your form behaves upon submission:
- AJAX forms (No Page refresh): Use a custom HTML listener in Google Tag Manager (GTM) to detect the ajaxComplete event and push data to the Data Layer. Then, trigger a GA4 event tag.
- Standard forms (Page refresh): Use the built-in “Form Submission” trigger in GTM. Configure it to fire only on your specific form ID to avoid tracking unwanted interactions.
This article contains multiple methods for tracking WP forms with Google Analytics 4 and Google Tag Manager, depending on the type of form you have on your site. You will only need to implement one of the methods to capture form submissions successfully.
Table of Contents
Here’s what you will learn in this article
- Assumptions
- Determine which method to use
- AJAX method
- Alternative methods
- Find form submission data in GA4
- Final thoughts
Video tutorial
If you prefer video content, here’s a tutorial from my YouTube channel.
Assumptions
Before we begin, I have two assumptions:
- You have installed GA4 on your website using Google Tag Manager
- You are familiar with creating tags, triggers, and variables in GTM. If not, check out the Google Tag Manager Tutorial for Beginners.
Go back and review the mentioned articles if you don’t feel like you are ready yet.
Determine which method to use
As suggested at the start of this article, there are multiple methods for tracking WP forms with GA4, so how do you know which method to use? Simple! When you complete a form submission, does the page with the form refresh?
If there is no page refresh, then you have an AJAX form on your site, and we will follow the method outlined in the Google Tag Manager AJAX form tracking article.
If the page refreshes, you can use the GA4 built-in tracking (I will explain the caveats later in this article) or create alternative tracking in Google Tag Manager with the built-in Form Submission trigger. We will go over both of these solutions.
Use this table to quickly decide which tracking method fits your specific form configuration:
| AJAX Method |
Standard Method |
|
| Form Behavior | Page does not reload after submission (success message appears on same page) | Page reloads or redirects to a “Thank You” page |
| Complexity | Intermediate (Requires Custom HTML listener) | Beginner (Uses built-in GTM triggers) |
| Recommended for | Most modern WPForms setups | Simple forms or redirect-based flows |

AJAX method
Standard GTM triggers rely on the browser’s default form submission events. However, AJAX forms prevent the default browser action to submit data in the background without a page reload.
Because the standard browser event is suppressed, GTM’s built-in “Form Submission” trigger never “sees” the form being submitted. The Custom HTML listener below bridges this gap by manually listening for the successful server response (ajaxComplete) and alerting GTM via the Data Layer.
We first want to create an Ajax listener using a custom HTML tag in Google Tag Manager. This will “listen” for requests using AJAX and push this information to the Data Layer. Once the information is in the Data Layer, we can create a GA4 event tag to capture it.
From the Google Tag Manager AJAX Form Tracking article, we will copy the below code:
<script id="gtm-jq-ajax-listen" type="text/javascript">
 (function() {

 'use strict';
 var $;
 var n = 0;
 init();

 function init(n) {

 // Ensure jQuery is available before anything
 if (typeof jQuery !== 'undefined') {

 // Define our $ shortcut locally
 $ = jQuery;
 bindToAjax();

 // Check for up to 10 seconds
 } else if (n < 20) {

 n++;
 setTimeout(init, 500);

 }

 }

 function bindToAjax() {

 $(document).bind('ajaxComplete', function(evt, jqXhr, opts) {

 // Create a fake a element for magically simple URL parsing
 var fullUrl = document.createElement('a');
 fullUrl.href = opts.url;

 // IE9+ strips the leading slash from a.pathname because who wants to get home on time Friday anyways
 var pathname = fullUrl.pathname[0] === '/' ? fullUrl.pathname : '/' + fullUrl.pathname;
 // Manually remove the leading question mark, if there is one
 var queryString = fullUrl.search[0] === '?' ? fullUrl.search.slice(1) : fullUrl.search;
 // Turn our params and headers into objects for easier reference
 var queryParameters = objMap(queryString, '&', '=', true);
 var headers = objMap(jqXhr.getAllResponseHeaders(), '\n', ':');

 // Blindly push to the dataLayer because this fires within GTM
 dataLayer.push({
 'event': 'ajaxComplete',
 'attributes': {
 // Return empty strings to prevent accidental inheritance of old data
 'type': opts.type || '',
 'url': fullUrl.href || '',
 'queryParameters': queryParameters,
 'pathname': pathname || '',
 'hostname': fullUrl.hostname || '',
 'protocol': fullUrl.protocol || '',
 'fragment': fullUrl.hash || '',
 'statusCode': jqXhr.status || '',
 'statusText': jqXhr.statusText || '',
 'headers': headers,
 'timestamp': evt.timeStamp || '',
 'contentType': opts.contentType || '',
 // Defer to jQuery's handling of the response
 'response': (jqXhr.responseJSON || jqXhr.responseXML || jqXhr.responseText || '')
 }
 });

 });

 }

 function objMap(data, delim, spl, decode) {

 var obj = {};

 // If one of our parameters is missing, return an empty object
 if (!data || !delim || !spl) {

 return {};

 }

 var arr = data.split(delim);
 var i;

 if (arr) {

 for (i = 0; i < arr.length; i++) {

 // If the decode flag is present, URL decode the set
 var item = decode ? decodeURIComponent(arr[i]) : arr[i];
 var pair = item.split(spl);

 var key = trim_(pair[0]);
 var value = trim_(pair[1]);

 if (key && value) {

 obj[key] = value;

 }

 }

 }

 return obj;

 }

 // Basic .trim() polyfill
 function trim_(str) {

 if (str) {

 return str.replace(/^[\s\uFEFF\xA0]+|[\s\uFEFF\xA0]+$/g, '');

 }

 }


 })();
 /*
 * v0.1.0
 * Created by the Google Analytics consultants at http://www.lunametrics.com
 * Written by @notdanwilkerson
 * Documentation: http://www.lunametrics.com/blog/2015/08/27/ajax-event-listener-google-tag-manager/
 * Licensed under the Creative Commons 4.0 Attribution Public License
 */
</script>
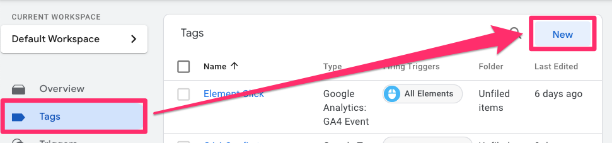
Now in Google Tag Manager, go to Tags in the left-side navigation and click “New”.
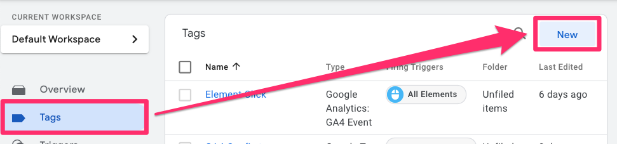
Select Tag Configuration, then choose Custom HTML tag.
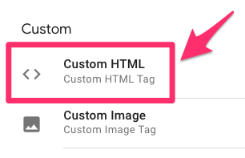
Paste the AJAX Listener (the code from above) in the textbox.
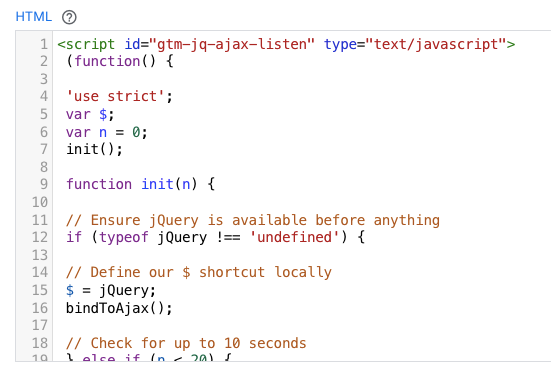
Scroll down to the Triggering section. Here, you have two options depending on what suits your needs better: (1) Trigger the event on all pages or (2) Trigger the event on some pages.
If you want to trigger that event on all pages, select the “All pages” Page View trigger, which comes default in your GTM container.
Otherwise, if you want only to trigger the event on certain pages, click the plus sign to add a trigger. Then, on the “Choose a trigger” page, click the plus sign (in the top-right corner) to create a new trigger.
Click “Trigger Configuration” and select the “Page View” trigger type. Fill in the information needed to capture the page(s) you’re interested in. Be sure to select “Some Page Views” under “This trigger fires on” to prompt the filter.
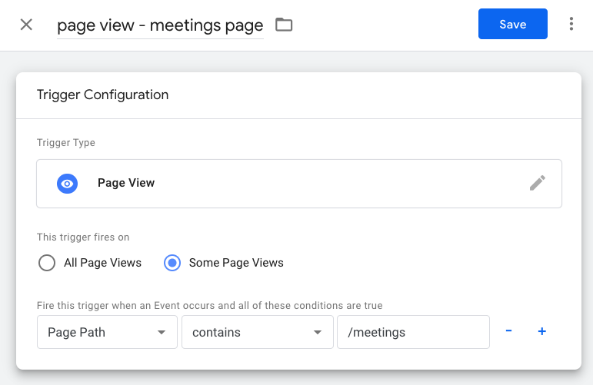
Name your trigger (using proper naming convention) and save.
Now that you have the trigger in the tag, name it “cHTML – AJAX Listener” (cHTML = custom HTML) and save.
![]()
![]()
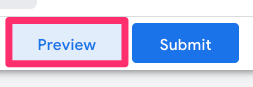
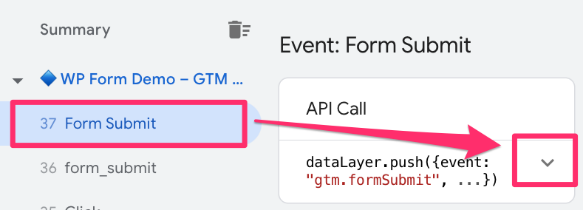
Preview the GTM container by clicking the “Preview” button in the top-left of the interface.
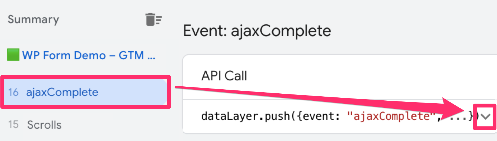
Enter your website’s URL and complete the WP form submission. Once you see the success message, go to Preview mode and check for the ajaxComplete event (dataLayer push). This should only appear if you have successfully submitted the form and there are no errors.
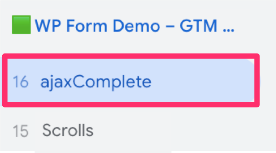
Click the ajaxComplete event and expand the API Call to see the information passed through into the Data Layer. I recommend going through and looking at all the available data.
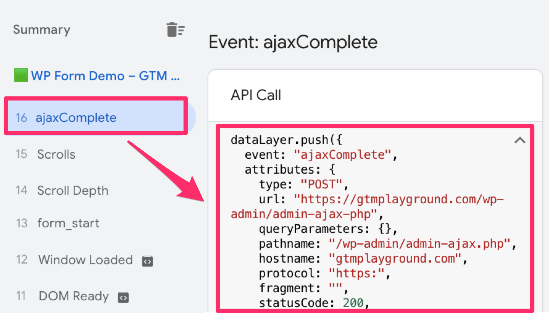
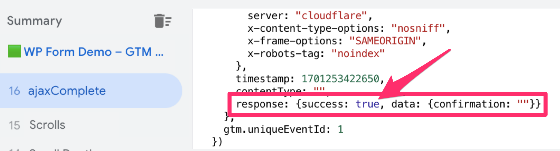
If you scroll to the bottom of the dataLayer.push event, you will see the response object. In this object, there will be a success parameter, which will be true if the AJAX request is successful (aka a user successfully submits an AJAX form).
However, we have made a slight oversight. Perhaps your site has multiple AJAX elements, so if you’re just looking for this success message, you could have false positives.
The solution? Make tracking more precise by only sending data to GA4 when the AJAX message comes from the WP form. To do this, we will create a trigger that will only fire in these situations.
But, as you can tell from the Data Layer event in Preview, we don’t see anything related to WP forms in the response object. So, how do we know when to trigger the event?

Only trigger event on WP forms
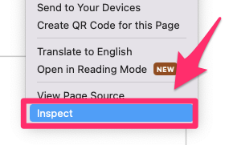
The key to restricting our event to only sending data to GA4 when the AJAX message comes from a WP form is to inspect the page (or open the developer tools). Once you have submitted the WP form, double-click on the page and select “Inspect”.
Navigate to Console > enter “dataLayer” (without quotes) > Find the ajaxComplete event.
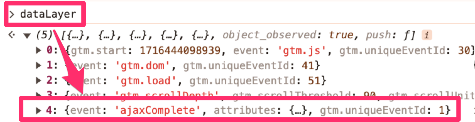
Click the arrow next to expand each object.
![]()
![]()
Look for a parameter that distinguishes the WP form, like attributes.response.data.confirmation (click the arrow next to attributes, then next to response, and finally data).

Notice that the contents of confirmation contain “wpforms”, so we can use this to create a trigger for an event to only fire on WP form submissions!
Next, go to Google Tag Manager > Variables and click “New” in the User-Defined Variables.

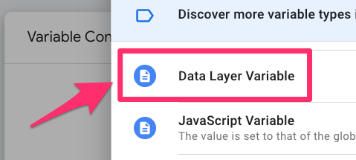
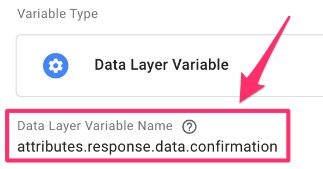
Click the “Variable Configuration” and select “Data Layer Variable”.
Input attributes.response.data.confirmation into the textbox. Name the variable “dlv – attributes.response.data.confirmation”.
Let’s test that the variable picks up the information we want! Preview the container, enter your site’s URL and submit the form. Back in Preview, click the ajaxComplete event and go to the Variables tab.

Find the Data Layer variable and check that it’s collecting information.

Notice that the string contains “wpforms-confirmation”. We will use this to create a trigger for our tag to ensure it is only firing when there is an AJAX form.
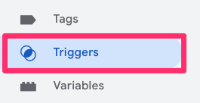
To create a trigger, go to Triggers in the left-side navigation of GTM and click the “New” button.
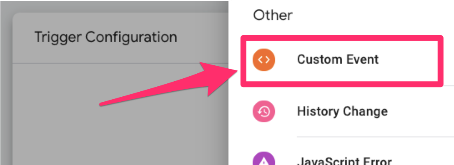
Click “Trigger Configuration” and select “Custom Event” under Other.
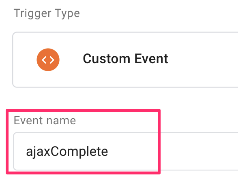
In the Event name textbox, enter the event name as it is in the Ajax listener code from before – “ajaxComplete”. It must be exactly the same, so make sure you double-check this before saving!
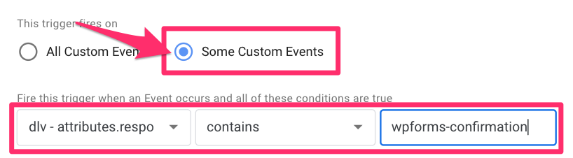
Click “Some Custom Events” and enter attributes.response.data.confirmation contains wpforms-confirmation.
Name the trigger “custom – ajaxComplete – wpforms” and save.
![]()
![]()
Extract WP Form ID
You may have noticed that a form ID appears in the data coming through from the WP form submission. By collecting this form ID, you could slice and dice your event data based on the form. Sounds useful? Follow the steps below!
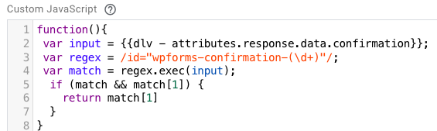
To get this form ID, copy the code below:
function(){
  var input = {{dlv - attributes.response.data.confirmation}};
  var regex = /id="wpforms-confirmation-(\d+)"/;
  var match = regex.exec(input);
  if (match && match[1]) {
   return match[1]
  }
}
Head over to GTM, go to Variables in the left-side navigation and click “New” under the User-Defined Variables.

Click the “Variable Configuration” and select “Custom JavaScript”.

Paste the code from above in the code block. An important thing to note is that the var input is the Data Layer variable we made above for the trigger, so this needs to match the name you used there exactly.
Name the variable “cjs – wpforms forms id” and save.

Create tag
By adding the custom code (aka the custom HTML) to our GTM container, we have made the information we want to track available in the Data Layer. However, we still need to create an event to actually collect and send the data to Google Anlaytics 4.
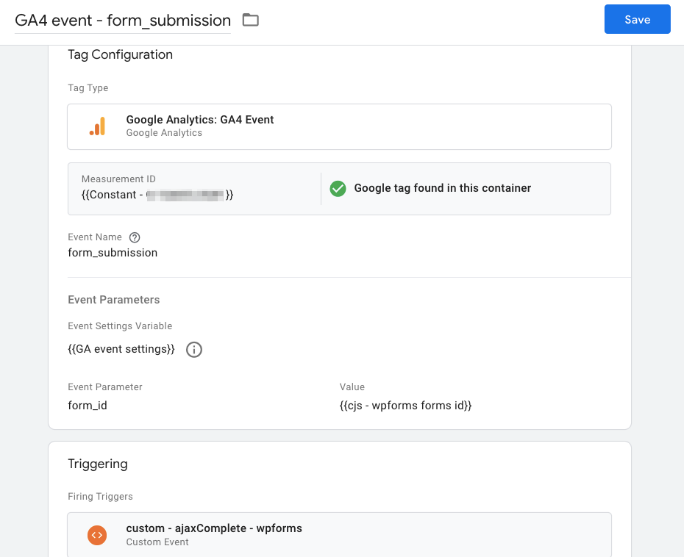
Now we have all these pieces, we can put it together into a GA4 event tag! Go to Google Tag Manager > Tags (in the left-side navigation) > New.

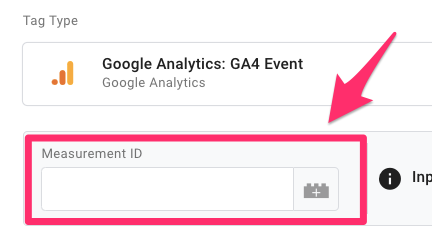
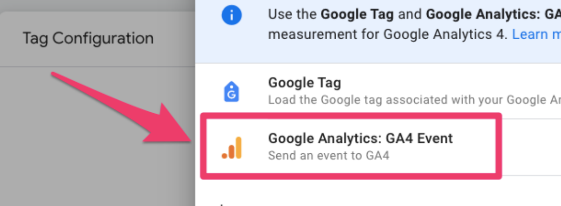
For the Tag Configuration, select Google Analytics > GA4 Event.

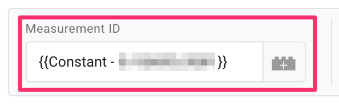
Measurement ID
If you don’t have your measurement ID saved as a constant in your container, you need to find it in your Google Analytics 4 data stream. Go to the GA4 interface, then Admin > Data collection and modification > Data streams.
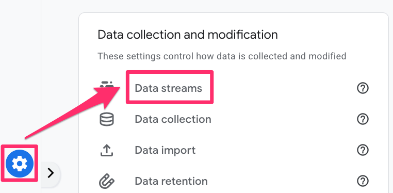
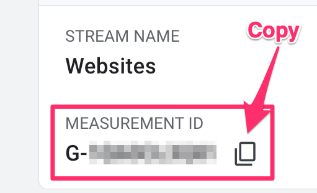
Click the data stream you are interested in and find the measurement ID.
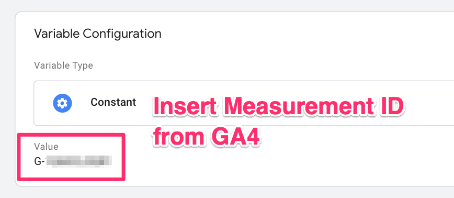
To keep your container more organized, you will want to create a new Constant variable to hold the measurement ID. Click to add a new variable.
Then, click on the plus in the top right to create a new variable.

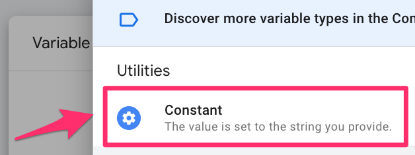
Click on Variable Configuration and select “Constant” as the variable type.
Copy the Measurement ID and paste it into the Value of the constant variable. Save your new variable as “Constant – G-XXXXXXXXXX” (or whatever makes sense to you). Read this blog post to learn more about the constant variable in Google Analytics 4.
Add the other elements
Every tag needs an event name and a trigger. Additionally, you can add parameters and adjust other minor settings (not as common). We’ve already done all the hard work to set up the trigger and parameters, so now we just need to add all these elements to the
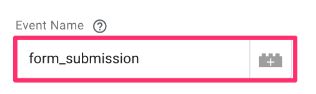
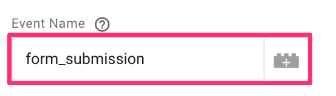
First, you can add an event name, e.g. “form_submission”.
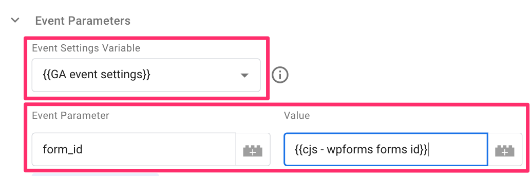
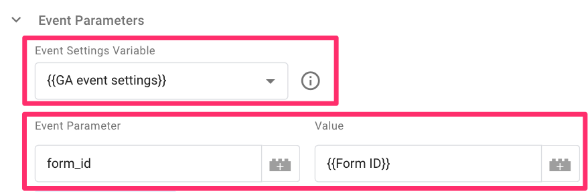
The next part is to add the event settings variable and parameter(s). If you are using the event settings variable, I highly recommend adding it to all your events, including this one. Check out this article if you don’t have this set up yet!
You can add the Data Layer variable you created to the event setting variable or just add them directly to the event. Since this parameter is particular to WP form tracking, I will just add it directly to the tag.
Lastly, add the trigger.
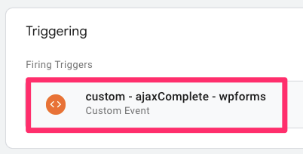
Name the event “GA4 event – form_submission”, save it, and let’s check to see if it works!
Create a custom dimension for form ID in GA4
One quick side note: If you haven’t already, create an event-scoped custom dimension in GA4 for the Form ID so that you can report on the parameters in the event in GA4.
While GA4 collects custom parameters like form_id automatically in the background, it does not make them available in standard reports or Explorations by default. You must register form_id as a Custom Dimension to “unlock” it for reporting. However, in the future this might change and GA4 might eventually add a built-in Form ID dimension.
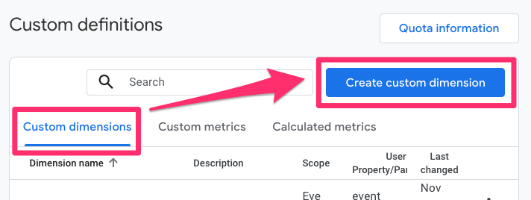
In GA4, go to Admin > Data Display > Custom Dimensions. Click “Create Custom Dimension”.
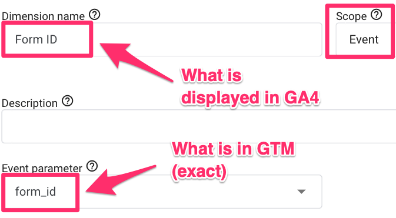
There are three elements that you need to consider:
- The Dimension name is the name that will be displayed in GA4 reports
- The Event parameter needs to have the same name as in Google Tag Manager
- Set the scope to “Event”
Test the new event
Same as when we tested the custom HTML tag, preview the GTM container > enter your website’s URL > complete the WP forms submission.
Once you see the success message, go to Preview mode and check for the ajaxComplete event (dataLayer push). You should see your tag under “Tags Fired”.

If your preview mode is not working, check out this article.
You should also go to DebugView in Google Analytics 4 to check all your events. To get there, go to Admin > Data Display > DebugView and check that you see the event.
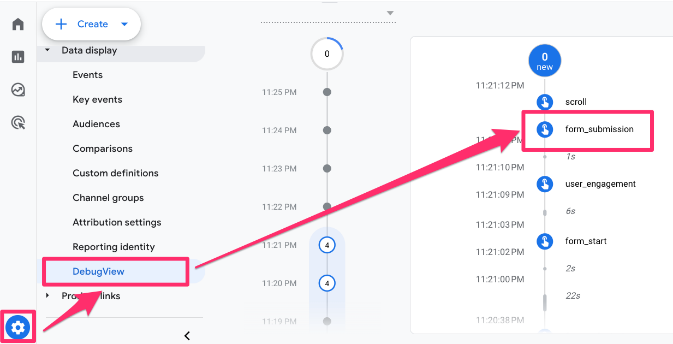
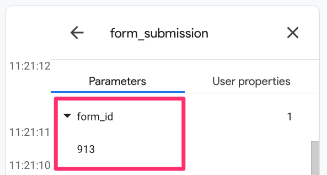
You can click on the event to see the collected parameters. Confirm that you see the form_id parameter that you added to the event.
Do you need help with Debugview? Check out this article.
Submit your GTM container and wait at least 24 hours for data to populate (assuming users submit forms in that time).
Alternative methods
Even though the AJAX form tracking method is the main one, there might be situations where you will need to apply alternatives. Here they are.
Using built-in GA4 form tracking
The built-in GA4 form tracking can track WP forms only if they are not using AJAX. Otherwise, you will need to use the above method. This is a quick way to enable WP forms tracking, but it’s also not the best way. While I will show how to set up the built-in tracking, it is recommended to disable the built-in tracking and use Google Tag Manager.
To use the built-in form submission tracking, go to Admin > Data collection and modifications > Data streams.

Select the data stream for your site with WP forms and ensure enhanced measurements are enabled (there will be a blue check if it’s enabled).
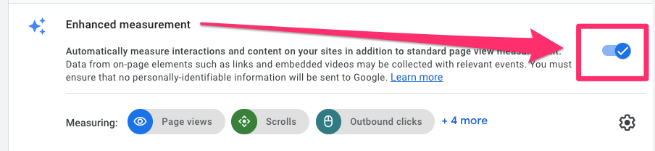
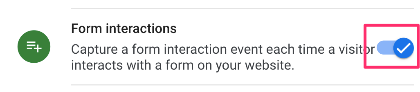
Specifically, you want to enable “Form Interactions” (there will be a blue check if it’s enabled).
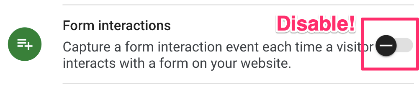
However, you may find that this isn’t the best approach since the net of events that are being captured is too wide, causing mixed results, or there could be issues with the event firing even when the form was not successfully submitted.
The solution: Disable “Form Interactions” and follow the next set of steps to track WP forms using the built-in form submission trigger in GTM!
Using the built-in form submission trigger in GTM
Alright, if you’ve made it here, then that means you want to track a non-AJAX form, and the built-in GA4 for submission tracking does not suit your needs. If this is not the case, review one of the options above (either the AJAX method or the built-in GA4 tracking).
The final option I have to present to you is using the built-in form submission trigger in GTM to track WP forms.
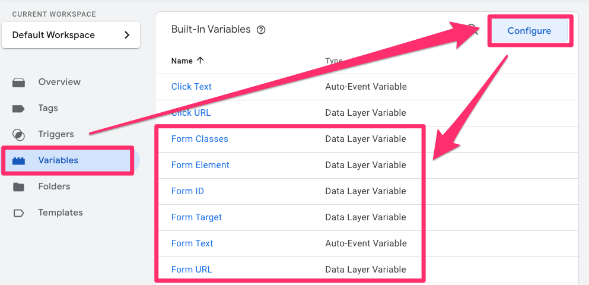
Enable form variables
To capture all the built-in variables related to forms, go to Variables, click “Configure” (under Built-in Variables) and enable all the variables under “Forms”.
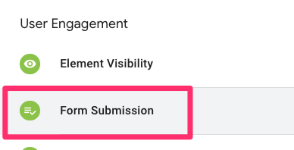
Create trigger
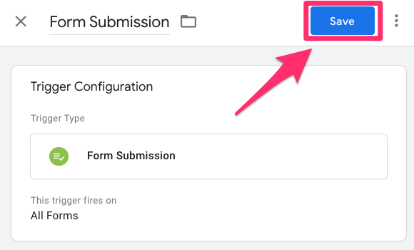
Next, we’ll set up the trigger. In GTM, go to Triggers > New > Trigger Configuration > Form Submission (under User Engagement).
Name the trigger “Form Submission”.
Preview the GTM container, enter your site’s URL and submit a WP form. Click the Form Submit event.
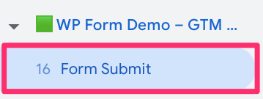
Expand the box with the API Call to see the information that is being passed through with the Form Submit event.
Check the information being passed through (also test this by submitting an incomplete form to ensure that the trigger does not fire in this case).
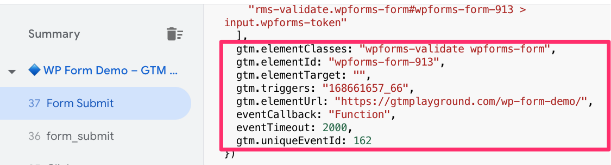
For example, this is what the Form ID variable would return:
![]()
![]()
If everything looks good, go back to the Form submission trigger. We will use the Form ID variable to update the trigger to only fire on WP forms submissions by selecting “Some Forms” and entering Form ID contains wpforms.
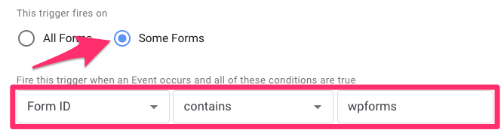
Rename trigger “Form submission – wp forms” and save.

Create tag
Now, the best part – putting it all together!
Go to Google Tag Manager > Tags (in the left-side navigation) > New.
For the Tag Configuration, select Google Analytics > GA4 Event.
For the tag, there are a few elements we will need to include:
- Add the measurement ID to the tag. If you aren’t sure how to do this, check out the Measurement ID section above.

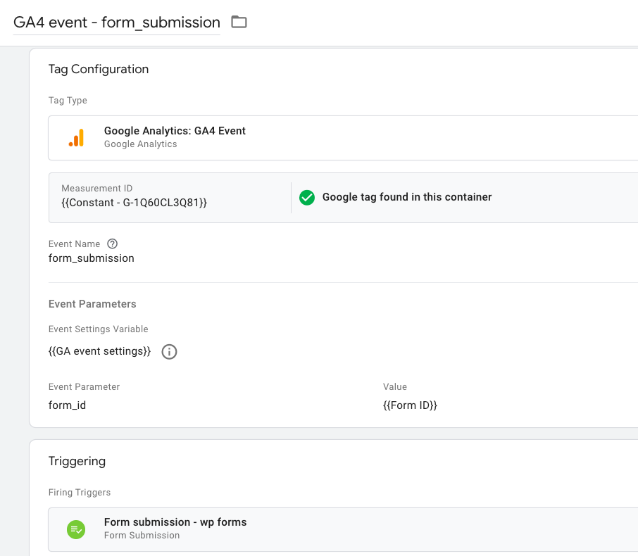
- Event name: form_submission

- Add the Event Settings Variable and form_id parameter from the built-in Form ID.

- If you haven’t already added the form ID as a custom dimension in GA4, check out the Create custom dimension for Form ID in the GA4 section above.
- Triggering: Form submission – wp forms

- Name the tag: “GA4 event – form_submission”
Test new tag
You’ve probably noticed that we do a lot of testing. This is important to prevent potential errors from unknowingly being pushed to production.
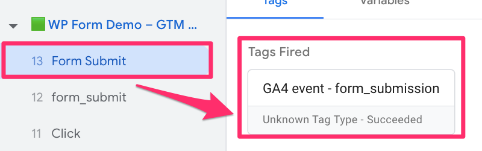
Just like before, Preview the container > Enter URL > Submit form > Find the Form Submit event. Click the Form Submit event to confirm that the tag we just created is under “Tags Fired”.
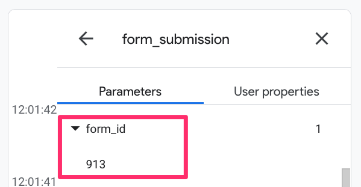
You will also need to check DebugView in Google Analytics 4 (make sure to check that the form_id parameter is showing up)
Submit the GTM container and wait at least 24 hours for data to begin populating (assuming forms are being submitted in that time).

Find form submission data in GA4
To explore your form submission data in Google Analytics 4, there are two methods you can take: the Events report or creating a GA4 exploration!
Built-in standard report
The quickest method is to head to the Events report in Google Analytics 4. Since GA4 is customizable, your property may not look the same as mine, so the location of this report may be elsewhere.
You can also add this report collection to your reports tab if you don’t have it by going to the Library and publishing the “Life cycle” collection.

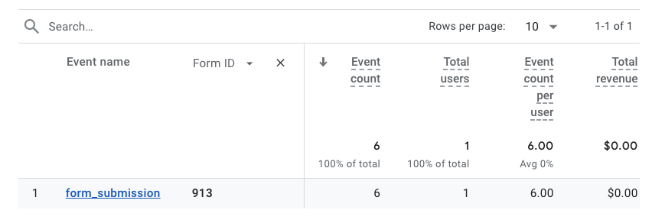
All you need to do is enter the name of the event – form_submission – into the search bar to filter the report.
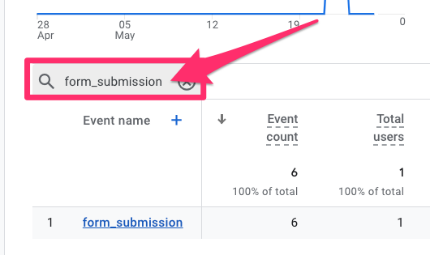
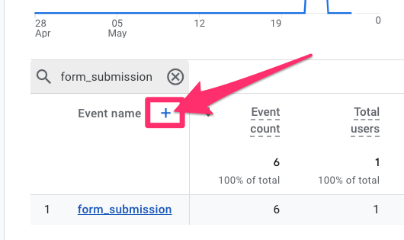
If you want to break down the data by the form ID, click the plus sign next to Event name.
Search for “Form ID” under the Custom dimensions.
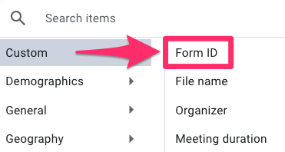
Now, you can see the number of times users have submitted a WP form on your site by the unique form!
If this is a report that you will be checking often, this process might get a bit annoying after a while. Instead, you can create a GA4 exploration that you can always reference, which will already have all the necessary filters and be customized to show the metrics that you are most interested in.
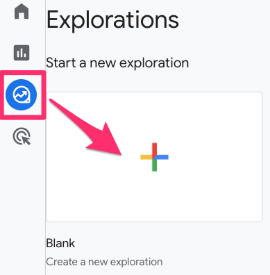
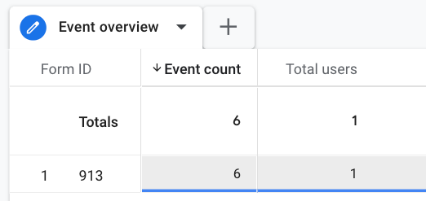
GA4 Explorations
Go to Explore in the left-hand navigation and click “Blank”.
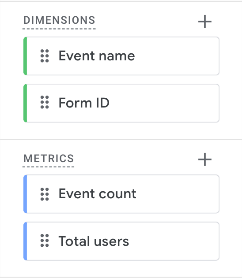
Add to the report:
- Dimensions: Event name and Form ID
- Metrics: Event count and Total users

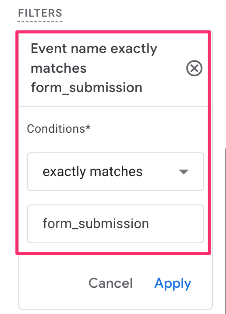
- Filter: Event name exactly matches “form_submission” (make sure to click “Apply” to activate the filter)

- Choose “Form ID” for the Row dimension and select all the metrics as Values. You can also name the tab if you will be adding more tabs to the report.

Learn more about GA4 explorations here!
Track WP Forms with Google Analytics 4: Final thoughts
I hope this tutorial was helpful. No matter how your WP forms are set up on your site, you can track their successful submission!
Remember, you should only use one of the methods above; otherwise, you could get weird results!

2 COMMENTS
How can we pass custom fields, such as country, opportunities, or other specific fields, to Google Analytics 4 (GA4)? For example, see the form at this https://wjz.kqk.mybluehost.me/artechSTG07112024/contact-us-copy/ .
We want to track these fields in GA4 using WPForms. How can we achieve this?
This is awesome. Thank you so very much!